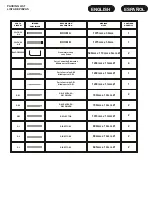
To place each plate to the boom, are fixed by screws
DIN 912 M6X20
and
DIN 9021 M6
washer. This plate must be very firm for positioning the
element. The next step would be like the other elements,
but considering that the screws use are DIN 912 M6X40 and DIN 985 M6
self-locking nuts once it is all assembled antenna.
DRIVEN ELEMENT
ENGLISH
13mm Ø
10mm Ø
10mm Ø
6mm Ø
HOSE CLAMP 8-16mm Ø
(P01000022)
HOSE CLAMP 7-11mm Ø
(P01000031)
6m Plates
DIN 912 6x40mm
DIN 912 6x20mm
DIN 9021 M6
DIN 985 M6
The first step of assembling the elements is to place in order by diameters according to page 2.
Once this is done keep in mind that at each end of the elements there is a part of each tube that has thick sea holes.
These are the ones that go at the end towards the end of the antenna, since the wide holes are where the head of the DIN 7984 screw enters.
and press the inner tube. Bear in mind that the head of the screw has to be housed inside the hollow of the element and in the other side, the
rivet has to be inserted to be screwed with the Allen key supplied.
See example below:
YES
NO
The fixing of the LOOP element, each element is using a
Hose Clamp 8-12mm (P0100022)
the
13 to 10mm
diameter and
7-11mm (P0100031)
to the
10 to 6mm
.
Measures page 2 are expressed in external lenght
, ie, measuring from each end of the tube. Once elements are assembled correctly ,
proceed
to put each item on the plate to the boom , which would be the last step assembly . Attach plates to boom as specified below .
Once you have the elements assembled, and the boom,
it's time to mount the plates
to the boom and then the elements to the plate.
What we advise is to start with the plates to the boom, if you rise up the antenna in one piece
. If what you want is to raise the elements
once the boom is placed on the mast, we recommend putting the elements to the plates for their best way of the “plate / element” assembly to the
boom.
To add the elements to the plate would have to focus with the help of a tape measure, each element of Ø 13mm, mark in the half with a edding,
and a once centered fix to the plate with the green plastic blocks
(EAHYP013)
with screws
DIN 912 M6X40
, as shown in the drawing below .
Summary of Contents for 50LFA5S
Page 10: ......
Page 11: ...Plotter de Elevaci n ESPA OL ENGLISH...
Page 12: ...Plotter de Azimut ESPA OL ENGLISH...
Page 13: ...Gr fico de R O E ESPA OL ENGLISH...
Page 14: ......


