background image

CONTENTS

Introduction/Registration and Service .................................................................................................................................................................................2

Warnings ..........................................................................................................................................................................................................................................3

General Safety Rules ....................................................................................................................................................................................................................4

Safety Precautions........................................................................................................................................................................................................................5

Service Safety/Symbols ..............................................................................................................................................................................................................6 

Safety Decals ..................................................................................................................................................................................................................................7

Features and Controls .................................................................................................................................................................................................................8

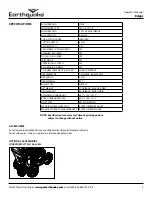
Specifications .................................................................................................................................................................................................................................9 

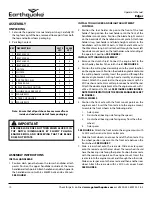
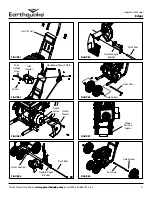
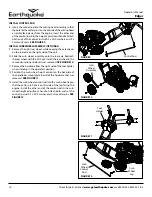
Assembly................................................................................................................................................................................................................................. 10-12

General Operation .............................................................................................................................................................................................................. 13-14

Edging Tips ...................................................................................................................................................................................................................................15

Slope Guide................................................................................................................................................................................................................................. .15

Maintenance ................................................................................................................................................................................................................................16 

Transporting and Storage .......................................................................................................................................................................................................17

Troubleshooting .........................................................................................................................................................................................................................17 

Troubleshooting Guide ............................................................................................................................................................................................................18

Operator’s Manual 

Edger

2

Check for parts online at 

www.getearthquake.com

 or call 800-345-6007 M-F 8-5

INTRODUCTION

Congratulations on your investment in quality. Thank you for purchasing an edger from 

Earthquake®

.  We have worked to ensure that 

your product meets the highest standards for usability and durability. With proper care, your edger will provide many years of service. 

Please read this entire manual before installation and use.  Earthquake reserves the right to change, alter or improve the 

product and this document at any time without prior notice.

This manual may contain information for several models. Read and keep this manual for future reference.  This manual contains important 

information on SAFETY, ASSEMBLY, OPERATION, AND MAINTENANCE.  The owner must be certain that all the product information is kept with the 

unit. This information includes the MANUAL(s), the ILLUSTRATED PARTS BREAKDOWN and the WARRANTY STATEMENTS. This information must be 

included to make sure state laws and other laws are followed.  This manual should remain with the unit even if it is resold.  

OWNERSHIP RECORDS

Owner’s Name:
Owner’s Address:
City

:

State/Province:

Zip Code/Postal Code:

Model Number:

Serial Number:

Engine Model: 

Engine Serial Number: 

Date of Purchase: 

Notes: 

REGISTRATION AND SERVICE

Record the product number and serial number in the space provided for easy reference when ordering parts or requesting 

technical support.  Excluding emissions-related warranty items, the warranty is valid only if the completed registration is received 

by Earthquake within 30 days of purchase

. (SEE WARRANTY STATEMENT FOR MORE INFORMATION.)

   You can register your 

warranty online by visiting www.getearthquake.com, or by mailing it to:  Warranty Department, 1160 Eighth Avenue, Cumberland, 

WI 54829.  If you do not have access to www.getearthquake.com, call our customer service department  at (800) 345-6007 

Mondays through Fridays from 8 a.m. to 5 p.m. CST.   

When contacting your authorized dealer or Earthquake for replacement 

parts, service, or information you MUST have these numbers. Do not take 

this product back to the store from which it was purchased.

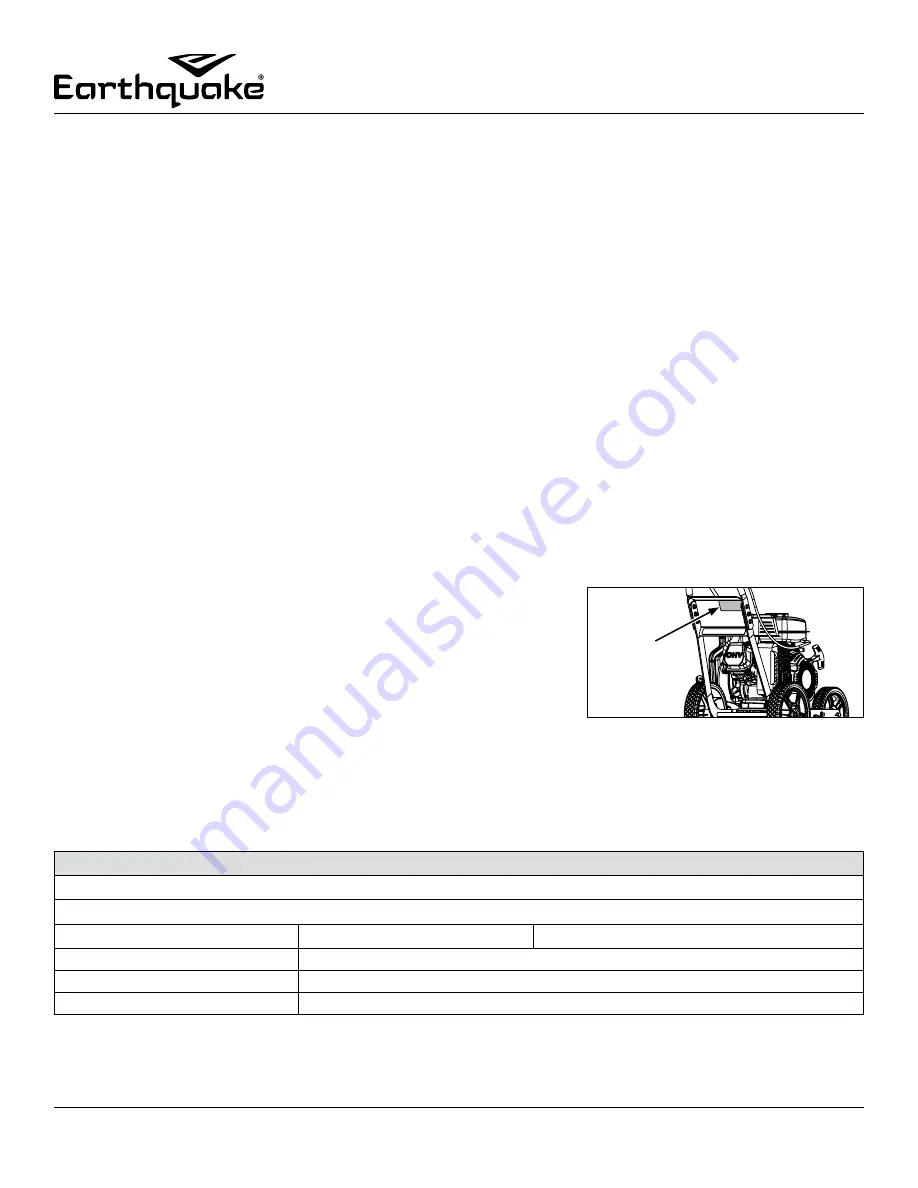
Record your model name/number, manufacturer’s serial number, and engine 

serial number in the space provided for easy access. 

NOTE:  For location of engine serial number, refer to the engine owner’s manual.

Serial

Number 

Decal

Summary of Contents for 23275

Page 1: ...ine at www getearthquake com or call 800 345 6007 Pi ces d tach es et assistance technique en ligne www getearthquake com ou composer le 800 345 6007 THIS INSTRUCTION BOOKLET CONTAINS IMPORTANT SAFETY...

Page 2: ...AKDOWN and the WARRANTY STATEMENTS This information must be included to make sure state laws and other laws are followed This manual should remain with the unit even if it is resold OWNERSHIP RECORDS...

Page 3: ...bly instructions Maintain the edger according to directions and schedule included in this operator s manual Ensure that anyone who uses the edger is familiar with all controls and safety precautions S...

Page 4: ...ficial light Do not operate product when fatigued or under the influence of alcohol drugs or other medication which can cause drowsinessoraffectyourabilitytooperatethismachinesafely Never operate mach...

Page 5: ...use they can ignite gasoline vapors Gasoline Fires and Handling Fuel Safely Use extra care in handling gasoline and other fuels They are flammable and vapors are explosive When storing extra fuel be s...

Page 6: ...uction decals as necessary Inspect engine before storage When not in use disconnect spark plug lead and store indoors in a dry place locked or otherwise inaccessible to children Use only original equi...

Page 7: ...knowledge to operate this equipment safely and effectively we have placed several safety labels on the unit to remind you of this important information while you are operating your unit All DANGER WAR...

Page 8: ...n engine throttle is released the engine will go back to idle and blade will stop turning Blade Depth Control Lever The blade depth control lever is located on the left side of the upper handle It is...

Page 9: ...EIGHT 57 LB BASE 61 25 LB CURB GROSS WEIGHT 64 LB BASE 68 LB CURB ASSEMBLED DIMENSIONS 38 7 x 19 3 x 37 7 BOXED DIMENSIONS IN 30 2 x 15 3 x 21 3 START TYPE RECOIL MANUAL MANUFACTURER WARRANTY 5 YEAR L...

Page 10: ...FIGURE 2 INSTALL CUTTING HEAD ASSEMBLY 3 Remove the clutch shield Connect the engine belt to the clutch pulley Reattach the clutch shield SEE FIGURE 3 4 Position the cutting head assembly onto the pi...

Page 11: ...Pulley Tool Holder Strap Handlebar Mount Plate Dash Panel Tool Holder Pivot Location Double Angle Bracket Pivot Rod Front Axle Wheel Position Spacer Axle Spacer Axle Spacer Rear Axle Double Angle Bra...

Page 12: ...tion as before it was removed SEE FIGURE 10 11 Remove the hardware from the right side of the tool holder when standing in the operator s position 12 Position the curb wheel height control on the back...

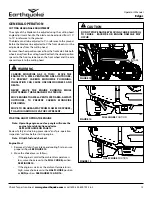
Page 13: ...HILE UNATTENDED TURN ENGINE OFF AFTER USE MOVE ENGINETO AWELL VENTILATED AREA ALWAYS OUTDOORS TO PREVENT CARBON MONOXIDE POISONING MOVE TO AN AREA AWAY FROM FLAMES OR SPARKS TO AVOID IGNITION OF VAPOR...

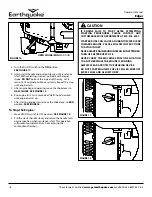
Page 14: ...letting it retract pull rope with a rapid stroke DO NOT pull out the rope all of the way Let it return to its original position very slowly Repeat this step until engine starts 5 After engine begins o...

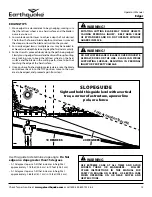
Page 15: ...ATING CUTTING BLADE MAY THROW OBJECTS CAUSING PERSONAL INJURY KEEP AREA CLEAR OF BYSTANDERS AND DO NOT OPERATE WITHOUT GUARDS IN PLACE WARNING DO NOT LOWER BLADE IF BLADE IS OVER CONCRETE ASPHALT ROCK...

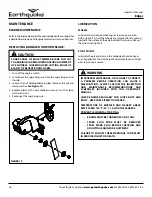
Page 16: ...THESE AREAS PREVENT ACCIDENTAL STARTING ENGINE MUST BE TURNED OFF AND COOL SPARK PLUG WIRE MUST BE REMOVED FROM SPARK PLUG BEFORE CHECKING AND ADJUSTING ENGINE OR EQUIPMENT FAILURE TO FOLLOW THESE WAR...

Page 17: ...vealldebrisfromtheedgerengineandbladeguardarea CAUTION TO AVOID INJURY OR DEATH NEVER SIPHON FUEL BY MOUTH NEVER STORE ENGINE WITH FUEL INTHETANK INSIDE A BUILDING POTENTIAL SPARKS MAY BE PRESENT FOR...

Page 18: ...sparkwireissecurelyattachedtosparkplug 3 Dirty carburetor 3 Call Customer Service Engine misses or lacks power 1 Clogged fuel tank or fuel filter 1 Remove and clean 2 Clogged air filter 2 Clean or rep...

Page 19: ...DES PI CES D TACH ES et les D CLARATIONS DE GARANTIE Cette documentation doit tre fournie en vertu de la r glementation en vigueur Le pr sent manuel doit rester avec la machine m me lorsqu elle est r...

Page 20: ...instructions d assemblage Entretenir le dresse bordure conform ment aux instructions et au calendrier figurant dans le manuel de l utilisateur S assurer que quiconque utilise le dresse bordure est fam...

Page 21: ...est fatigu ou sous l emprise de l alcool de drogues ou de m dicaments susceptibles de provoquer unesomnolenceoud alt rerlacapacit utiliserlamachineentoute s curit Ne jamais utiliser la machine dans de...

Page 22: ...carburant dans le r servoir l cart de chaudi res po les chauffe eau et autres appareils lectrom nagers comportant une veilleuse ou autre source d inflammation susceptible d enflammer les vapeurs d ess...

Page 23: ...c ble de bougie et entreposer l int rieur dans un endroit sec verrouill ou autrement inaccessible aux enfants Utiliser exclusivement des pi ces Earthquake d origine y compris tous les crous et vis A B...

Page 24: ...nous avons appos plusieurs autocollants de s curit sur la machine pour rappeler certaines informations importantes l op rateur durant l utilisation de la machine Tous les messages DANGER AVERTISSEMENT...

Page 25: ...z le moteur revient au ralenti et la lame cesse de tourner Levier de commande de profondeur de la lame Le levier de commande de commande de profondeur de la lame en haut gauche sur le guidon Elle sert...

Page 26: ...S BRUT 29 KG 64 LB BASE 31 KG 68 LB TROTTOIR DIMENSIONS ASSEMBL ES 98 x 49 x 96 CM 38 7 x 19 3 x 37 7 PO DIMENSIONS DE L EMBALLAGE 77 x 39 x 54 CM 30 2 x 15 3 x 21 3 PO TYPE DE D MARREUR LANCEUR CORDO...

Page 27: ...e outil vu de la position de conduite VOIR FIGURE 2 MONTER LA T TE DE COUPE 3 Retirer le carter d embrayage Raccorder la courroie du moteur la poulie d embrayage Remonter le carter d embrayage VOIR FI...

Page 28: ...util Plaque de fixation du guidon Panneau enjoliveur Porte outil Point de pivot querre double Tige de pivot Axe avant Entretoise de roues Bague d espacement d axe Bague d espacement d axe Axe arri re...

Page 29: ...1 Retirer la visserie de fixation du c t droit du porte outil vu de la position de conduite 12 Placer la commande de hauteur de la roue de trottoir sur l arri re de la plaque de fixation du guidon Rem...

Page 30: ...LAISSER LE MOTEUR EN MARCHE SANS SURVEILLANCE ARR TER LE MOTEUR APR S UTILISATION PLACER LE MOTEUR DANS UN ENDROIT BIEN A R TOUJOURS L EXT RIEUR POUR VITER TOUTE INTOXICATION AU MONOXYDE DE CARBONE S...

Page 31: ...nceur se r tracter le tirer d un mouvement rapide NE PAS tirer le cordon jusqu au bout Le laisser revenir tr s lentement sa position de repos R p ter cette tape jusqu ce que le moteur d marre 5 Une fo...

Page 32: ...SSEMENT LA LAME DE COUPE EN ROTATION PEUT PROJETER DES OBJETS ET PROVOQUER DES BLESSURES CORPORELLES TENIR LES PERSONNES PR SENTES L CART ET NE PAS UTILISER LA MACHINE SANS SES CARTERS DE PROTECTION A...

Page 33: ...RRAGES ACCIDENTELS LE MOTEUR DOIT TRE L ARR T ET FROID LE C BLE DE BOUGIE DOIT TRE D BRANCH DE LA BOUGIE AVANT TOUT CONTR LE OU R GLAGE DU MOTEUR OU DE LA MACHINE POUR CARTER LES RISQUES DE BLESSURE G...

Page 34: ...e bordure ATTENTION POUR CARTER LES DANGERS DE BLESSURE OU DE MORT NE JAMAIS SIPHONNER LE CARBURANT PAR LA BOUCHE NE JAMAIS ENTREPOSER LE MOTEUR AVEC DU CARBURANT DANS LE R SERVOIR L INT RIEUR D UN B...

Page 35: ...ougie 3 Carburateur sale 3 Appeler le service apr s vente Le moteur a des rat s ou manque de puissance 1 R servoir ou filtre carburant encrass 1 Enlever et nettoyer 2 Filtre air encrass 2 Nettoyer ou...

Page 36: ...1160 Eighth Avenue PO Box 666 Cumberland WI 54829 Phone T l pone 800 345 6007 Fax T l copieur 715 822 2124 www getearthquake com...

Reviews: