background image

Operator's Manual

CRT Models 5040 and 6040E

Check for parts online at 

www.getearthquake.com

 or call 800-345-6007 M-F 8-5 CST

17

EnGinE mAintEnAnCE

Refer to the engine manual included in your parts 
packet for information on engine maintenance. Your 
engine manual provides detailed information and a 
maintenance schedule for performing the following 
tasks:
1. Check oil level before each use or after every 8 hours 

of operation.

. Change oil after first 5-8 hours of operation. Change 

oil while engine is warm. Refill with new oil of recom-
mended grade.

4. Check spark plug yearly or every 100 hours of opera-

tion.

5. Service air cleaner.
6. Keep engine and parts clean.
7. Check engine and equipment often for loose nuts 

and bolts, keep these items tightened.

ChECk oR FiLL EnGinE CRAnkCASE

1. Add oil according to engine manual. Do not overfill. 

Use a clean, high quality detergent oil. Container 

must be marked A.P.I. Service SF - SJ. Use no special 

additives with recommended oils. Do not mix oil with 

gasoline. Oil level must be full. Check the oil level by 

removing oil fill plug. Oil level should be up to the 

bottom of the fill plug opening.

. Always check oil level before starting engine. Refer to 

engine manual for capacity and type of oil to use.

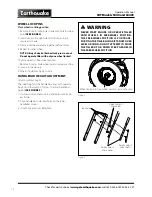
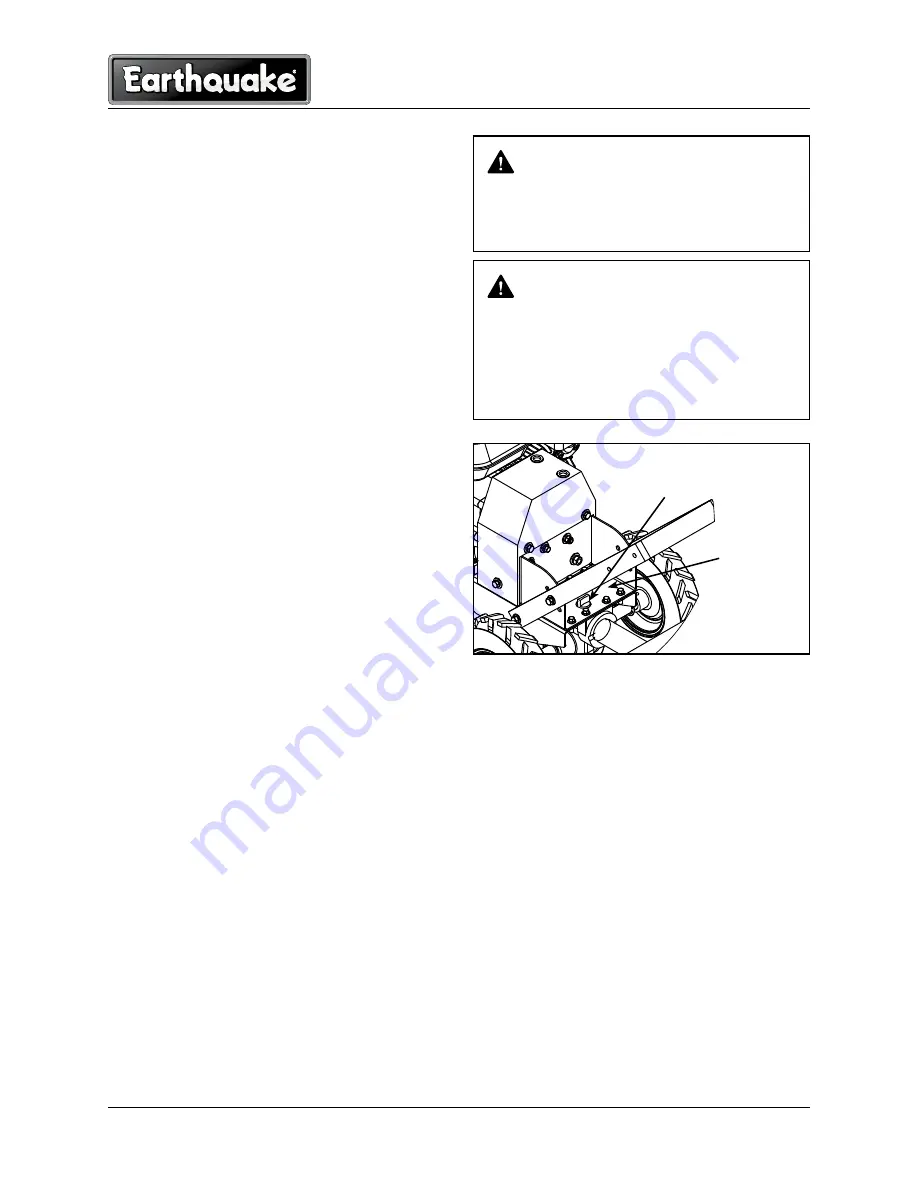
ChECk tiLLER tRAnSmiSSion GREASE

Check the grease level annually. To check the grease 
level:
1. Move tiller to level ground.
. Remove grease level dipstick located between the 

handlebar mounts on the engine mount. Correct 
grease level is indicated between the high and low 
levels on the dipstick.

3. Replace grease level dipstick in the filler hole.
4. Note that the front wheel transmission and rear tine 

transmission are one common reservoir. When you 

add to the front transmission, you must wait a short 

period of time for the grease to flow rearward and 

equalize in both front and rear. The dipstick will read 

correctly on level ground for both gear units.

  (Use Mystic 00 transmission fluid PN1690)
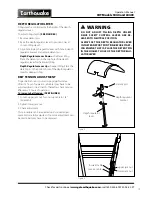
ChECk tiRE PRESSuRE

Recommended tire pressure is 0 PSI. If tires do not have 
equal pressure, tiller will pull to one side.

 iMpoRTanT

EnGinE  iS  ShiPPEd  FRom  FACtoRY  With-

out oiL. You muSt Add EnGinE oiL BEFoRE 

StARtinG EnGinE.

 iMpoRTanT

tiLLER  tRAnSmiSSion  iS  ShiPPEd  FRom 

FACtoRY  With  thE  PRoPER  Amount  oF 

Liquid GREASE.
WhEn REPLACinG GREASE, thE tiLLER tRAnSmiS-

Sion hoLdS 18-22 ounCES. do not oVERFiLL.
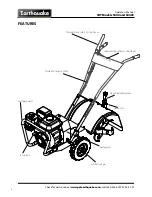
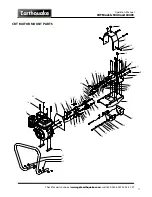
gear case 
dipstick

transmission 
cover plate

Summary of Contents for 5040

Page 1: ...perator s Manual CRT Rototillers 5040 6040E OMCRTC Revised 11 09 09 2009 Ardisam Inc All Rights Reserved 5040 BRIGGS stratton 4 cycle 206cc 8 50 ft lbs gross torque 6040E VIPER ELECTRIC 4 cycle 196 cc...

Page 2: ...change models specifications and price without notice This product if used as intended will give you years of trouble free service We hope you will enjoy the quality of our products for years to come...

Page 3: ...procedures and specifications are subject to change without notice CONTENTS Registration Warranty 2 Safety 3 6 Unpacking Assembly 7 Features 8 Operation 9 14 Maintenance 15 18 Troubleshooting 19 20 Pa...

Page 4: ...pment Do not allow children to operate this rototiller Keep small children away from the area being tilled Do not allow adults to operate the tiller without proper instruction Preparation Dressappropr...

Page 5: ...s and run the tiller in reverse If this does not clean clogged vegetation from the tines STOP THE ENGINE AND DISCONNECT THE SPARK PLUG WIRE before removing vegetation by hand Engine muffler will be ho...

Page 6: ...ou will see as you perform normal tilling operations Please review these labels now If you have any questions regarding their meaning or how to comply with these instructions reread the complete safet...

Page 7: ...tween lower handlebar mount and nuts 7 Tighten all 3 8 16 nuts 8 Remove the battery box cover and plug the white plastic connector from the battery into the mating white plastic connector in the batte...

Page 8: ...arts online at www getearthquake com or call 800 345 6007 M F 8 5 CST Features forward drive safety control lever detent pin forward reverse cable recoil start wheel lock pin belt guard reverse drive...

Page 9: ...one time and allow to return normally 4 Pull starting rope out rapidly and allow rope to return normally For electric start models turn ignition key to START position and hold until the engine starts...

Page 10: ...ve safety control lever labeled FORWARD this will engage the wheels and tines NOTE You can slow the tiller s forward advance at any time by putting slight downward pressure on the handlebars You can s...

Page 11: ...aged reverse lever Caution Do not operate both FORWARD and REVERSE drive safety control levers at the same time This information is provided here only to introduce the controls DO NOT START THE ENGINE...

Page 12: ...in in axle only 3 Wheel should turn freely on axle Handlebar height Adjustment Adjust handlebar height The ideal height of the handlebar varies with operator height and the depth of tilling To adjust...

Page 13: ...ling BELT TENSION ADJUSTMENT Proper belt tension is critical to good performance After 1 2 hour of operation all cables may have to be adjusted due to initial stretch Thereafter check tension after ev...

Page 14: ...the handlebars to control sudden lurches If weeds tall grasses vines or other materials clog or jam the tines reverse the tiller to unwind vegetation Immediately release the drive control levers if th...

Page 15: ...Please read this normal care schedule and note the recommended care operating intervals to extend the life of your unit Maintenance Operation Page Before Each Use 50 hours or Every Season Change forwa...

Page 16: ...belt free of engine pulleys and reverse belt guides pull belt down and away from transmission pulley install new reverse belt thread belt up from bottom place belt around transmission pulley in groove...

Page 17: ...p to the bottom of the fill plug opening 2 Always check oil level before starting engine Refer to engine manual for capacity and type of oil to use Check Tiller Transmission Grease Check the grease le...

Page 18: ...system completely following engine manufacturer s instructions or add fuel stabilizer to prevent fuel from gumming up during extended storage period 3 While engine is still warm drain the oil from the...

Page 19: ...and clean fuel tank Clean or replace air cleaner Improper carburetor adjustment take to authorized engine service center Replace spark plug and adjust gap Drain and refill gas tank and carburetor On...

Page 20: ...ark plug wire Belts squeal in forward operation Adjust tabs on the reverse belt guide turn engine off and allow muffler to cool disconnect spark plug wire and secure from spark plug release drive safe...

Page 21: ...erator s Manual CRT Models 5040 and 6040E Check for parts online at www getearthquake com or call 800 345 6007 M F 8 5 CST 21 CRT Handlebar parts 16 8 7 6 10 4 5 3 12 18 13 11 1 2 15 14 17 19 1 14 37...

Page 22: ...9 HANDLEBAR WELDMENT 1 18 60G56 NUT BI WAY LOCK 5 16 18 1 19 90138 Bolt 3 8 16 x 3 4 Serrated Flange 4 REF NO PART DESCRIPTION QTY 20 21 300500 GROMMET 1 2 ID 1 22 300501 NUT WING M5 X 8 2 23 300502 S...

Page 23: ...call 800 345 6007 M F 8 5 CST 23 CRT Motor Mount PARTS 48 47 23 13 49 18 14 18 25 14 21 22 16 2 8 24 17 16 11 12 20 6 3 4 5 1 6 26 9 10 45 43 44 41 18 16 18 45 16 42 16 28 29 16 36 16 32 30 26 31 18 3...

Page 24: ...NUT M8 NYLOCK 3 24 332020 NUT M6 NYLOCK 2 25 W1265V0903 NUT M10 HNYLK GR8 8 ZN 2 26 1407 SPRING FORWARD ARM 2 27 31321 ENGINE 6 5 HP VIPER HORIZONTAL 1 28 332023 PANEL BELT GUARD BACK 1 R E F NO PART...

Page 25: ...Models 5040 and 6040E Check for parts online at www getearthquake com or call 800 345 6007 M F 8 5 CST 25 CRT Tines Hood parts 11 2 22 5 8 9 17 20 10 27 30 29 18 28 25 26 16 19 3 23 21 3 7 6 5 14 12 2...

Page 26: ...L OIL DRIVE SHAFT 1 10 1500P101 BOLT 1 4 20 X 3 4 3 11 1710 EXTERNAL SNAP RING 2 12 1900LCRT LEFT TINE SET 1 13 1900RCRT RIGHT TINE SET 1 14 2001 BOLT 3 8 16 X 1 3 4 2 15 2104 NUT BI WAY LOCK 3 8 16 2...

Page 27: ...AFT 1 7 BUSHING TINE AND WHEEL SHAFT 4 8 SHIM TINE AND WHEEL SHAFT 8 9 RING RETAINER INTERNAL 4 10 SEAL GREASE TINE AND WHEEL SHAFT 4 11 GEAR WORM TINE CRT SHAFT 1 12 KEY WOODRUFF 2 13 SHAFT TINE 1 14...

Page 28: ...k for parts online at www earthquake com or call 800 345 6007 M F 8 5 Earthquake Division of Ardisam Inc 1160 8th Avenue PO Box 666 Cumberland WI 54829 800 345 6007 Fax 715 822 2223 Email info ardisam...

Reviews: