background image

Operator's Manual

Rolling String Trimmer 600050V, 600050B

Check for parts online at 

www.getearthquake.com

 or call 800-345-6007 M-F 8-5

9

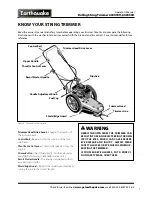
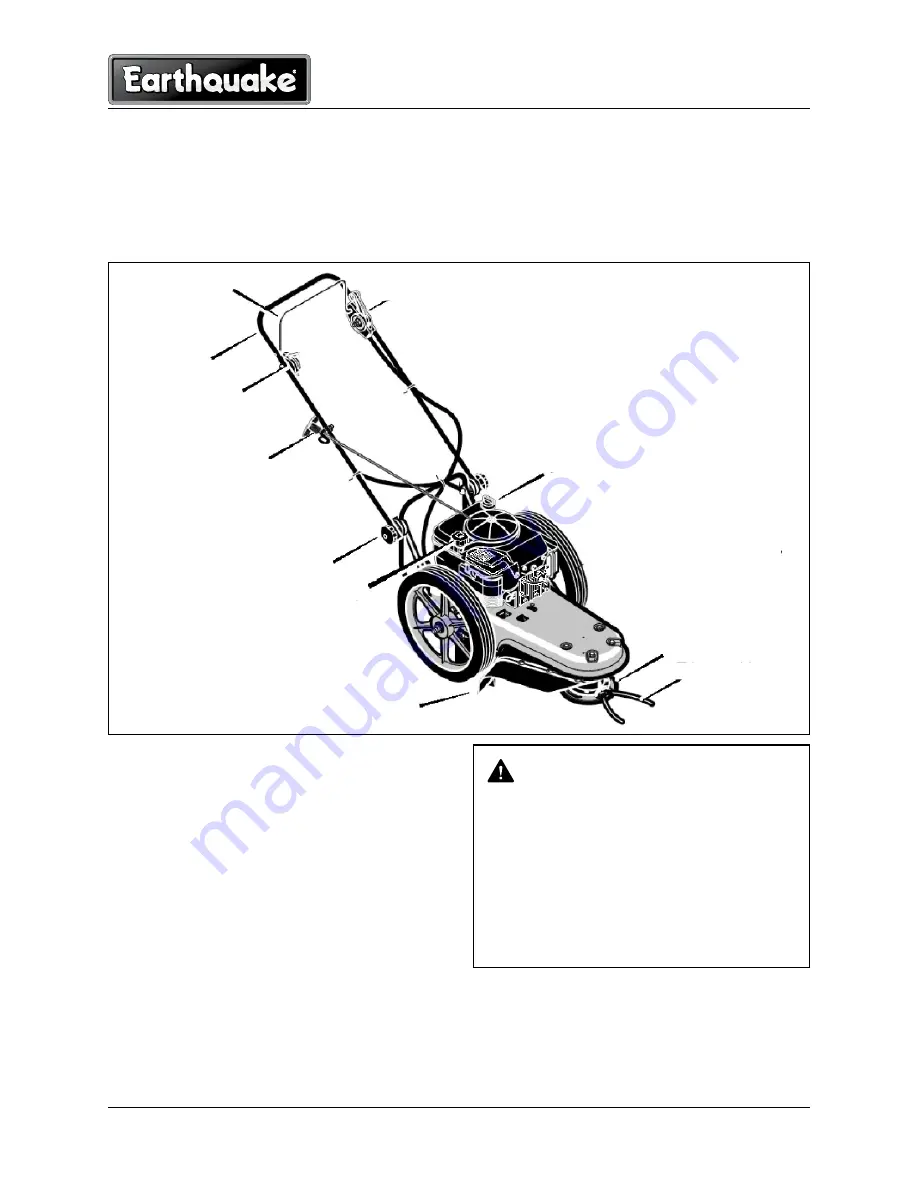
knoW YouR StRing tRimmER

Read this owner’s manual and safety rules before operating your trimmer. Take time to compare the following 

illustration with the washer to familiarize yourself with the product and its controls.  Save this manual for future 

reference.

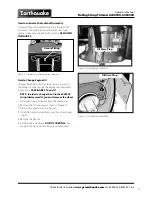
trimmer head drive Lever -

 Engages the rotation of 

the trimmer head.

Control Bail - 

Release to stop the rotation of the trim-

mer head.

Throttle Control Lever -

 Controls the speed or stops the 

engine.

Primer Button - 

Injects fuel directly into the carburetor 

manifold for faster starts (600050B models only )

Recoil Starter Handle -

 The engine is equipped with an 

easy pull recoil starter.

Shield Edge Guard -

 Protects the shield by automatically 

cutting the line to the correct length.

waRning

dEbRiS  thRoWn  fRom  thE  tRimmER  CAn 

RESuLt in foREign obJECtS bEing thRoWn 

into thE  EYES, WhiCh  CAn  CAuSE  SEVERE 

EYE  dAmAgE  And  inJuRY.    ALWAYS  WEAR 

SAfEtY gLASSES oR EYE ShiELdS WhEn oP-

ERAting thE tRimmER.
if You WEAR  EYE  gLASSES,  Put  A WidE Vi-

Sion SAfEtY mASk oVER thEm.

Figure 5 : Your new string trimmer

Shield Edge guard

trimmer Line

trimmer head

dipstick   

trimmer head drive Lever

handle Adjustment knob

fuel Cap  

Recoil Starter handle

throttle Control Lever

upper handle

Control bail

Summary of Contents for 600050V

Page 1: ...Operator s Manual Rolling String Trimmer 600050V 600050B OM600050V OM600050B R091109 2009 Ardisam Inc All Rights Reserved...

Page 2: ...specifications and price without notice This product if used as intended will give you years of trouble free service We hope you will enjoy the quality of our products for years to come For replaceme...

Page 3: ...Earthquake reserves the right to change alter or improve the product and this document at any time without prior notice CONTENTS Registration and Warranty 2 Introduction Contents 3 Operation Safety 4...

Page 4: ...and follow all instructions on the machine and in the manual s Be thoroughly familiar with the controls and the proper use of the trimmer before starting 2 Familiarize yourself with all of the safety...

Page 5: ...check the cable linkage running to the carburetor for kinks loose fittings and obstructions Verify that the control bail is working properly 19 Stop the rotating trimmer head when crossing gravel dri...

Page 6: ...allow to evaporate D Never store the machine or fuel container inside where there is an open flame such as a water heater or other ignition source E If the fuel has to be drained this should be done...

Page 7: ...bled for shipment To Attach the Tires Attach the tires by inserting the spacer the washer and the wheel Secure and tighten by using the axle nuts provided Figure 2 Assembling tires To Remove the Trimm...

Page 8: ...e manufacturer s instructions for the Type of gasoline to use Note Actual sustained horsepower will likely be lower due to operating limitations and environ mental factors How to Raise the Handle 1 Ho...

Page 9: ...e engine Primer Button Injects fuel directly into the carburetor manifold for faster starts 600050B models only Recoil Starter Handle The engine is equipped with an easy pull recoil starter Shield Edg...

Page 10: ...ol bail against the handle Move the trimmer head drive lever forward to engage the trimmer head The faster the engine runs the faster the trimmer head will rotate SEE FIGURE 6 2 Once the trimmer head...

Page 11: ...the FAST position If the weeds or grass are tall and thick operate the trimmer at a slower walking speed Frequently clean the underside of the trimmer to remove any grass build up See the Maintenance...

Page 12: ...inal length replace with new line Note 2 Clean daily if used in extremely dusty or dirty conditions Note 3 Change more often if used in extremely dusty or dirty conditions To service the air filter an...

Page 13: ...the engine manufacturer s instructions SEE FIGURES 10 and 11 NOTE In order to change the oil in the 600050V string trimmer model you must remove the wheel 1 Disconnect spark plug wire from the spark p...

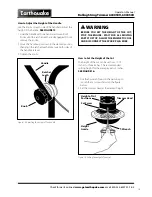
Page 14: ...ter The line will then stay flexible and easy to change A flexible line will also last much longer WARNING Before you inspect clean or service thetrimmer stoptheengine Makesure that all moving parts h...

Page 15: ...the handle are level 3 Tighten the knobs How to Set the Height of the Cut The height of the cut can be set from 1 1 2 inches to three inches The recommended cutting height for the average yard is 2 in...

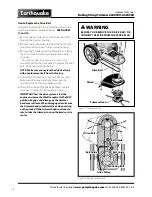
Page 16: ...E Make sure you replace the drive belt only with a replacement belt from the factory 5 To assemble the drive belt reverse the above steps Make sure all fasteners are tight Make sure the mounting bolt...

Page 17: ...om the cylinder Pour one ounce of oil into the cylinder Slowly pull the recoil starter handle so that the oil will protect the cylinder Install a new spark plug in the cylinder 4 Completely clean the...

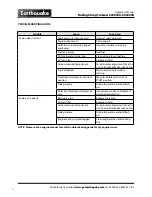
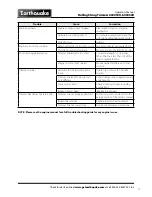
Page 18: ...Dirty air filter Replace air filter Carburetor out of adjustment For carburetor adjustment take the unit to an authorized service center Engine flooded Wait several minutes before starting Throttle co...

Page 19: ...line length is 21 5 inches When the line is less than 1 2 of this length replace the line Engine not set at FAST speed Move engine throttle lever to FAST position Trimmer vibrates Set screw for the t...

Page 20: ...hat increases in height at approximately 1 76 feet in 10 feet A 15 degree slope is a hill that increases in height at approximately 2 68 feet in 10 feet WARNING Use extreme care at alltimes and avoid...

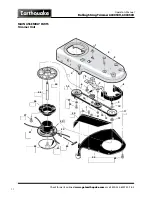
Page 21: ...V 600050B Check for parts online at www getearthquake com or call 800 345 6007 M F 8 5 21 MAIN ASSEMBLY PARTS Base Unit 2 7 6 26 17 16 18 19 11 31 12 14 10 4 11 9 14 4 5 4 6 3 1 2 8 6 21 27 23 18 22 2...

Page 22: ...gTrimmer 600050V 600050B Check for parts online at www getearthquake com or call 800 345 6007 M F 8 5 22 33 31 32 24 29 31 11 8 3 2 1 27 25 26 12 15 17 18 20 19 23 22 30 2 7 5 16 6 9 10 13 14 1 4 21 M...

Page 23: ...gine Viper Engine Briggs 1 1 29 60005050 Glasses safety 1 30 60005062 Nut 8 31 60005057 Support handle 2 32 60005066 Screw 1 33 60005047 Clamp throttle 1 KEY PART NUMBER DESCRIPTION QTY 1 60005036 Nut...

Page 24: ...k for parts online at www earthquake com or call 800 345 6007 M F 8 5 Earthquake Division of Ardisam Inc 1160 8th Avenue PO Box 666 Cumberland WI 54829 800 345 6007 Fax 715 822 2223 Email info ardisam...

Reviews: