background image

1-800-345-6007

Page 6

www.ardisam.com

SAFETY RULES

SAFETY RULES

SAFETY RULES

SAFETY RULES

SAFETY RULES

SAFETY DECAL

SAFETY DECAL

SAFETY DECAL

SAFETY DECAL

SAFETY DECAL

This mini cultivator has been designed and manufactured to provide you with the safety and reliability you would expect
from an industry leader in outdoor power equipment manufacturing.

Reading this manual and the safety instructions it contains will provide you with the necessary basic knowledge to operated
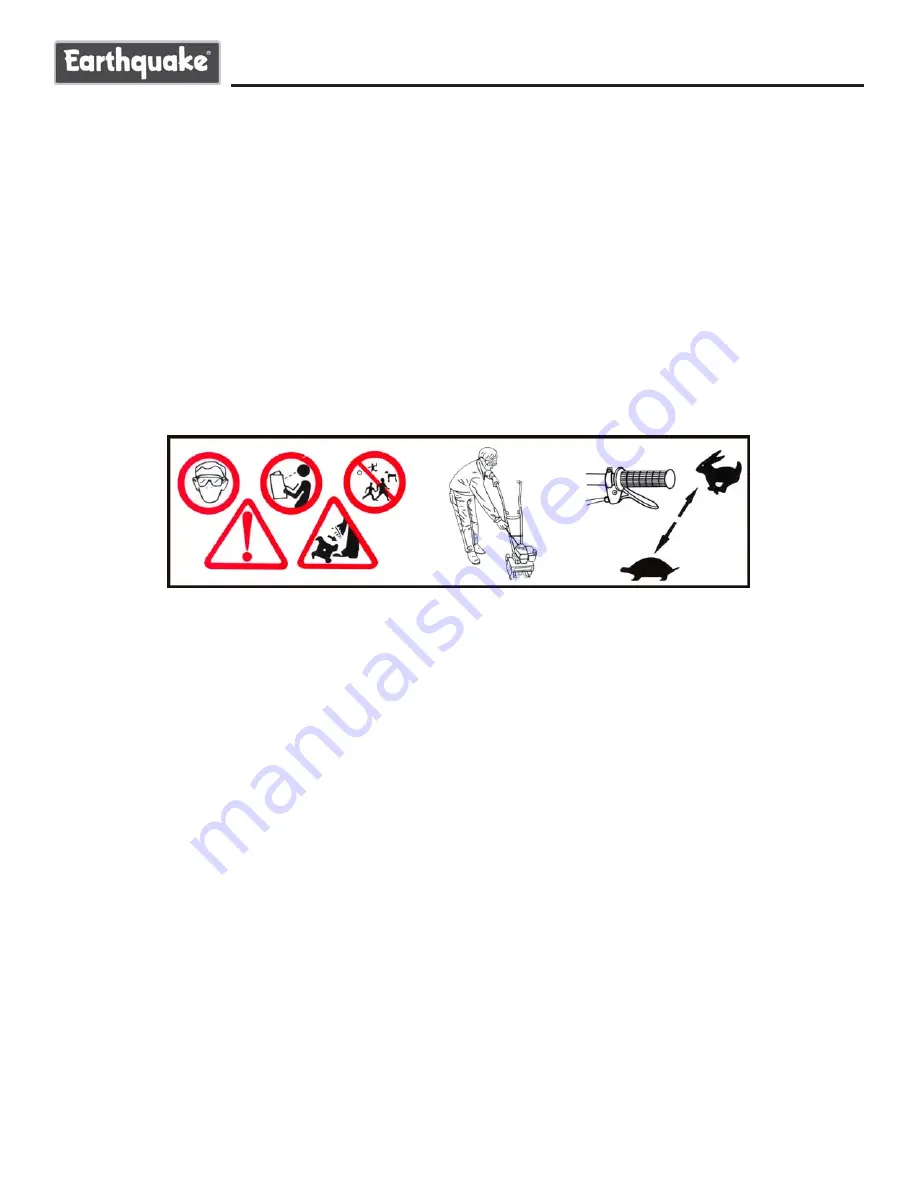
this equipment safely and effectively. We have placed a safety decal on the cultivator to remind you of some of this impor-
tant information while you are operating the unit.

This important safety decal is illustrated below, and is shown here to help familiarize you with the location and content of the
safety messages you will see as you perform normal cultivating operations. Please review this decal now, and if you have
any questions regarding its meaning or how to comply with these instructions, reread the complete safety instruction text in
this manual, or contact your local dealer.

Should this decal become unreadable because of being worn, faded, or otherwise damaged during the use of your mini
cultivator, please use the part number information provided to order a replacement label from your local authorized dealer.
These decals are easily applied, and will act as a constant visual reminder to you, and others who may use the equipment,
to follow the safety instructions necessary for safe, effective operation of your mini cultivator.

Part No. LBLMC43W

Warning Decal MC43E

Tine Shield Decal

Summary of Contents for MC43E

Page 1: ...MC43E Mini Cultivator Operator s Manual IBMC43E 4 25 05 Copyright 2005 Ardisam Inc All Rights Reserved Printed in USA ...

Page 2: ...es not cover defects arising from misuse alteration negligence commercial use or accident This warranty applies only to the original purchaser and is not transferrable How to obtain service Call 1 800 345 6007 for service assistance or return the product to us at the address below with transportation charges prepaid This warranty supersedes all other warranties either expressed or implied and all ...

Page 3: ...onal safety Read and follow all instructions in this manual before attempting to operate this equipment Do not transport the mini cultivator from one place to another with the engine running The tines of the cultivator should not rotate when the engine is idling If it does rotate when engine is idling contact Ardisam Inc for instructions Dress appropriately when operating the cultivator Always wea...

Page 4: ...ay be present Never use fuel where a potential source of ignition could occur Examples include hot water or space heaters clothes dryer electric motors etc Keep flames and sparks away from engine and fuel to prevent fires Fuel fires spread very quickly and are highly explosive Prevention of Gasoline Fires Never fill your fuel tank with fuel indoors Examples include basement garage barn shed house ...

Page 5: ...CAUTION Do Not Alter Modify Engine or Mini Cultivator Avoid injury Never alter or modify the engine from the factory Serious injury or death may occur if engine is modified or altered CAUTION Steps for W Steps for W Steps for W Steps for W Steps for Working on Engine or Mini Cultivator orking on Engine or Mini Cultivator orking on Engine or Mini Cultivator orking on Engine or Mini Cultivator orkin...

Page 6: ...lustrated below and is shown here to help familiarize you with the location and content of the safety messages you will see as you perform normal cultivating operations Please review this decal now and if you have any questions regarding its meaning or how to comply with these instructions reread the complete safety instruction text in this manual or contact your local dealer Should this decal bec...

Page 7: ...SURETHEY ARE ASSEMBLED ONTOTHEIR RESPECTIVE SIDES OF THE MINI CULTIVATOR ASSEMBLY 3 Install the upper handlebar by wedging it into the grooves of the lower handlebar pieces and secure snugly with bolt 4642 tee handle nut 4640 and washer 4641 Refer to Handlebar parts breakdown on page 17 DO NOT overtighten the tee handle nut 4640 4 Tighten the hardware bolt 4654 and nut 4655 securing the lower hand...

Page 8: ...f switch terminals see Figure 4 Attach the narrow copper colored wire terminals to the red starting button terminals see Figure 5 8 Place the battery back into the battery box so its wires are on top and accessible and attach battery wiring using the white wire coupling see Figure 6 Reattach the battery box cover 9 Use the provided zip ties to secure the wiring and throttle cable to the handlebars...

Page 9: ...ed Wipe off excess fuel and allow to dry Remove engine from area to avoid sparks CAUTION OPERA OPERA OPERA OPERA OPERATION TION TION TION TION DO NOT start engine with battery charger connected to battery This could cause damage to the mini cultivator P P P P Preparing Engine for Starting reparing Engine for Starting reparing Engine for Starting reparing Engine for Starting reparing Engine for Sta...

Page 10: ... position and move throttle to desired speed 13 To stop turn switch to OFF position Avoid injury Starter rope can cause an unanticipated jerk towards engine Please follow instructions to avoid injury CAUTION DO NOT attempt to start engine in the following ways DO NOT use starting fluid DO NOT spray flammable liquids or vapors into air cleaner carburetor or spark plug chamber DO NOT remove spark pl...

Page 11: ...g before removing 2 Remove spark plug and replace if any of the following have occurred pitted electrodes burned electrodes cracked porcelain or deposits around the electrodes 3 Check spark plug for proper gap 025 to 030 4 After analysis of the spark plug install original or a new spark plug and tighten securely NOTE DO NOT OVERTIGHTEN NOTE CROSS REFERENCE SPARK PLUG IS CHAMPION CJ8 Carburetor Nev...

Page 12: ...ed area or building CAUTION MAINTENANCE AND ST MAINTENANCE AND ST MAINTENANCE AND ST MAINTENANCE AND ST MAINTENANCE AND STORAGE ORAGE ORAGE ORAGE ORAGE T T T T Transporting Y ransporting Y ransporting Y ransporting Y ransporting Your Mini Cultivator our Mini Cultivator our Mini Cultivator our Mini Cultivator our Mini Cultivator 1 Never transport engine inside an enclosed space or vehicle Fuel or f...

Page 13: ...egin by following the suggestions in the troubleshooting guide in this section The guide will help you pinpoint the causes of common problems and identify remedies For more complicated repairs you may want to rely on your retailer an authorized mechanic or Ardisam Inc contact your retailer for a list of authorized mechanics in your area A parts catalog is included in this section We will always be...

Page 14: ...ory 4 Replace spark plug and adjust gap 1 Adjust idle speed lower 2 Replace spring 1 Make sure gas cap vent screw is in venting position 1 Add fuel to tank 1 Power switch off 2 Spark plug wire disconnected 3 Battery not connected or low charge 1 Dirty air cleaner 2 Choke partially engaged 3 Carburetor out of adjustment 1 Stale fuel 2 Spark plug wire loose 3 Dirty carburetor 1 Clogged fuel tank 2 C...

Page 15: ...1 800 345 6007 Page 15 www ardisam com MC43E ENGINE P MC43E ENGINE P MC43E ENGINE P MC43E ENGINE P MC43E ENGINE PARTS LIST ARTS LIST ARTS LIST ARTS LIST ARTS LIST ...

Page 16: ...TAKE COVER 1 300455 INTAKE COVER ADAPTER PLATE 1 300456 BOLT M5 X 50MM 2 300457 AIR FILTER COVER 1 300458 INTAKE COVER 1 300463 ENGINE SHROUD GROMMET 1 300467 LOCATING PIN 2 300470 FUEL LINE HOSE FILTER 1 300471 BOLT M5 X 12MM 3 Part Description Qty 300472 IGNITION COIL 1 300474 CATALYTIC CONVERTER MUFFLER 1 300475 MUFFLER GASKET 1 300476 INTAKE GASKET 2 300477 HEAT DISK 1 300478 INTAKEWINDPIPE 1 ...

Page 17: ...NUT M8 HEX HD 2 4657 COVER BATTERY BOX 1 4659 VOLTAGE RECTIFIER 1 4660 SOLENOID 1 4661 CHARGER PIGTAIL 1 4662 NUT CHARGER PIGTAIL 1 Part Description Qty 4663 CAP CHARGER PIGTAIL 1 4664 SWITCH ON OFF 1 4665 SWITCH PUSH BUTTON START 1 4666 SWITCH PLATE 1 4667 THROTTLE CABLE 1 4669 BOLT M6 X 1MM X 12MM PAN HD 1 4670 BOLT M5 X 0 8MM X 10MM PAN HD 1 4681 BATTERY CHARGER NOT SHOWN 1 4800 THROTTLE HOUSIN...

Page 18: ...P 1 4606 WASHER FIBER 2 4607 SETSCREW 2 4624 TINE SHIELD 2 4625 BOLT M6 X 1 0 X 42MM FLANGED HEX HD 4 4626 BOLT M6 X 1 0 X 45MM HEX HD CAP SCREW 4 4627 CLEVIS PIN 8MM X 18MM 1 Part Description Qty 4628 BOLT M10 X 1 5 X 200MM HEX HD 1 4629 NUT M10 X 1 5 CENTER LOCK HEX HD 1 4630 WHEEL SPACERTUBE 2 4631 WHEEL BUSHINGTUBE 2 4632 BRACKET WHEEL MOUNT 1 4634 WHEEL 2 4635 HUB CAP 2 4644 TRANSMISSIONASSEM...

Page 19: ...USHING DRIVE SHAFT 2 4615 THRUST BEARING ASSEMBLY 1 4616 SPACER BUSHING 1 4617 REDUCER THRUST BEARING 1 4618 WASHER THRUST 2 4619 THRUST BEARING CAGE ASSEMBLY 1 4620 NUT M8 JAM 1 Part Description Qty 4621 DRIVE SHAFT 1 4622 CONNECTING SPACER 1 4623 BALL BEARING 9MM 1 4633 ARMWHEEL DRAG STAKE MOUNT 1 4645 BUSHING TINE SHAFT 2 4646 SEAL TINE SHAFT 2 4647 BOLT M6 X 1 0 X 18MM FLANGED HEX HD 4 4648 BO...

Page 20: ...Ardisam Inc 1690 Elm Street Cumberland Wisconsin 54829 Phone 715 822 2415 Main Fax 715 822 2223 1 800 345 6007 Email info ardisam com www ardisam com ...

Reviews: