Chapter 1
— Introduction
Quick Start
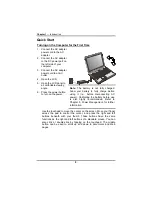
Turning on the Computer for the First Time
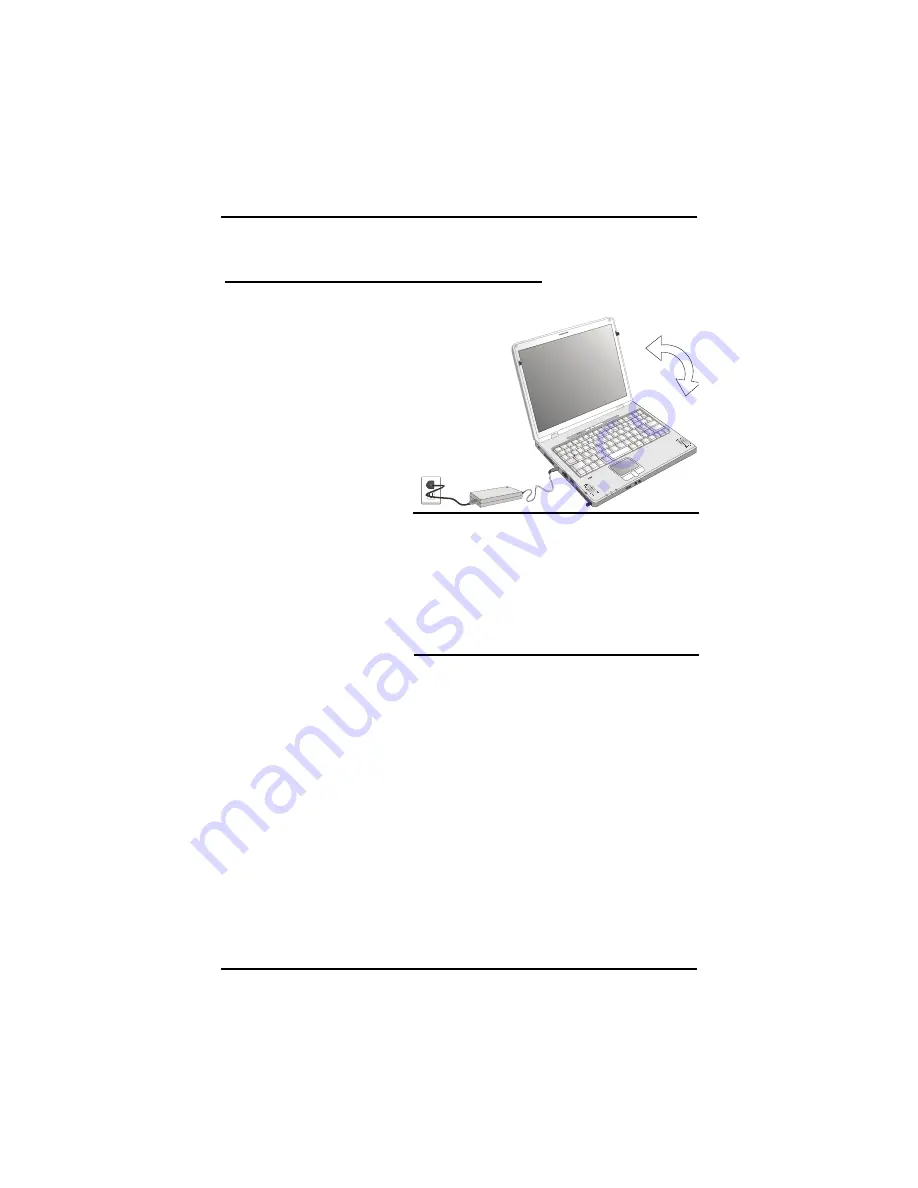
1. Connect the AC adapter
power cord to the AC
adapter.
2. Connect the AC adapter
to the DC power port on
the left side of your
computer.
3. Connect the AC adapter
power cord to an AC
outlet.
4. Open the LCD.
5. Open the LCD panel to
a comfortable viewing
angle.
6. Press the power button
to turn on the power.
Note:
The battery is not fully charged.
Allow your battery to fully charge before
using it (i.e., before disconnecting AC
power). Calibrating the battery before use
is also highly recommended. Refer to
Chapter 5,
Power Management
, for further
information.
Use the touchpad to move the cursor on the screen. Move your finger
across the pad to control the cursor, and press the right and left
buttons beneath with your thumb. These buttons have the same
functions as the right and left buttons of a standard mouse. You can
also click or double-click by tapping on the touchpad. The middle
button can be used to scroll up and down in documents and Web
pages.
8
Summary of Contents for eBuddy 8.5
Page 5: ...C Ch ha ap pt te er r 1 1 I In nt tr ro od du uc ct ti io on n ...
Page 18: ...Chapter 1 Introduction 14 ...
Page 19: ...C Ch ha ap pt te er r 2 2 G Ge et tt ti in ng g S St ta ar rt te ed d ...
Page 37: ...Getting Started Information about the Wireless LAN button 33 ...
Page 38: ...C Ch ha ap pt te er r 3 3 M Ma ak ki in ng g C Co on nn ne ec ct ti io on ns s ...
Page 42: ...C Ch ha ap pt te er r 4 4 S Sy ys st te em m S So of ft tw wa ar re e ...
Page 44: ...C Ch ha ap pt te er r 5 5 P Po ow we er r M Ma an na ag ge em me en nt t ...
Page 51: ...Chapter 5 Power Management 48 ...
Page 61: ...Chapter 6 Using the BIOS Setup Utility 58 ...
Page 66: ...A Ap pp pe en nd di ix x B B S St ta at te em me en nt ts s ...


