Assembly and Operation Instructions
Earthway_2050TP Manual_V1
PAGE 2
ASSEMBLY INSTRUCTIONS:
▪
Make sure #28 Wire Brace is under #15 Control Support prior to attaching #15 Control Support.
▪
Attach #15 Control Support to #11 using #7 Bolts and #16 Nuts
—
DO NOT TIGHTEN.
▪
Using #13 Brace Clip and #7 Bolt and #16 Nut attach #28 Wire Brace to lower side of #15 Control
Support.
TIGHTEN ALL HARDWARE NOW
OPERATING INSTRUCTIONS
Before filling hopper, become familiar with the operation of this spreader.
▪
Obtain proper setting for material to be used from the SETTING MATRIX included with this spreader.
▪
Move stop bolt on rate gauge assembly to the proper setting and tighten to secure.
▪
While pulling spreader forward, push control lever toward the spreader to the stop bolt. To stop, pull lever
forward to close flow holes before you stop moving.
▪
When finished, empty any remaining material from hopper.
▪
To prevent corrosion, spray a light oil or Fluid Film inside the tubing of the chassis and on all metal parts.
▪
If using,
Rock Salt,
to prevent damage to the gearbox remove salt from the hopper daily.
Rock Salt
will
reconstitute back into a solid block if left in the hopper overnight and will damage your gearbox if operated with
the salt in place.
The
SideSpred-
Control™
is an innovation that eliminates the need to use a side deflector, which can adversely affect
your application rate, to prevent material from being spread into flowerbeds, on sidewalks, or driveways. The
SideSpredControl™
maintains the correct application rate while it is activated, giving you excellent results in seeding
or spreading while controlling the spread pattern on the left side of the spreader. The
SideSpred-
Control™
is an
EarthWay
®
exclusive.
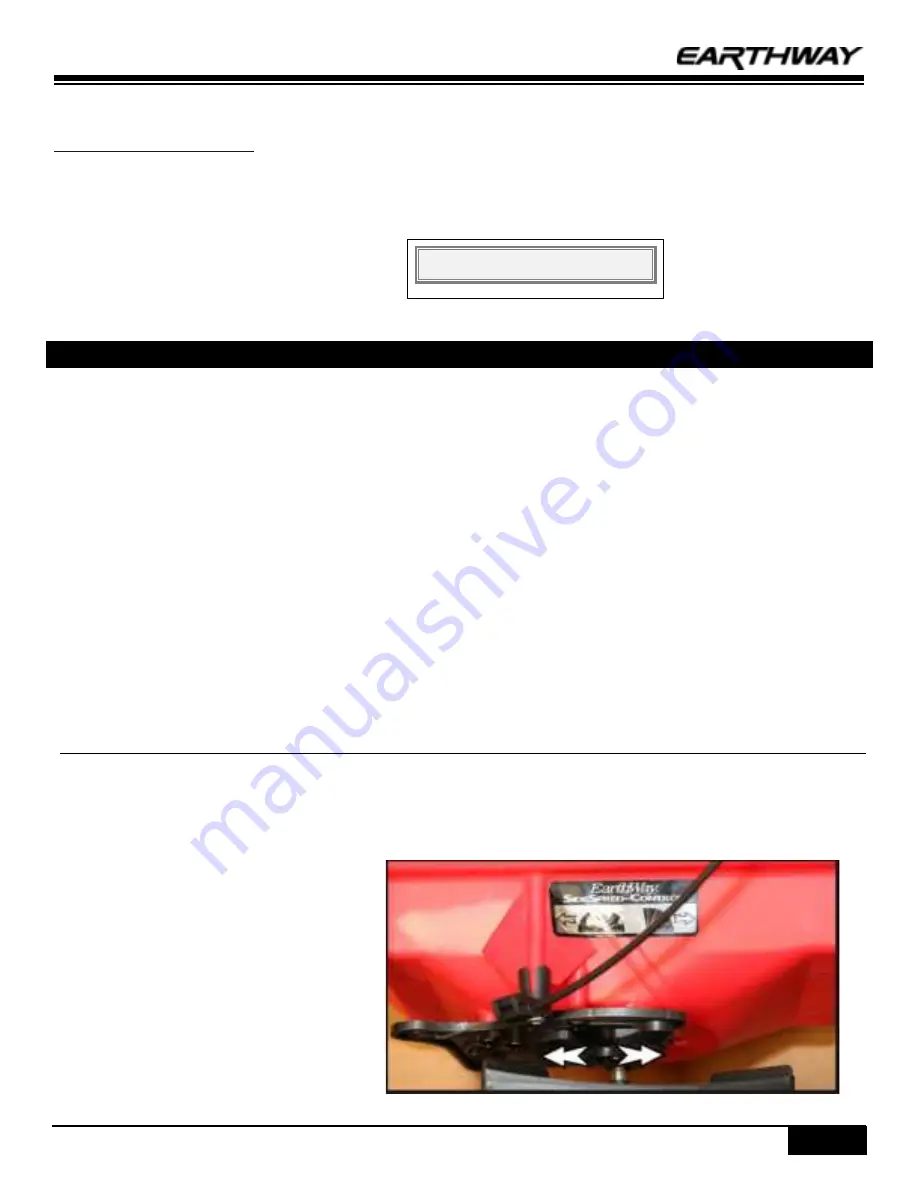
SideSpred-Control™ OPERATION
The
SideSpred-Control
™
lever is located on the back of the hopper at the bottom. To operate the
SideSpred-
Control™
, slide the
control lever from the left, to the right. This will activate the
SideSpred-
Control™
for a
PARTIAL
spread pattern and prevent material
from being spre
ad to the left side of the spreader. Position the left wheel of your spreader 12”
-
16” from the sidewalk, flowerbed, or
driveway and spread as normal. When you have completed this spreading pass, open the
SideSpred-
Control™
by sliding the control
lever from right to left, for a
FULL
spread pattern.
3MPH Maximum towing speed


