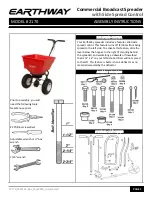
Assembly and Operation Instructions
P2170_M52164_Rev_May2020_compressed
PAGE 2
HELPFUL HINTS
Read the directions before assembly.
If your spreader does not spread evenly, be sure the FRONT on the gear box points to the front of the spreader.
The impeller must turn clockwise. Reversing the gearbox will cause the impeller to turn counter clockwise. Clean
the impeller plate after each use. Fertilizer stuck on the impeller blades will cause uneven spreading.
Your spreader is designed to be pushed at three miles per hour, which is a brisk walking speed. Slower or faster
speeds will change the spread patterns. Wet fertilizer will also change the spread pattern and flow rate. Clean
and dry your spreader thoroughly after each use. Coat all metal surfaces
(pay special attention to the inside &
outside of tubing -
it’s easiest to do while assembling)
with light oil, Fluid Film® or silicon spray to help prevent
corrosion. Wash between the shut off plate and bottom of the hopper.
Do not use powdered materials.
Gears are permanently lubricated at the factory. Do not open the gearbox or dirt may enter.
IF YOUR SPREADER COMES SEMI ASSEMBLED, SKIP TO STEP #7
Assembly Steps
Step 1:
Remove all components and hardware items
from the box. Place the spreader hopper on its side.
Step 2:
Install frame using (4) ¼-20 x 1½
″
Pan Head
Phillips bolts and (4) ¼-20 nylon insert locknuts.
First put bolts through holes in frame then through holes
in bottom of hopper.
Secure with locknuts.
TIGHTEN THESE LOCKNUTS NOW.
DO NOT TIGHTEN WITH POWER TOOLS
.
TIP
: coat stainless steel bolts with wax or grease
before tightening to prevent them from seizing.


