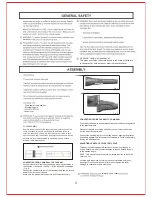
Fig. 2
Fig. 1
3
telescopic pole collars
distance
Chain saw w/chain and bar
Telescoping pole
CONVERTING FROM CHAIN SAW TO POLE SAW.
Pull the release latch located on the handle assembly backwards in
the direction of the handle. (see Fig 1. )Slide the handle downwards.
( Fig. 2).
Connect the handle to the rear of the telescopic pole and the cutting
head to the front end of the pole.
Make sure the release latch snaps in to lock the parts securely.
The electric chainsaw is a separate operating unit when not assembled
to the telescopic pole.
Disconnect handle and cutting head from ends of telescopic pole as
per the instructions provided.
Connect the handle directly to the cutting head by aligning the grooves
and pulling upward. The release latch must snap in, firmly and securely
locking the parts together.
To adjust the telescoping pole disconnect the saw from the power
supply. Rotate the collar counterclockwise to loosen. Extend the pole
to the desired length.
NOTE: Only extend the pole to minimum length required to reach the
limb to be cut.
Lock the pole in position by turning the collar clockwise until firmly
hand tight. Do not use wrench or pliers to over tighten the collar.
Damage to collar and/or pole may result.
CONVERTING FROM POLE SAW TO CHAIN SAW.
ADJUSTING LENGTH OF TELESCOPIC POLE
POLE ASSEMBLY:
Remove rubber caps from the upper and lower pole sections. Hold
the two sections of the pole as shown with the arrows facing up.
Insert the upper pole section into the connector on the lower pole
section until you hear the sections click together. Make sure the two
sections are securely assembled by stretching the pole out and
drawing it back several times.
WARNING: California Proposition 65:
This product contains chemicals known to the State of California
to cause cancer, birth defects or other reproductive harm.
Summary of Contents for CVPS41008
Page 1: ...CVPS41008 CVPS41010 CONVERTIBLE 2 IN 1 CHAIN SAW This product...
Page 4: ...4 INSTALLING REPLACING THE GUIDE BAR AND CHAIN...
Page 5: ...5 INSTALLING REPLACING THE GUIDE BAR AND CHAIN...
Page 10: ...10 and chain oil Reverse chain so that cutters face the right direction...
Page 11: ...11 CVPS41008 CVPS41010 LOCK OFF BUTTON TRIGGER SWITCH 2 75m 9 ft 2 8m 9 ft 2 in...
Page 12: ...12...
Page 13: ......


