background image

7. Once you have determined which placement will provide you with the ability 

to have the microphone heads two to three inches in front of the dampers, you 

are ready to place the PianoMic™ System inside the piano. With the bar fully ex-

tended and the clutch adjusted where there is still a little friction, place the support 

bracket on the edge of the piano case opposite you. Then push on the bar until the 

PianoMic™ is the correct length to allow the support bracket to easily rest on the 

edge of the piano case nearest to you.

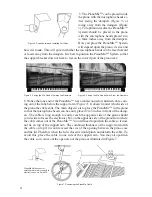
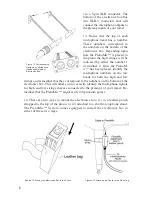
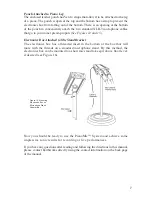
8. With the PianoMic™ in place, you will need to determine if you want the 

microphones to favor the high strings, low strings or neither. The center sec-

tion of the PianoMic™ can slide up to eight inches in either direction in order 

to favor the high or low strings, if desired. This positioning is illustrated in 

Figures 8 and 9.

9. Once you have positioned the PianoMic™ center section, tighten both clutches 

to insure that the PianoMic™ bar stays in place.

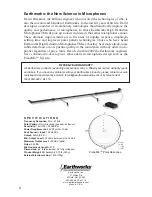
10. With the PianoMic™ in place, you 

can move the flex arms attached to the 

microphone heads several inches to the 

left or to the right to achieve your de-

sired placement (See Figure 10).
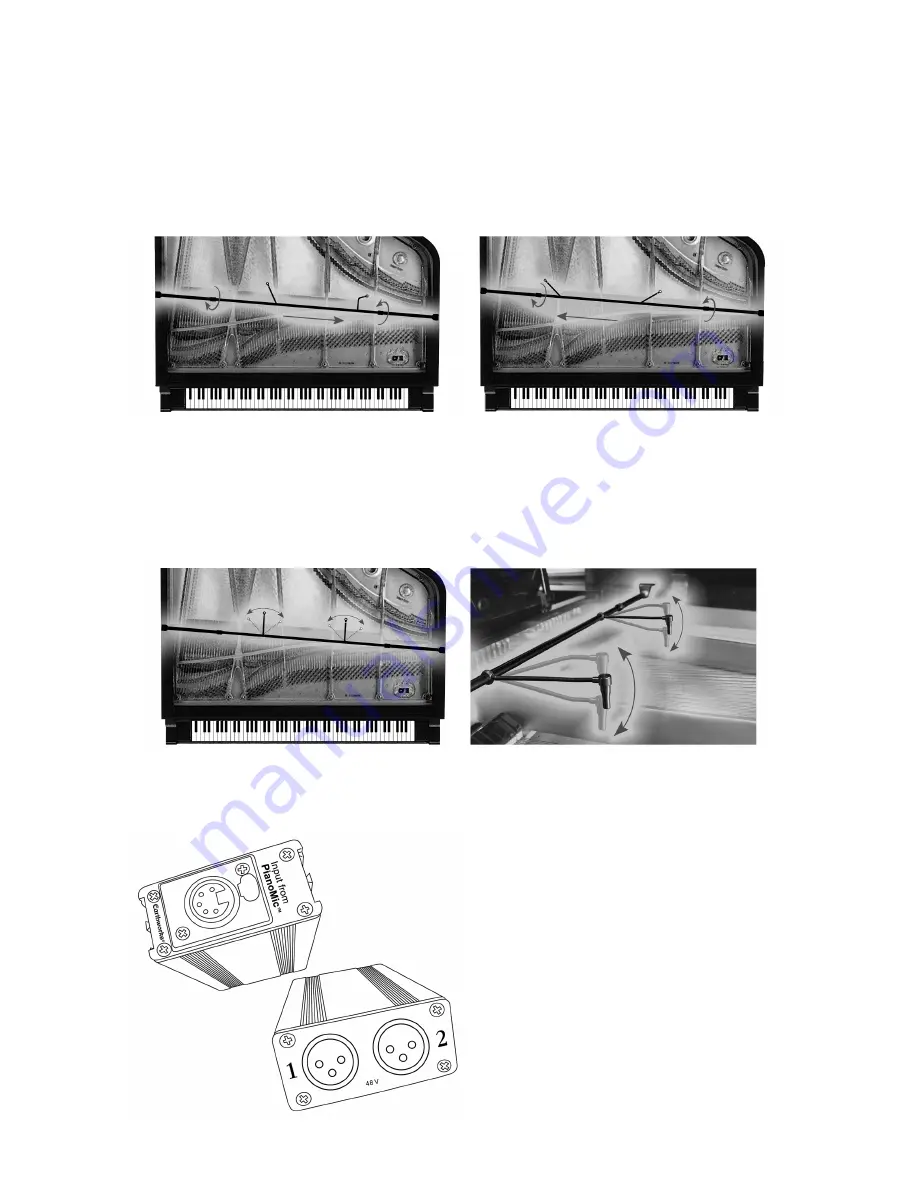
11. The flex arms also allow you to ad-

just the height of the microphone heads 

as shown in Figure 11.
12. With the PianoMic™ placed inside 

the piano and the microphones properly 

positioned you are ready to connect the 

PianoMic™ cable to the electronics box 

Figure 10. Adjustable flex arms for the Microphones

Figure 11. Adjusting the Microphone Height

Figure 12. Top 

and Bottom of 

Electronics Box

Figure 8. Favoring the High Strings

Figure 9. Favoring the Low Strings

5

Summary of Contents for PianoMic PM40

Page 1: ......

Page 2: ......

Page 3: ...ve changed Conventional miking practices suggest that a piano must be miked from outside to achieve a good sound and that a good piano sound cannot be achieved with closely placed microphones inside t...

Page 4: ...a classic example of a diffuse sound field which is defined as a confined area where there are multiple sound sources and multiple reflections arriving at the microphone from every angle at similar le...

Page 5: ...iano keyboard 1 Check that all items are included with your PianoMic System by using the list of Items Enclosed on the first page of this manual 2 Remove the PianoMic telescop ing bar from the case an...

Page 6: ...piano so that the microphone heads can be easily placed 2 to 3 inches in front of the damp ers The cable is long enough to easily reach the opposite side of the piano should you decide to locate the...

Page 7: ...o eight inches in either direction in order to favor the high or low strings if desired This positioning is illustrated in Figures 8 and 9 9 Once you have positioned the PianoMic center section tighte...

Page 8: ...low strings and remember that they correspond to the numbers on the bottom of the electronics box This will allow you to correctly identify the microphone signals for high and low strings that are co...

Page 9: ...Stand Bracket The electronics box has a threaded insert in the bottom of the box that will mate with the threads on a standard microphone stand By this method the electronics box can be mounted to a...

Page 10: ...rthworks engineers have continued to develop new innovations in microphone design such as the PianoMic System FIFTEEN YEAR WARRANTY All Earthworks products excluding accessories carry a fifteen year l...

Page 11: ......

Page 12: ...Made in U S A Earthworks Inc 37 Wilton Rd Milford NH 03055 603 654 6427 ext 14 www earthworksaudio com email sales earthworksaudio com Printed in U S A...

Reviews: