

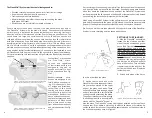
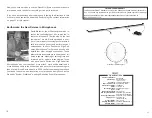

11. With the PianoMic
™
placed in-
side the piano and the microphones
properly positioned you are ready to
connect the PianoMic
™
cable to the
electronics box via a 5-pin XLR con-
nector. The back of the electronics
box has two XLR-3 connectors that
will connect the microphone out-
puts to the preamp inputs of your
mixer
(See Figure 13).
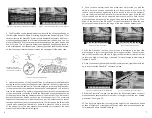
12. Notice in Figure 14 that
the top of each microphone
head has a number. These
numbers correspond to the
numbers on the rear of the
electronics box. Depending
upon how the PianoMic
™
is
placed in the piano the high
strings will be indicated by
either the number 1 or num-
ber 2. Once the PianoMic
™
has been placed, identify the
microphone numbers on the
mic heads for both the high
and low strings and remem-
ber that they correspond to
the numbers on the rear of
the electronics box. This will allow you to correctly identify the microphone
signals for high and low strings that are connected to the preamps of your
mixer. Remember that the PianoMic
™
requires 48-volt phantom power.
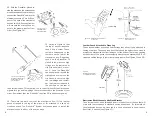
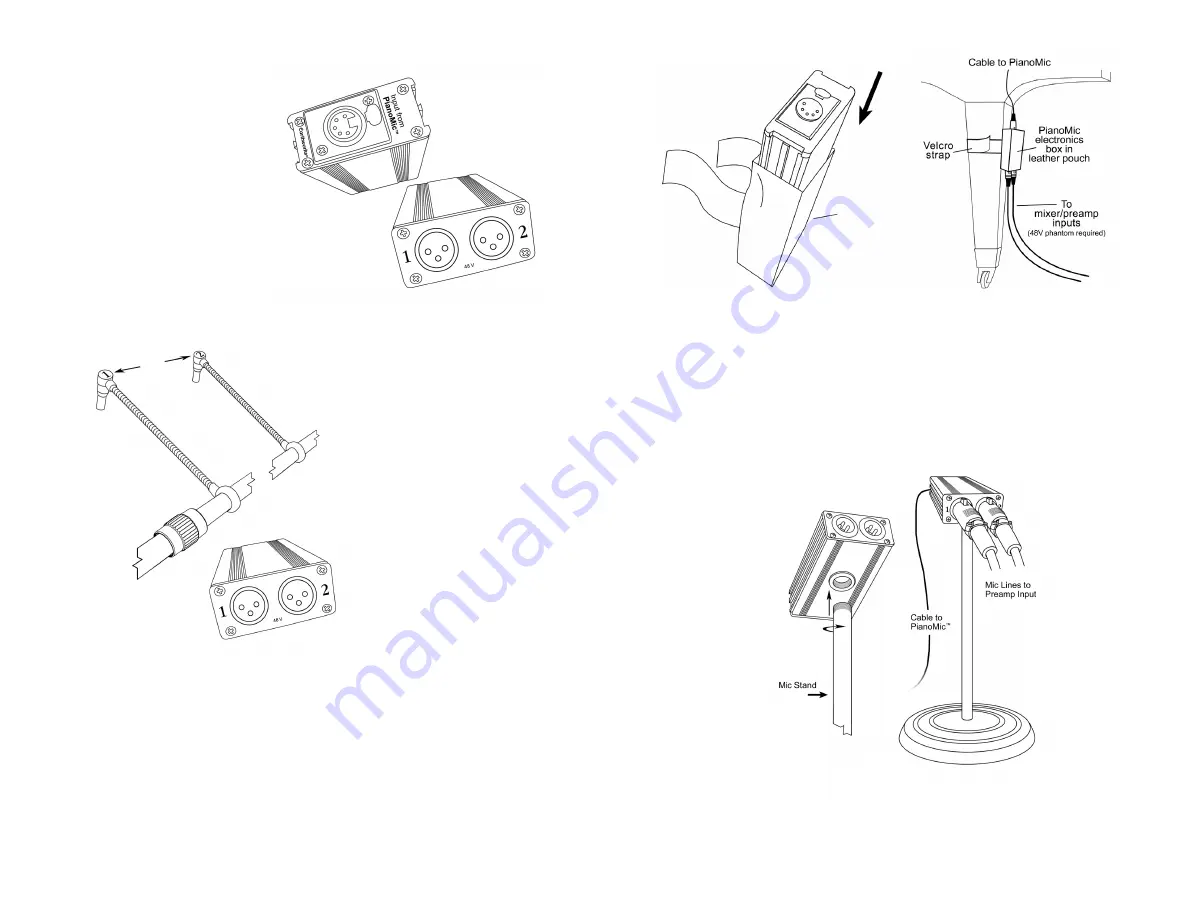
13. There are two ways to mount the electronics box: (1) in a leather
pouch strapped to the leg of the piano, or (2) attached to a short mi-
crophone stand. The PianoMic
™
System comes equipped to install the
electronics box in either of these two ways.
8
Figure 14. Corresponding
Numbers on Microphone
Heads and Outputs of
Electronics Box.
Figure 13. Front
and Rear of the
Electronics Box
Leather Pouch Attached to Piano Leg
The enclosed leather pouch has Velcro straps that allow it to be attached to
the leg of a piano. The pouch is open at the top and the bottom has a strap to
prevent the electronics box from falling out of the bottom. There is an opening
at the bottom of the pouch to conveniently attach the two standard XLR-3 mi-
crophone cables that go to your mixer preamp inputs
(See Figures 15 and 16).
Figure 17.
Mounting Electronics Box
on a Microphone Stand
Electronics Box Attached to Mic Stand Bracket
The electronics box has a threaded insert in the bottom of the box that will
mate with the threads on a standard microphone stand. By this method,
the electronics box can be mounted to a short mic stand to keep it above
floor level, if desired (see Figure 17).
Figures 15. Placing the Electronics Box
in the Pouch.
Figures 16. Attaching the Pouch
to the Piano Leg.
Leather Bag
9
Summary of Contents for PM40T
Page 8: ...Notes 12...


