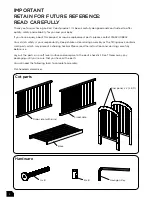

Assembly 5
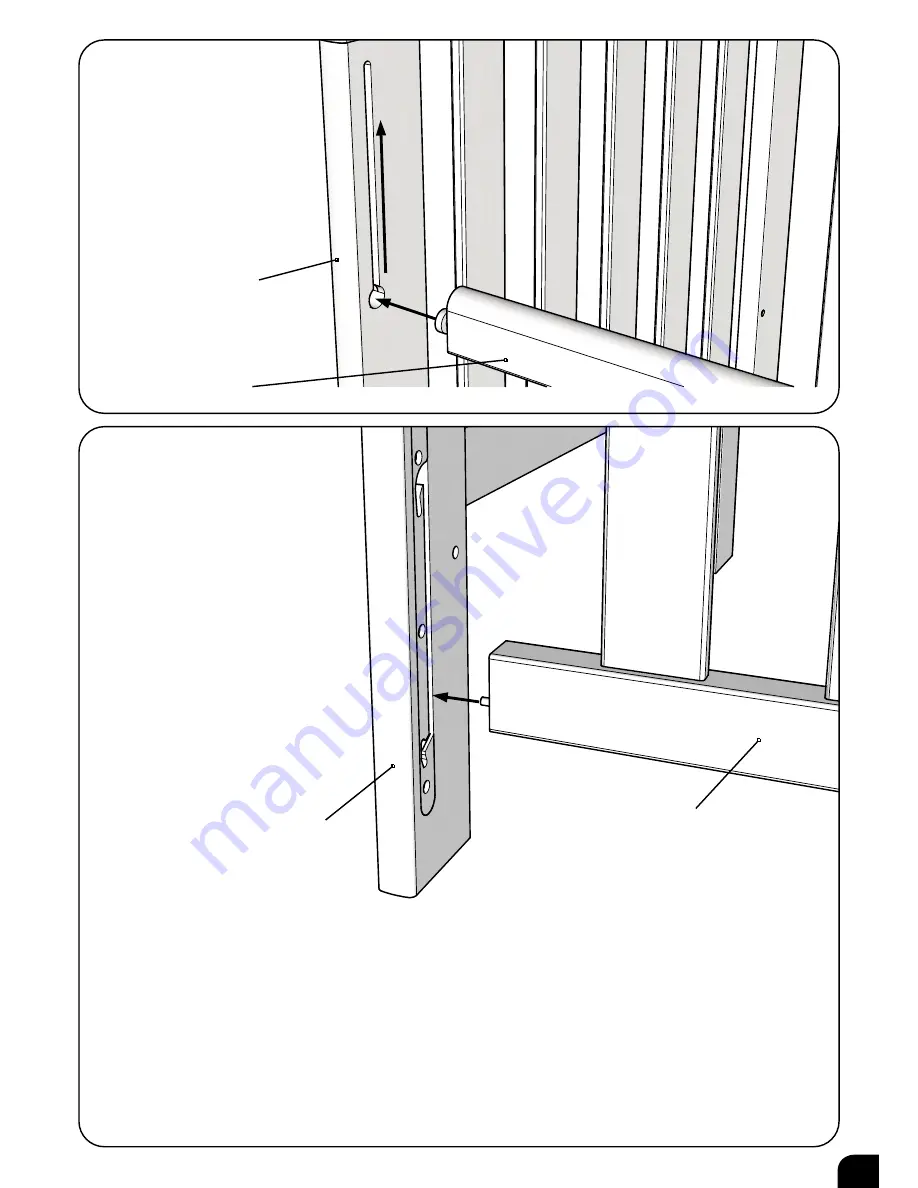
Ease the cot ends apart
and making sure that the
plastic caps remain in
place, fit the top end pins
of the Drop side fully into
the lower end of the top
slot in each End panel, as
shown.
2
To operate the Drop side:
Grasp the top rail in the centre and lift slightly.
Press the bottom of the Drop side in with your leg - this will disengage the locks and allow the side
to drop. To raise the side, lift the Drop side slightly, push the bottom rail inward with your leg then
lift again until the Drop side clicks into place.
IMPORTANT: Always grasp the top rail in the centre to ensure that both locks engage and
disengage.
A light application of furniture polish to the slots in the end panels will help ensure smooth
operation of the Drop side.
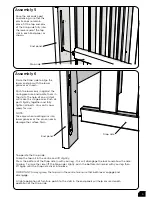
1
Raise the Drop side to align the
lower end pins with the lower
grooves as shown.
Push the lower pins in against the
spring pressure and locate them in
the slots. The help of an assistant
will make this stage easier. Push all
parts tightly together and fully
tighten all bolts. Your cot is now
ready for use.
NOTE:
Take care when locating pins into
lower grooves as the pin can easily
damage the surface finish.
Assembly 6
End panel
Drop side
Drop side
End panel
5