Stegosaurus Dig Kit
Instruction Manual
Warning! Not suitable for children
under 36 months due to small parts.
Choking hazard. Use with care and
only under supervision of adults.
Note: Do not place the material in
mouth. Ask an adult for help with
this project. Always work on a solid,
level working surface and try to keep
the area neat and clean.
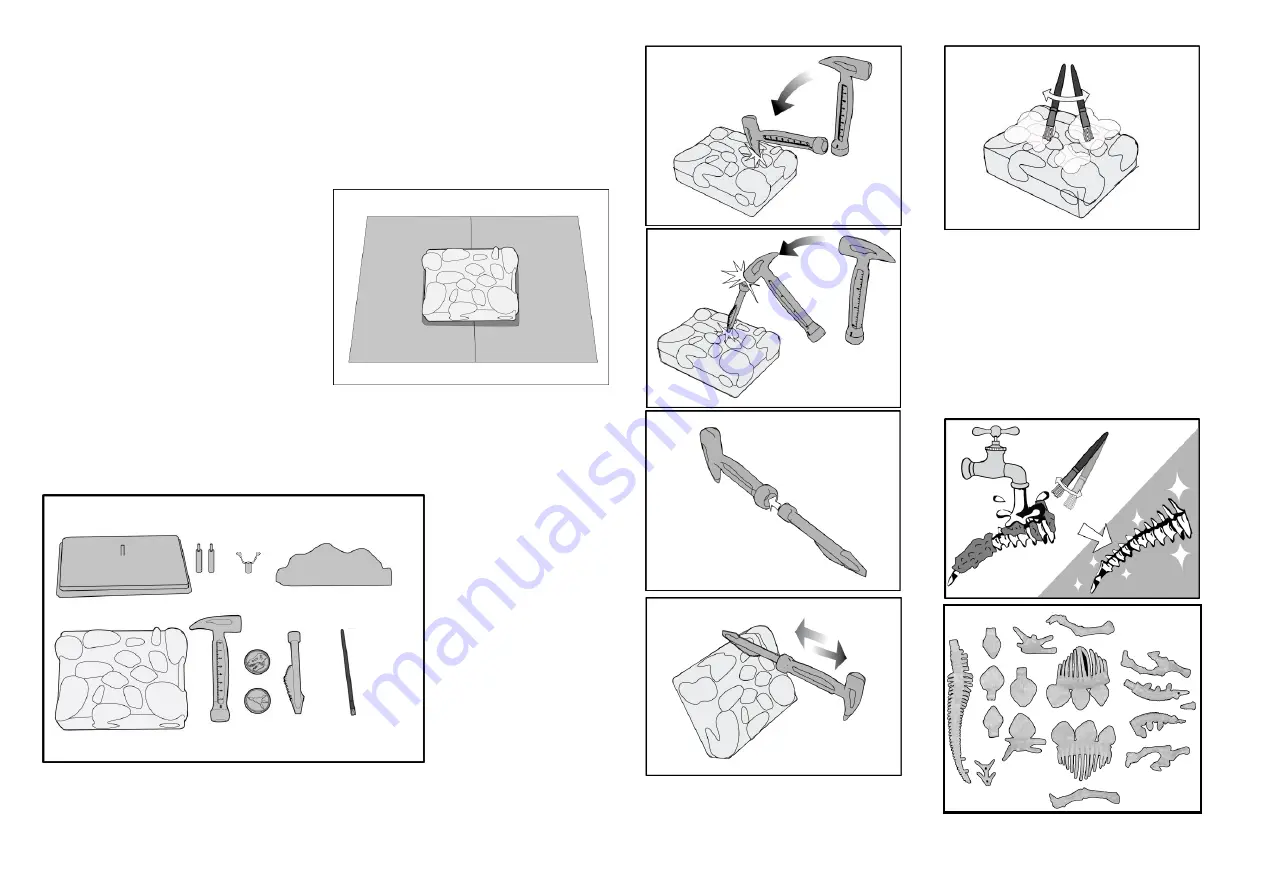
Components
1.
17 Bone Pieces embedded in a plaster block
2.
1 Hammer
3.
1 Chisel
4.
2 Dinosaur stamps
5.
1 Brush
6.
1 Base
7.
1 Supporting Holder
8.
2 Supporting Pins
9.
1 Name Card
Excavating bone pieces
1.
Preparation
Choose an area where it is easy to clean up the
dust and plaster bits afterwards. Work on a level
table top protected with several layers of old
newspaper. Always avoid breathing in the plaster
dust. The plaster may also soil your clothes so it
is best to wear old clothes.
2.
Digging
Put the plaster block and the tools on the
table. Like a real paleontologist, you do not
want to break the bones or fossils. Therefore,
start digging from the top layer carefully at the
center of the block and work your way
towards the edge in each direction.
Use the pointed end of the
hammer to remove larger blocks
of plaster first. When you found a
piece of bone, use the flat side of
the hammer to hit the chisel held
on the other hand to remove the
chunks of plaster around the
bone. Work carefully from all
sides until the piece is easily
separated from the plaster. Do
not pull the bone out by force
when it is still attached to the
plaster. The hammer can be used
as a handle by attaching it to the
chisel/saw component. It helps to
clear the small plaster bits stuck
on the bones. Brush away the
plaster bits with the paintbrush so
that you can see clearly while
digging.
3.
Cleaning
Continue digging until all pieces are
excavated. Check the bones you found
against the skeleton component picture below
to make sure there are no missing parts.
Wash and clean the pieces with water and
paintbrush. Make sure the holes and hollow
part of the bones are free of plaster. Dry the
pieces with paper towel (not included) or let
them air dried on a piece of newspaper. With
all the pieces ready, you should clean up the
work area before assembling the skeleton.
M 36055 Eng
1
2
3
4
5
6
7
8
9


