Device Management
NVR User Manual
85
③
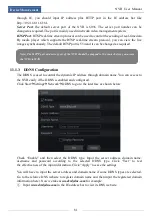
Set the NVR’s IP address, subnet mask and gateway and so on corresponding to the router.
④
Check “Enable” in the interface as shown below and then click “Apply” button.
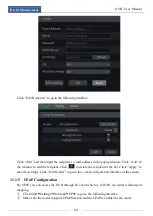
Click “Refresh” button to refresh the UPnP status. If the UPnP status were still “Invalid UPnP”
after refreshing it for many times, the port number would be wrong. Please change the mapping
type to “Manual” and then click
to modify the port until the UPnP status turns to “Valid
UPnP”. Refer to the following picture. You can view the external IP address of the NVR. Input
the external IP address plus port in the IE address bar to access the NVR such as
http://183.17.254.19:81.
11.1.6 NAT Configuration
Click Start
Settings
Network
NAT to go to the interface for NAT configuration. Check
“Enable” and then select the NAT server address (
nat.autonat.com
by default). Click “Apply”
to save the settings.
11.1.7 View Network Status
Click Start
Settings
Network
Network Status to view the network status or click
on
the tool bar at the bottom of the live preview interface to view network status conveniently.
11.2 Basic Configuration
11.2.1 Common Configuration
Click Start
Settings
System
Basic
General Settings to go to the following interface. Set
the device name, device No., language, video format and resolution. Enable or disable wizard,
“Log In Automatically” and “Log Out Automatically” (if checked, you can set the wait time).
Click “Apply” to save the settings.
Summary of Contents for 23SE-S
Page 22: ...Wizard Main Interface NVR User Manual 17...
Page 59: ...Record Disk Management NVR User Manual 54...
Page 108: ...FAQ NVR User Manual 103 Fig 11 1 Fig 11 2...
Page 111: ...450011000729 A4...


