background image

.1,)(3/81*(

&</,1'(5

7+(7$%5$.(

62/(12,'

&+,//(5

'5,//02725

62/(12,'

35(66(5)227

62/(12,'

'5,//

62/(12,'

'5,//

62/(12,'

)8//35(6685((;7(51$/3,/27

5(*8/$7('35(6685(

)8//35(6685(

36,0$;

36,0,1

$,578%(

),/7(5

5(*8/$725

35(66(5)227

'5,// &</,1'(5

'5,// &</,1'(5

9$/9(0$1,)2/'

,62/$7,21

',6.

&+,//(5

'5,//02725

62/(12,'

 3257

237,21

 3257

237,21

7+(7$%5$.(

&</,1'(5

.1,)(3/81*(

&</,1'(5

9$/9(

0$1,)2/'

$,578%(

$,578%(

0

0

36,0$;#6&)0

36,0,1#6&)0

$,578%(

5(*8/$725

*$8*(

*$175<86(5,17(5)$&(

7KHVHGUDZLQJVDQGVSHFLILFDWLRQVDUHWKHSURS

HUW\RI(DVWPDQDQGVKDOOQRWEHUHSURGXFHG

FRSLHGXVHGRUGLVFORVHGWRDQ\WKLUGSDUW\ZLWK

RXWSULRUZULWWHQFRQVHQWRI(DVWPDQ

$

-52*$&.,

62/,':25.6

-:5

1(:5(/($6(

4

%<

'$7(

&+$1*(6

0$7(5,$/

+($775($7

:DVKLQJWRQ6WUHHW%XIIDOR1<

(DVWPDQ0DFKLQH&R

'21276&$/('5$:,1*

'$7(

'5$:1%<

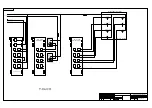
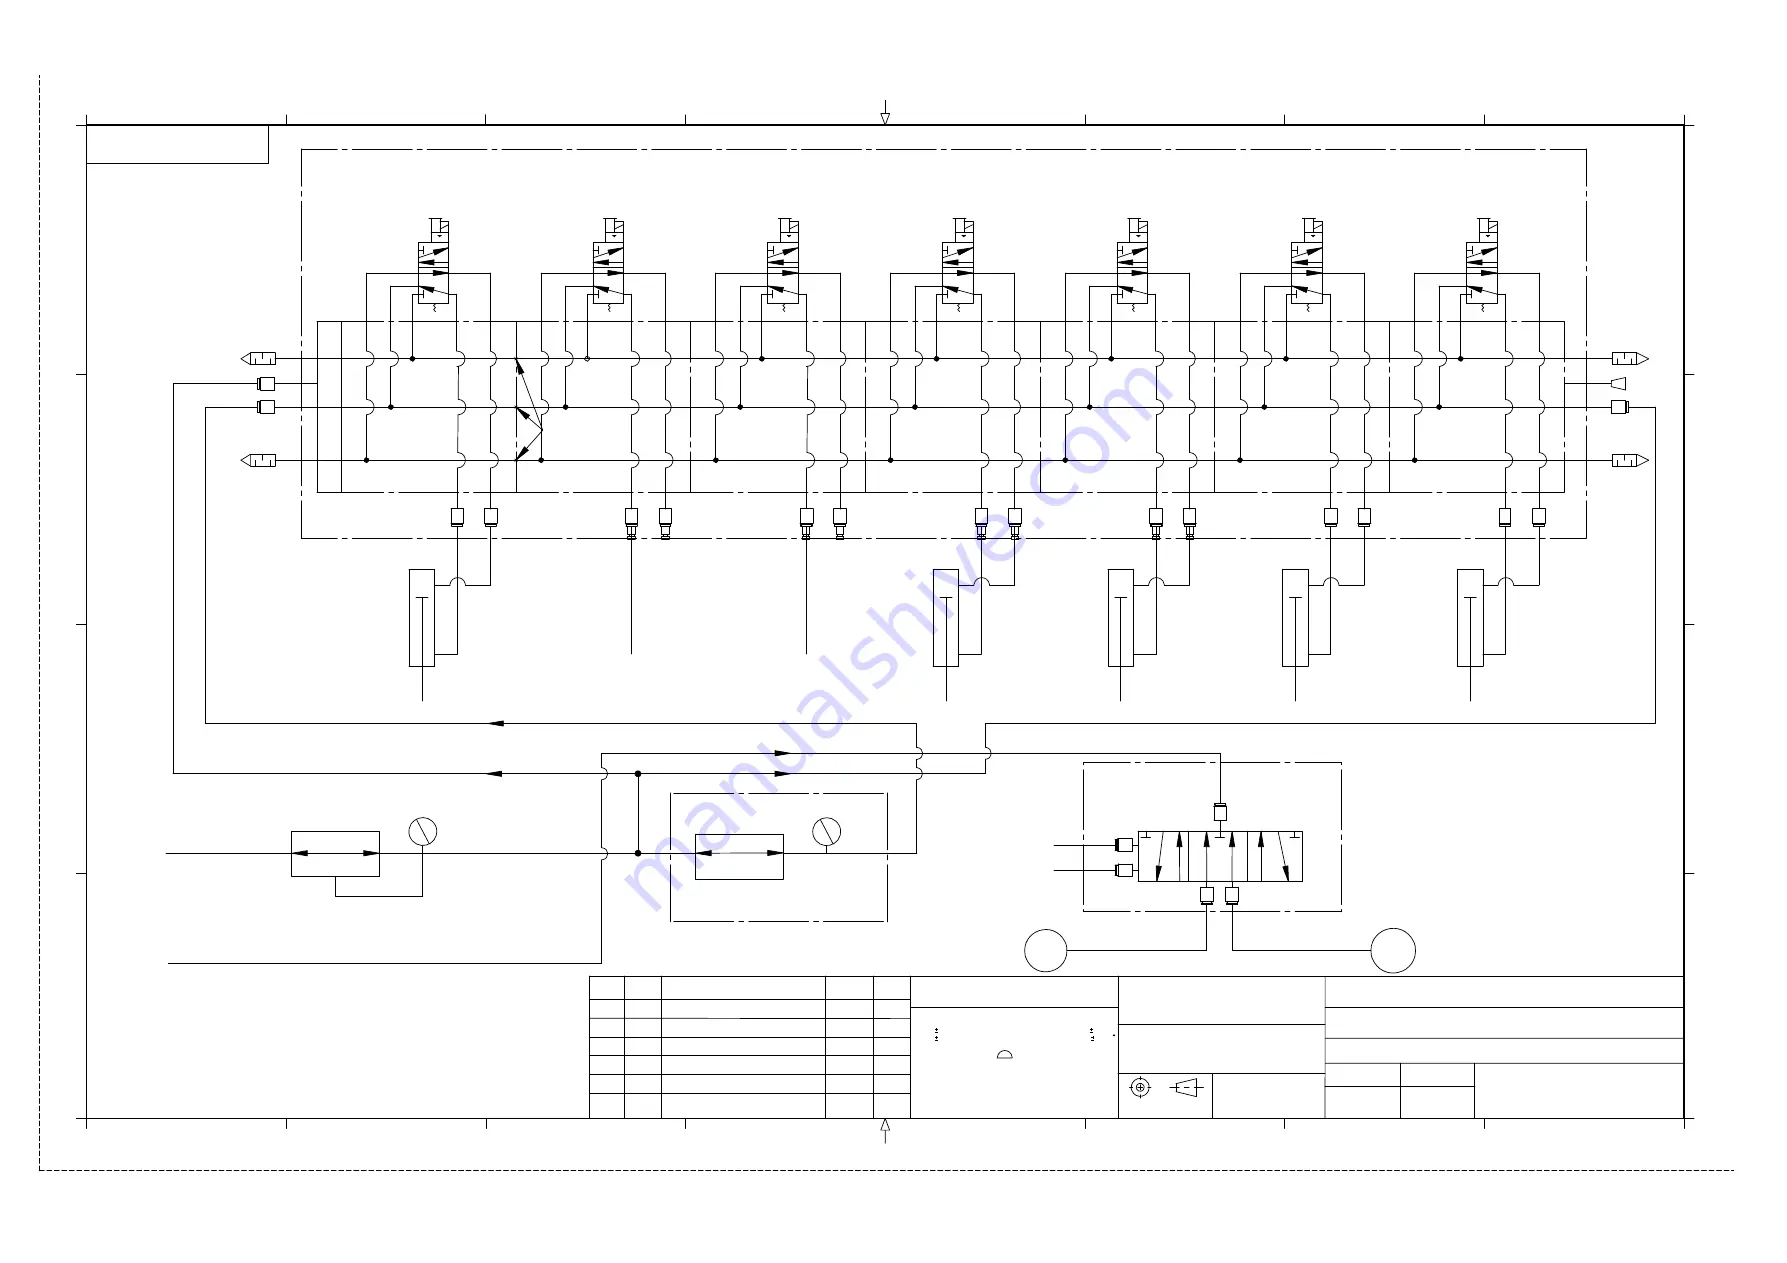
08/7,3/<31(80$7,&',$*5$0

722/+($'31(80$7,&603&

(&1

5(9

&

'

&

'

%

$

%

',0(16,216$5(,1,1&+(6

72/(5$1&(681/(6627+(5:,6(63(&,),('

;; )5$&7,21$/ 

;;; $1*8/$5  

685)$&(),1,6+3(5$16,506

685)$&(352),/(

%5($.6+$53&251(560$;,080

$//:(/'672%(&/($1$1')5((2)63$77(5

$//685)$&(672%()5(($1'&/($52)

6&5$7&+(65867$1'67$,1

,17(535(7',0(16,216$1'72/(5$1&,1*3(5

$60(<0

),1,6+

6,=(

6&$/(

Summary of Contents for MPC 5000

Page 1: ...ormE 551 Technical Support 1 800 872 5595 WARNING This machine is equipped with a very sharp knife Keep hands arms and hair away from the knife area at all times Misuse of this machine or failure to follow all safety instructions on this machine and in the instruction manual may result in serious personal injuries THE EASTMAN Multi Ply Automatic Cutting System Model MPC 5000 Service Manual ...

Page 2: ...oods or parts This warranty should not apply if defects are caused by product misuse or neglect if the machine has been altered or modified by the buyer or if other than genuine Eastman parts are used in the machine THIS WARRANTY IS APPLICABLE TO THIS PURCHASE ONLY SELLER DISCLAIMSALL OTHER WARRANTIES EXPRESSED OR IMPLIED INCLUDING BUT NOT LIMITED TO THE IMPLIED WARRANTIES OF MERCHANTABILITYAND FI...

Page 3: ...r Bearings 28 Replacing the Y axis Top Linear Bearings 31 Replacing the Y axis Front Linear Bearings 34 Replacing of Take off Conveyor Drive Belt 38 Replacing of Take off Conveyor Belt 41 Replacing the XMP Controller Card and Loading Configuration Files 45 Adjustment Procedures and Specifications for parts requiring Service 46 Checking and Adjusting Gantry Backlash 46 Checking and Adjusting Y car ...

Page 4: ...g allen wrench release the two socket head cap screws from the top of the blade link 5 Move the blade link upwards along with the coupler assembly and the knife 6 After the blade link coupler assembly and knife are completely removed from the reciprocating housing holding the coupler loosen the clamping bolt found on the top surface of coupler using allen wrench NOTE The screw will first become sl...

Page 5: ... 551 7 Pull the knife away from the coupler being careful to keep hands away from the sharp knife edge 8 Ensure that the removed knife is placed in a safe area because it contains sharp edges that pose hazards ...

Page 6: ...de assemblies While holding the blade link gradually insert the knife along with the coupler into the recipro cating housing guide tube Ensure that the back edge of knife is facing the lower knife back roller The lower knife guide back roller can be seen by pressing down the spring loaded presser foot assembly The tip of the knife should pass through the rectangular opening in the throat plate fou...

Page 7: ... allen wrench release the two socket head cap screws from the top of the blade link 5 Move the blade link upwards along with the coupler assembly and the knife 6 After the blade link coupler assembly and knife are completely removed from the reciprocating housing remove the rotating tool head assembly as per the instructions below 7 Disconnect all wires connected to intellicut 8 Hold the bottom of...

Page 8: ...rpening wheels 3 Install the new sharpening wheels 4 Return the screws to hold the grinding wheels 5 Return the rotating tool head and ensure when you put back the tool head on the shaft the pin on the tool head should be aligned to the key way on the shaft ref image 6 Raise the tool head after alignment with keyway to upper position until it stops 7 Tighten the screw which holds the rotating tool...

Page 9: ... the cover to the tool head 2 Carefully swing the tool head cover and move it upwards to ensure it is in upper position 3 Using the supplied chuck key turn counter clockwise to loosen the drill chuck 4 After the drill chuck is loosened the drill rod will drop down 5 Manually lift the drill pressure foot upwards until the drill rod is removable ...

Page 10: ...6 Lift the drill pressure foot high enough to install the new drill rod 7 Insert the new drill rod through the drill bushing into the drill chuck 8 Hold the drill rod in one hand and tighten the drill chuck using the chuck key as required ...

Page 11: ...ensure it is in upper position 3 Using the supplied chuck key turn counter clockwise to loosen the drill chuck 4 After the drill chuck is loosened the drill rod will drop down 5 Manually lift the drill pressure foot upwards until the drill rod is removable 6 Using allen wrench loosen the set screw found on the drill pressure foot 7 Using fingers push the drill bush from the bottom of the pressure ...

Page 12: ...e holes align the correct size hole which matches the drill rod 3 Rotate the guide bushing until the drill rod is aligned with the hole of the drill chuck 4 Tighten the set screw on the drill pressure foot and ensure that the drill rod is aligned with the hole in the guide bushing 5 Tighten the drill chuck after the drill rod is aligned and inserted correctly ...

Page 13: ... Filter Removing the Vacuum Filter 1 Using flat head screw driver remove the screws which hold the filter box cover plate 2 Remove the wing nut which holds the filter cover on filter housing 3 Remove the filter cover from mounting stud ...

Page 14: ...cuum cleaner remove all debris found inside the filter chamber 3 Return the cleaned filter cartridge and cover the filter housing 4 Inspect the seal found on the filter box cover for any damage and repair as required 5 Carefully return the filter box cover plate to the machine and secure it using the mounting screws 6 Cover the cutting surface with polythene plastic and start the vacuum pump Check...

Page 15: ...slot Replacing the Bristle Block 1 Install the new bristle block by ensuring that the tab alignment is proper according to the slat arrangement on the aluminum slat refer image 2 Apply pressure on the surface of bristle block so that the mounting tabs snap in the slat found with in the aluminum slat 3 Release the E stop allowing conveyor and gantry movement and advance conveyor and inspect the rem...

Page 16: ...ersons are required one on either side of the machine 2 Lift up the bar which holds the plastic overlay tube and set it on flat surface 3 Pull out the bar from tube and insert into a new roll 4 Replace the bar on tower and thread under the elevation bar as required ...

Page 17: ...ne using proper shut down lock out procedures 2 Remove the 6 screws using hexagonal wrench found on the left and right side of covers from both the operator and non operator side of the gantry 3 Remove the 6 screws using hexagonal wrench found on the control panel from both the operator and non operator side of the gantry and place the control panel upwards ...

Page 18: ...51 4 Remove the 4 screws found on either side of the electronics tray and swing the electronics tray outwards 5 Loosen the 4 screws of the motor and now the motor will drop down to loosen the tension on the belt ...

Page 19: ... FormE 551 6 Cut the 2 zip ties found on the shaft support plate 7 Remove the 6 screws found on the shaft support plate 8 Rotate the shaft support plate to convenient orientation to get access to the belt ...

Page 20: ...sh it outwards so that so that it will help relieve the tension on belt 10 Remove the worn out belt Replacing the X Motor Belts 1 Take a new belt 2 Put it on the big pulley and roll it on the motor pulley a couple of times until it seats itself ...

Page 21: ...to the belt 4 Tighten the 4 screws of the motor to get the tension on the belt 5 Return the 6 screws back on the shaft support plate 6 Return the 2 zip ties found back on the shaft support plate 7 Return the control panel and secure it back with the screws 8 Return the covers of the gantry and secure it back with the screws ...

Page 22: ...the thumb screw found on the front portion of tool head cover which secure the cover to the tool head 3 Carefully swing the tool head cover and move it upwards to ensure it is in upper position 4 Remove the two control I O cables from the I O block Note the Y amp control I O cable plugs into J1 and the theta amp control I O cable plugs into J2 ...

Page 23: ...23 FormE 551 5 Remove the 3 screws on the operator side of the Y car and slowly open the electronics tray and ensure that no wires interfere ...

Page 24: ...24 FormE 551 6 Remove the 2 screws found on the operator side on the Y pulley plate 7 Remove the 2 screws found on the T of the Y pulley plate ...

Page 25: ...25 FormE 551 8 Remove the screws found on the non operator side of Y pulley plate 9 Remove the pulley plate ...

Page 26: ...cing the Y Motor Belt 1 Take a new belt 2 Put it on the big pulley and roll it on the motor pulley a couple of times until it seats itself 3 Pick up the motor and put a screw driver under the motor housing and pick up the screw driver to get tension to the belt 4 Tighten the 4 screws of the motor to get the tension on the belt 5 Return the pulley plate ...

Page 27: ...eturn the 2 screws found on the operator side on the Y pulley plate 9 Return the 3 screws on the operator side of the Y car and slowly close the electronics tray and ensure that no wires interfere 10 Return the two control I O cables from the I O block 11 Secure the tool head top and bottom covers Replacement of Theta Motor Belt On hold for now ...

Page 28: ...ease cutting performance and accuracy NOTE All work should be performed by a qualified technician with power turned off to the machine in accordance with company lock out procedures Removing Linear Bearings 1 Power down the machine using the proper shut down lock out procedures 2 Remove the covers from both the operator and non operator side of the gantry 3 Remove the end stops from all four corne...

Page 29: ...e Repeat this step for all the 4 bearing blocks 6 Unscrew the backlash adjusting screw from the backlash adjusting block until the gantry is resting on the 2 x 4 wooden blocks 7 Remove the 4 screws from the bearing block which hold the bearing Repeat this step for all the 4 bearing blocks ...

Page 30: ...r each of backlash adjusting screws and replace the screws through the side plate and into the bearing blocks Do not fully tighten screws until the backlash is adjusted 5 Begin adjusting the backlash adjusting screws to raise the gantry Use a level to make sure that both blocks on each side plate are adjusted level to each other 6 Adjust the backlash adjusting screws until the X axis spur gear is ...

Page 31: ... gears increase cutting performance and accuracy NOTE All work should be performed by a qualified technician with power turned off to the machine in accordance with company lock out procedures Removing Linear Bearings 1 Power down the machine using the proper shut down lock out procedures 2 Remove the front and rear covers of the tool head found on the Y car of the gantry 3 Remove the 8 screws fou...

Page 32: ...perator side plate and remove them through the access relief cutout Installing New Bearings 1 Remove new bearings from package and press the Zerk grease fitting provided into the bearings Using a grease gun and the grease gun adapter provided with machine fill the bearings with white or clear lithium grease ...

Page 33: ... 3 Be careful not to damage the bearing seals while mounting on the linear rail 4 Slide the bearings under the Y car ad align with the mounting holes and secure back the 8 screws 5 After the replacement of new bearings check for the Y car backlash and adjust as required 6 Please note bearing replacement may effect Y car cutting calibration ...

Page 34: ...ife of spur gears increase cutting performance and accuracy NOTE All work should be performed by a qualified technician with power turned off to the machine in accordance with company lock out procedures Removing Linear Bearings 1 Power down the machine using the proper shut down lock out procedures 2 Remove the top and bottom covers of the tool head found on the Y car of the gantry 3 Identify all...

Page 35: ...e red color buttons and slightly pulling on the air lines 5 Disconnect the theta motor cable and theta feedback cable 6 Remove the 6 screws which secure the tool head to the Y car assembly 7 Disconnect the laser pointer wiring from the back of Y car assembly ...

Page 36: ...ct the positional sensor from the back of Y car assembly 9 Remove the 8 screws which secure the linear bearings to the tool head interface plate 10 Lift the Y car slightly 11 Slide the 2 bearings out towards the operator side ...

Page 37: ... the bearings with white or clear lithium grease 2 Slide the new bearings unto the linear rail and ensure that bearing adjustment screws are accessible from the top of gantry 3 Be careful not to damage the bearing seals while mounting on the linear rail 4 Slide the bearings under the Y car and align with the mounting holes and secure back the 8 screws 5 After the replacement of new bearings check ...

Page 38: ...e Take off Conveyor Drive Belt 1 Power down the machine using the proper lock out tag lock out procedures 2 Remove the 3 allen screws which secure the cover to the assembly on the operator side 3 Carefully remove the cover without disturbing the electronics connection ...

Page 39: ...39 FormE 551 4 Loosen the 4 screws found on the side support 5 Remove the allen screw found on the end cover for additional clearance ...

Page 40: ...belt on to the motor pulley first and then to the drive pulley 2 Slide the motor mount plate to the right to tension the belt until a belt deflection is achieved 3 Install the allen screw which is removed for clearance 4 Tighten the 4 screws found on the side support 5 Return the cover to the assembly 6 Re install the 3 allen screws to the cover ...

Page 41: ...eyor Belt Removing the Take off Conveyor Belt 1 Advance the conveyor belt until the zipper seam is exposed 2 Power down the machine using the proper lock out tag lock out procedures 3 Remove the 7 screws found on the take off transfer plate ...

Page 42: ...he transfer plate exposing the take off conveyor tension roller 5 Remove the 4 screws found on the tension assembly cover plate which is located at the front on the operator side 6 Loosen the 2 screws found on the side frame ...

Page 43: ...the belt 8 Repeat steps 5 through 7 on non operator side 9 Using a pry bar or screw driver pull up the belt exposing the edge where the zipper seam is exposed 10 Using pliers pull the seam wire from the zipper seam When the seam wire is removed the belt will come apart ...

Page 44: ...dge of belt on both the operator side and non operator side 5 Tuck the belt under side frame so that no edge of belt is exposed 6 Tighten the tension jack screw on both the operator side and non operator side of the conveyor frame so that the belt is tight enough to drive and not rub on the blower frame below Note if the belt is tensioned too much conveyor fault s may occur 7 Tighten the 2 screws ...

Page 45: ...ters for each node on the network Controller Card Amp Slice IO etc In the rare case that a Controller Card needs replacement the loading of the proper Configuration Files should be done with the help of Eastman s Technical Service Department If the Multi Ply Machine s Computer is hooked up to the internet Eastman s Technical Service Department has the capability of remotely accessing your machine ...

Page 46: ...erved in the cut piece Checking Gantry Backlash 1 Power up automated cutting machine zero the table move gantry to center of table 2 Stand in front of operator side of gantry alternately push from left to right against rear top corners of cover assembly enabled gantry drive motors will resist movement 3 If there is any free side to side movement their exist a backlash 4 Repeat steps 1 thru 3 for n...

Page 47: ...d then adjust the gantry backlash Adjusting Gantry Backlash 1 Remove all screws from gantry E chain cover allen wrench remove cover Although this step is not required it allows for easier access adjustment 2 Slightly loosen eight 8 screws holding two 2 rail car connectors to gantry side plates using an allen wrench 3 Place a level across top edge of the gantry side plate ...

Page 48: ...heck gantry drive belt backlash Repeat adjustment until free movement in drive is eliminated Do not over tighten backlash else gantry movement will be restricted causing amp faults excessive drive component wear 6 Retighten eight 8 screws holding two 2 rail car connectors to gantry side plates 7 Recheck drive belt backlash again readjust if necessary 8 Replace gantry cover 9 Perform the same proce...

Page 49: ...2 Hold the pulley and move the Y car back and forth in Y direction and observe if there is any audible click or movement 3 If there is any free side to side movement their exist backlash 4 If free movement in drive belt is found then adjust the Y car backlash Adjusting Y car Backlash 1 Loosen motor mount bolts to relieve tension on drive belt ...

Page 50: ... the Y car 3 Tighten the 4 screws of the pulley plates on the non operator side of Y car 4 Pull the pulley plate towards the linear rack and tighten the 4 screws of the pulley plates found on the operator side 5 Ensure that all the 10 screws of the pulley plates are secured ...

Page 51: ...r or pry bar apply pressure to motor belt to displace motor belt Tighten the motor until there is no belt deflection 7 Tighten the motor mounting screws 8 Please note when ever the belt is replaced the backlash adjustment should follow ...

Page 52: ... by a slight touch or vibration 3 If the stop discs are not activated by slight touch or movement are then adjust the stop discs Adjusting Stop Discs 1 Remove the operator side cover which will expose the stop disc mechanism 2 Check the plunger by the pause switch on the stop disc 3 Loosen the nut while holding the set screw with allen key ...

Page 53: ...n increases the force on the detent ball until sufficient tension is applied to the stop disc rod 5 Tighten the nut while holding the set screw in position 6 Return the cover 7 Check the operation of stop disc 8 Do the same check on non operator side ...

Page 54: ...tter is powered up check both the X and Y axes for backlash If the backlash is excessive on either axis adjust as required Check connecting link to verify that it is securely fastened to reciprocating assembly Check blade edges for nicks and replace as required Ensure that the knife is securely fastened to the coupler At the end of each work session make sure the computer is off Clean up debris fr...

Page 55: ...eciprocating drive belt and theta drive belt Excessive deflection will need belt adjustment or replacement as required First Working Day of Month CAUTION Before performing the weekly tasks make sure the Multi Ply cutter and computer are turned off at the electrical disconnect and locked out Remove gantry covers and inspect electrical connections to make sure tight Inspect all 24 VDC power supply c...

Page 56: ...56 FormE 551 Lubrication Chart Below are the lubrication points for the Multi Ply Cutter ...

Page 57: ...k c e h C y l b m e s s A r e v o C k c a B s t n e m m o C f f o n g i S l a n o i t a r e p o e r a s e l d d a P e s u a P y f i r e V b l u b t h g i l g n i r i w h c t i w s p o t S y c n e g r e m E k c e h C b l u b t h g i l g n i r i w h c t i w s e s u a P k c e h C t e k c a r b h c t i w s h c t i w s t i m i l k c e h C y l b m e s s A e l b a C s t n e m m o C f f o n g i S e s o o ...

Page 58: ... i n o r t c e l e e h t t a h t k c e h C s e d i s h t o b n o e t a l p d n e t n o r f o t r o s k c a r c r a e w y n a r o f s e l b a c d n a g n i r i w k c e h C s n o i t c e n n o c e s o o l s i g n i r i w t a h t e r u s n e o t s l a n i m r e t w e r c s l l a k c e h C e r u c e s y l b m e s s a r o t o m 1 X r o f h s a l k c a b t s u j d a k c e h C s w e r c s l l a e r u c e...

Page 59: ...i x a X m o r f y r t n a g o t n i s n o i t c e n n o c e l b a c l l a t c e p s n I n I t e N q n y S a t u O t e N q n y S b T I U c O I y r t n a G d r e w o P y r t n a G e e s o H r i A f d n e t n o r f o t d e n e t s a f y l e r u c e s s i y a r t s c i n o r t c e l e e h t t a h t k c e h C s e d i s h t o b n o e t a l p e s o o l r o s k c a r c r a e w y n a r o f s e l b a c d n ...

Page 60: ...s e l b a c d n a g n i r i w k c e h C s n o i t c e n n o c e r u c e s s i g n i r i w t a h t e r u s n e o t s l a n i m r e t w e r c s l l a k c e h C s a l i a r e s a e r g r o l i o l i a R n o s p m o h T r a e n i l e r u c e S k c e h C d e r i u q e r k c a r r a e g e r u c e S k c e h C s w e r c s l l a e r u c e S k c e h C r o y e v n o C s t n e m m o C f f o n g i S s e l t s ...

Page 61: ...r o t o M Y k c e h C k c o l B d i o n e l o S e n i m a x E d i o n e l o s h c a e e r i f o t r e g g i r t l a u n a m e s U a s k a e l r i a r o f k c e h C b s w e r c s t e s l l a e r u c e S k c e h C y e l l u P e g r a L a y e l l u p e v i r d r o t o M Y b r a e g r u p S c s g n i r a e b r a e n i L n o s p m o h T t c e p s n I h s a l k c a b y l b m e s s a r o t o m Y t s u j ...

Page 62: ... v i r d r o t o M a t e h t e r u c e S a i v y l l a u n a m s r e d n i l y c e r i F n o i t o m r e d n i l y c e n i m a x E k c o l b d i o n e l o s g n i s u o h g n i n e p r a h s e h t t c e p s n I s t r a p e s o o l y n a r o f m e t s y s t u c i l l e t n i e f i n k e h t t c e p s n I g n i r i w r o r o t o m e f i n k r o f t l e b e v i r d e h t t c e p s n I y l b m e s s A...

Page 63: ...t t a h t k c e h C s e d i s h t o b n o e t a l p d n e t n o r f o t d e n e t s a f s k c a r c r a e w y n a r o f s e l b a c d n a g n i r i w k c e h C s n o i t c e n n o c e s o o l r o g n i r i w t a h t e r u s n e o t s l a n i m r e t w e r c s l l a k c e h C e r u c e s s i n o i t a r o l o c s i d r o f s r e m r o f s n a r t k c e h c t c e p s n I e r a g n i r i w r o f l a ...

Page 64: ...a t c e p s n I e r u s n e d n a e c a f r e t n i r o t o m r e w o l b t c e p s n I e r u c e s d n a t h g i t e r a s k c o l b l a n i m r e t e r o f e b s r e w o p l a c i r t c e l e l l a t u o g a t t u o k c o L n i t l u s e r y a m t i e s l e e c n a n e t n i a m g n i m r o f r e p h t a e d r o y r u j n i s u o i r e s r o t o m r e w o l b f o n o i t c e p s n i l a u s i v ...

Page 65: ...65 FormE 551 Additional Comments Maintenance Signature Date ...

Page 66: ...66 FormE 551 Trouble Shooting Guides and Aides UIT Error Messages This has to be developed by software hence it is on hold as of now ...

Page 67: ...s not generate an error message Problem UIT Does Not Power Up Description of Problem The UIT does not power Screen is blank and not lit up Troubleshooting 1 Touch the screen to see if it turns on If the machine sits for a long period of time the touch screen goes i nto a sleep mode to protect the screen 2 Check the power switch on the electronics drawer is in the on position 3 Make sure that eSuit...

Page 68: ... the plunger is too loose tighten it to prevent the pause switch from activating c Do the same check on the non operator side Problem The buttons on the Touch Screen are out of alignment Description of Problem The buttons on the touch screen do not line up with the where the screen needs to be touched to activate the command Operator needs to push above below right or left of the button for the co...

Page 69: ...n Setup screen appears use the left and right arrows to navigate and select to enter a sub menu Toggle to page 2 until you see the calibration screen and select to enter the sub menu Toggle down until Touch Screen is highlighted and select it to activate it 6 Using a very small screw driver paperclip or a fine tip object press the center of the cross that is located at the top left corner of the s...

Page 70: ...e procedure for the bottom right cross 8 Navigate to page 3 and toggle down to Save and Exit and select it 9 Your Touch Screen will restart in normal mode It is ok to run the machineafter all proper startup procedures are followed ...

Page 71: ...ol power on gantry is turned on This can be verified by making sure the laser pointer is on 2 Check the mapping of your tools and the layers are mapped properly under each tool a The quick way to verify tool and layer mapping is to look at the tool bar at the bottom of the eCut window If there is no Tool Bar then click on View then click on Layers and Tools in the main eSuite menu 3 With eSuite cl...

Page 72: ...a different air valve If the other air valves are working properly the bad air valve should be replaced Problem Gantry goes past limit and hits End Stops Description of Problem While cutting certain files the conveyor begins to pull and gantry runs to end of table and hits end stops Troubleshooting 1 Check the table limits to make sure that each tool can reach to the laser position without hitting...

Page 73: ...mmen dations Install an earth ground as close as possible to the transformer feedingAC power to the cutting machine and power feed unit Enclose all AC power cables in rigid conduit and ground securely to the earth ground Route the four power cables for the computer controls around the end of the cutter instead of under the unit and Implementation of the foregoing should at least reduce the level o...

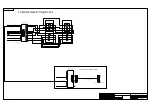
Page 74: ...C1 13 A1 24 VDC RETURN TABLE 4 F3 13 A6 24VDC Common 2 A1 230 VAC Return 13 A1 Takeoff Table 115 VAC Return Computer Power Monitor Power H N G UIT Power H N G T1 T2 GND GND GND Signal HPI 35 3 5 kVA 230 VAC 15 2 Amp 31 26500 115V 100V 0V 115V 0V 230V 0V 115V 0V To Conveyor Amplifier Fuse Blocks To All Amp Node Disables Motor Power Enable 230 VAC Power For Gantry Main Disconnect Main Circuit Breake...

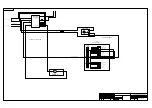
Page 75: ... 0 1 2 3 4 5 6 7 TSIO 2008 DIGITAL INPUT CH1 CH0 CH3 CH2 CH5 CH4 CH7 CH6 0 1 2 3 4 5 6 7 TSIO 5001 RELAY OUTPUT CH1 CH0 CH1 CH0 L1 L1 L2 L2 T1 T2 T3 T4 GND T1 T2 T3 T4 T5 T6 GND T5 T6 0 1 2 3 4 5 6 7 TSIO 7002 ANALOG OUTPUT CH 2 CH 1 CH 2 CH 1 SHLD SHLD GND Line Filter 31 26501 Line Load 230VAC L1 GND L2 L1 GND L2 Fuse 15A FNQ R Mistubishi F700 VFD STF AU SD 4 5 From Transformer HPI 35 Gantry Moto...

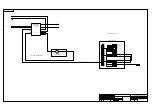
Page 76: ... 3 13 2 C1 3 A3 4 B1 5 C1 13 A1 13 A6 X 1 B1 3 A3 X 0 1 2 3 4 5 6 7 TSIO 6006 ANALOG INPUT CH 1 CH 0 COM COM SHLD SHLD CH 2 CH 3 1 2 3 4 HI LO Pressure Transmitter Zero Span Supply 10 35 VDC Output 4 20 mA 1 2 3 4 RANGE 0 20 IN W C 1 2 3 4 HI LO Pressure Transmitter Zero Span Supply 10 35 VDC Output 4 20 mA 1 2 3 4 RANGE 0 100 IN W C White Blue Blue Black Red Red Black Black White White Black Yell...

Page 77: ...ETURN TABLE 2 E3 Pause 2 D3 Next 2 E3 Belt Jog 1 B1 3 A3 X E STOP PAUSE NEXT JOG BOX 1 4 3 2 1 4 4 4 3 3 3 E STOP PAUSE NEXT JOG BOX 2 4 3 2 1 4 4 4 3 3 3 15 8 9 1 9 15 1 8 9 15 1 8 DB15 Screw Terminal Interface Block DB15 1 2 3 4 5 6 7 8 9 10 11 12 13 14 15 SHLD DB15 Screw Terminal Interface Block DB15 1 2 3 4 5 6 7 8 9 10 11 12 13 14 15 SHLD White Green Red Violet Black Blue Yellow Orange 9 15 1...

Page 78: ...D Positive Limit Negative Limit Node Disable Home Opto_In_Com 5 VDC Common Node Disable Home Opto_In_Com Home Node Disable Opto_In_Com Shield Shield J1 J2 J3 Plug 1 Pin1 Plug 1 Pin 2 Plug 1 Pin 3 Plug 1 Pin 4 Plug 1 Pin 5 Plug 1 Pin 6 Plug 1 Pin 7 Plug 2 Pin 3 Plug 2 Pin 4 Plug 2 Pin 5 Plug 3 Pin 3 Plug 3 Pin 4 Plug 3 Pin 5 All 3 Plug HSG s All 3 Plug HSG s Custom I O Block 1 2 3 4 5 6 7 8 9 10 11...

Page 79: ...sable Home Opto_In_Com 5 VDC Common Node Disable Home Opto_In_Com Home Node Disable Opto_In_Com Shield Shield J1 J2 J3 Plug 1 Pin1 Plug 1 Pin 2 Plug 1 Pin 3 Plug 1 Pin 4 Plug 1 Pin 5 Plug 1 Pin 6 Plug 1 Pin 7 Plug 2 Pin 3 Plug 2 Pin 4 Plug 2 Pin 5 Plug 3 Pin 3 Plug 3 Pin 4 Plug 3 Pin 5 All 3 Plug HSG s All 3 Plug HSG s Custom I O Block 1 2 3 4 5 6 7 8 9 10 11 12 13 14 15 Feedback Pwr Mtr M X1 Moto...

Page 80: ...pto_In_Com 5 VDC Common Node Disable Home Opto_In_Com Home Node Disable Opto_In_Com Shield Shield J1 J2 J3 Plug 1 Pin1 Plug 1 Pin 2 Plug 1 Pin 3 Plug 1 Pin 4 Plug 1 Pin 5 Plug 1 Pin 6 Plug 1 Pin 7 Plug 2 Pin 3 Plug 2 Pin 4 Plug 2 Pin 5 Plug 3 Pin 3 Plug 3 Pin 4 Plug 3 Pin 5 All 3 Plug HSG s All 3 Plug HSG s Custom I O Block 1 2 3 4 5 6 7 8 9 10 11 12 13 14 15 Feedback Pwr Mtr M X2 Motor IP20 IP20 ...

Page 81: ...n 6 Plug 1 Pin 7 Plug 2 Pin 3 Plug 2 Pin 4 Plug 2 Pin 5 Plug 3 Pin 3 Plug 3 Pin 4 Plug 3 Pin 5 All 3 Plug HSG s All 3 Plug HSG s Custom I O Block 1 2 3 4 5 6 7 8 9 10 11 12 13 14 15 Feedback Pwr Mtr M Y Motor IP20 IP20 Glentek Power Supply AC In 1 AC In 2 AC In 3 Chassis GND Fan Pwr In Fan Pwr In B 1 B 1 B 2 B 2 B 3 B 3 B 4 B 4 GP8600 50 2 Fan Pwr Out Fan Pwr Out 1 2 B B Motor T Motor S Motor R 24...

Page 82: ...e Opto_In_Com Home Node Disable Opto_In_Com Shield Shield J1 J2 J3 Plug 1 Pin1 Plug 1 Pin 2 Plug 1 Pin 3 Plug 1 Pin 4 Plug 1 Pin 5 Plug 1 Pin 6 Plug 1 Pin 7 Plug 2 Pin 3 Plug 2 Pin 4 Plug 2 Pin 5 Plug 3 Pin 3 Plug 3 Pin 4 Plug 3 Pin 5 All 3 Plug HSG s All 3 Plug HSG s Custom I O Block 1 2 3 4 5 6 7 8 9 10 11 12 13 14 15 Feedback Pwr Mtr M Theta Motor IP20 IP20 1 2 B B Motor T Motor S Motor R 24 Re...

Page 83: ...pto_In_Com Home Node Disable Opto_In_Com Shield Shield J1 J2 J3 Plug 1 Pin1 Plug 1 Pin 2 Plug 1 Pin 3 Plug 1 Pin 4 Plug 1 Pin 5 Plug 1 Pin 6 Plug 1 Pin 7 Plug 2 Pin 3 Plug 2 Pin 4 Plug 2 Pin 5 Plug 3 Pin 3 Plug 3 Pin 4 Plug 3 Pin 5 All 3 Plug HSG s All 3 Plug HSG s Custom I O Block 1 2 3 4 5 6 7 8 9 10 11 12 13 14 15 Feedback Pwr Mtr M Knife Motor IP20 IP20 1 2 B B Motor T Motor S Motor R 24 Retur...

Page 84: ...1 2 3 4 5 6 7 TSIO 4005 DIGITAL OUTPUT CH1 CH0 CH3 CH2 CH5 CH4 CH7 CH6 10 B3 SynqNet From Knife Amp T31 T32 SINKING NPN SWITCH BLACK BLUE BROWN SINKING NPN SWITCH BLACK BLUE BROWN Knife Down Knife Cylinder Presser Foot Cylinder Sharpener Brake Cylinder Y Car I O Air Cylinder Solenoids Blue White Blue Yellow Green White Blue Blue White Blue Blue White Blue Yellow Yellow Yellow Blue Knife Cylinder P...

Page 85: ...cket Connector 38 9 15 1 8 15 15 DB15 Socket Connector 39 DB15 Screw Terminal Interface Block DB15 1 2 3 4 5 6 7 8 9 10 11 12 13 14 15 SHLD Pause PB 1 2 Pause PB 1 2 T4 T3 T3 T16 T6 T7 T15 T8 T7 T20 T20 Computer SynqNet Controller Card Ethernet Ports SynqNet In SynqNet Out Touchscreen Network POWER OVER ETHERNET INJECTOR DATA POWER DATA Operator Side Pause Circuit Non OP Side Pause Circuit Joystic...

Page 86: ...e Disable Home Opto_In_Com 5 VDC Common Node Disable Home Opto_In_Com Home Node Disable Opto_In_Com Shield Shield J1 J2 J3 Plug 1 Pin1 Plug 1 Pin 2 Plug 1 Pin 3 Plug 1 Pin 4 Plug 1 Pin 5 Plug 1 Pin 6 Plug 1 Pin 7 Plug 2 Pin 3 Plug 2 Pin 4 Plug 2 Pin 5 Plug 3 Pin 3 Plug 3 Pin 4 Plug 3 Pin 5 All 3 Plug HSG s All 3 Plug HSG s Custom I O Block 1 2 3 4 5 6 7 8 9 10 11 12 13 14 15 Feedback Pwr Mtr M Mot...

Page 87: ... 5 7KHVH GUDZLQJV DQG VSHFLILFDWLRQV DUH WKH SURS HUW RI DVWPDQ DQG VKDOO QRW EH UHSURGXFHG FRSLHG XVHG RU GLVFORVHG WR DQ WKLUG SDUW ZLWK RXW SULRU ZULWWHQ FRQVHQW RI DVWPDQ 52 62 25 6 5 1 5 6 4 7 1 6 0 7 5 7 75 7 DVKLQJWRQ 6WUHHW XIIDOR 1 DVWPDQ 0DFKLQH R 2 127 6 5 1 7 5 1 08 7 3 31 80 7 5 0 722 31 80 7 6 03 1 5 9 0 16 216 5 1 1 6 72 5 1 6 81 66 27 5 6 63 5 7 21 1 8 5 685 1 6 3 5 16 506 685 352 ...

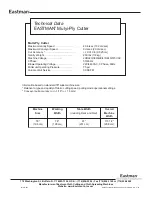
Page 88: ...10 in 0 025 cm Gantry Weight 260 lbs 118 kg Machine Voltage 208 220 380 400 415 440 575 VAC 3 Phase 50 60 Hz Blower Operating Voltage 220 440 VAC 3 Phase 60Hz Minimum Operating Pressure 75 psi Volume ofAir Service 30 SCFM e n i h c a M e z i S g n i k r o W h t d i W h t d i W e l b a T l i a R d n a k c a R g n i d u l c n i l l a r e v O e n i h c a M h t d i W 8 7 m c 8 9 1 8 7 m c 8 9 1 1 9 m ...

Reviews: