4
Eastwood Technical Assistance: 800.544.5118 >> techelp@eastwood.com
To order parts and supplies: 800.345.1178 >> eastwood.com
5
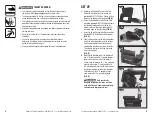
SET UP
1.
Beginning with the bare Frame, install the
Base onto the side of the Frame using the
provided M12X 1.75 X 80 Bolt. Ensure that the
Base has the degree scale facing up
(FIG. A)
.
2.
Attach the Bearing Block to the Swivel Plate
using two provided M10X1.5X20 Bolts. Ensure
that the bolts heads are flush or below the
bottom surface of the swivel plate so that it
will rotate freely on the slider base
(FIG. B)
3.
Install the Swivel Plate onto the Base using the
Provided M12X1.75X60 Bolt and Flat washer.
(FIG. C)
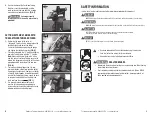
4.
Slide the tube clamp into the tube clamp slider.
Install the tube clamp slider onto the notcher
from the bearing block side. Install the last
stop bolt into the side of the frame. Install the
T-handle into the rear of the Tube clamp and
install retaining bolt.
(FIG. D)
5.
Note that the threaded end of the Arbor Shaft
has ½" threads and a 5/8" threaded adapter
loosely attached. This is to accommodate
smaller sized hole saws with ½" Dia. mounting
holes or larger (up to 3") hole saws with 5/8"
Dia. mounting holes. For smaller hole saw use,
the adapter must be removed from the Arbor
Shaft however if the 5/8" adapter is to be
used, be sure that it is securely tightened.
(FIG. E)
Only specifically
designed threaded metal saws are to be
used with this unit. Severe personal injury
can occur with improper saw use!
FIG
. B
FIG
. C
FIG
. D
FIG
. E
FIG. A
INJURY HAZARDS!
• This tool emits sharp shards when cutting that can cause eye injury.
Always wear ANSI-approved goggles when using this tool.
• The hole saws used with this tool can cause serious cut wounds. Keep
hands and body away from cutting area and blade when cutting.
• The cut edges of tubing are sharp and can cause severe cuts to hands and
body. Wear heavy duty work gloves and keep cut tubing edges away from
body to prevent injury.
• Unplug drill before adjusting or changing saw blades to prevent accidental
starting and injury.
• Do not force the tool to cut. If tool does not cut acceptably install a
new blade.
• Secure the tubing notcher in a bench vise or bolt to workbench
before use. Do not hold the tool or tubing against your body or in your
hands as this could lead to injury.
• Use only hole saws specifically designed for use on threaded arbors.


