6
Eastwood Technical Assistance: 800.343.9353 >> techelp@eastwood.com
To order parts and supplies: 800.343.9353 >> eastwood.com
7
ADDITIONAL SAFETY INFORMATION
HEALTH AND INJURY HAZARDS!
• This Saw can quickly and violently kick back or twist while operating causing
severe hand and or wrist injury. Do not apply excessive force to Saw while
in use. Always make sure the workpiece or material being cut is securely
clamped or anchored to allow two handed operation of the Saw.
• Damaged blades can break at high speed causing personal injury or property
damage. If excessive vibration is felt, discontinue use immediately and
disconnect tool from electrical supply. Inspect blade and Saw for damage.
Do not resume use until resolution is found.
• This Saw will eject a trail of sparks at high speed which can ignite flammable
materials or injure others nearby. Do not operate in the vicinity of flammable
materials and keep all persons and pets away from the work area.
BLADE INSTALLATION
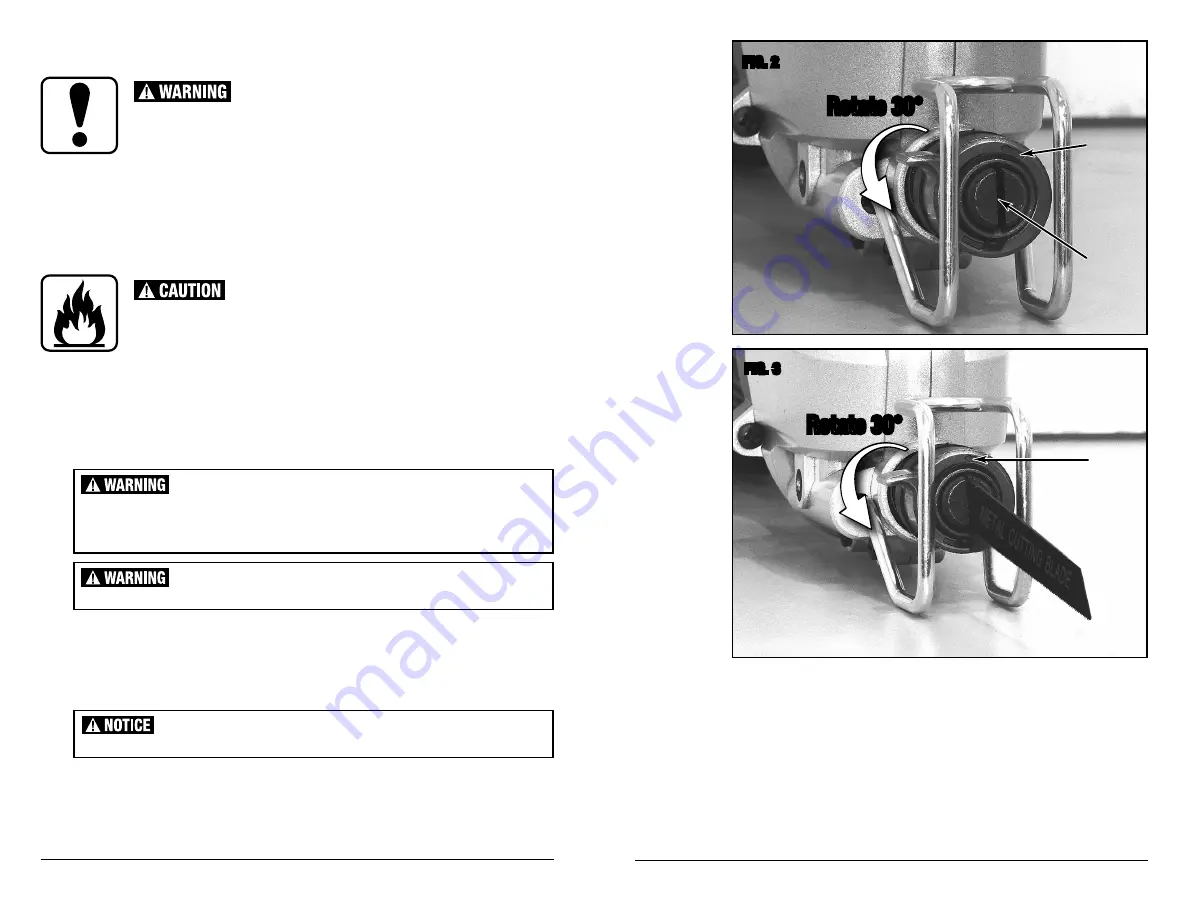
• Rotate the Spring-Loaded Blade Retainer 30° Counter Clockwise (as viewed from the front end
of the Saw) and hold it in that position
(FIG 2)
.
• Place the keyed end of the Blade into the slot on the end of the Saw Shaft
(FIG 3)
until it fully
is seated.
• Release the Spring-Loaded Blade Retainer.
FIG. 2
This Saw can quickly start up when handling while plugged in to electrical
supply causing serious personal injury. Always unplug the Saw from the
electrical supply before changing blades or performing maintenance.
Sharp blade edges can cut. Always wear protective work gloves while handling.
The Blade can be inserted with teeth up or teeth down as the need demands.
FIG. 3
Blade
Lock
✓
Blade
Slot
✓
Rotate 30°
Rotate 30°
Blade
Lock
✓
BLADE REMOVAL
• Rotate the Spring-Loaded Blade Retainer 30° Clockwise (As viewed from the front end of the
Saw) and hold it in that position
(FIG 3)
.
• Pull out Blade.
• Release the Spring-Loaded Blade Retainer.


