To order parts and supplies: 800.343.9353 >> eastwood.com
13
BUFFING OBJECTS
As with many skills, Buffing requires a learning curve to become proficient; however once learned,
will prove to be highly satisfying.
To get started, learn how to Buff as well as what not to do; a great source of guidance is item #13304,
Eastwood Art of Buffing
Instructional DVD.
It is highly recommended to practice buffing on some old objects of low value and experiment with
different metals Compounds and Buff Wheels. Generally, expect to spend some time and waste some
product before taking on something of value.
• Before turning on the Motor, take a few moments and plan the work to be done. Take notice of
all sharp edges, corners or protruding features that could snag the wheel. Be sure to plan on
buffing those areas with the wheel rotating away.
• Begin in one area, let the compound
work and move the object across the
piece across the wheel horizontally.
Never stop and hold the object against
wheel. Use very light pressure and
move down 1/4" after each pass until
finished
(FIG 12)
.
• On larger objects, divide the surface area into 1” x 2” areas and move from area to area.
APPLYING COMPOUND
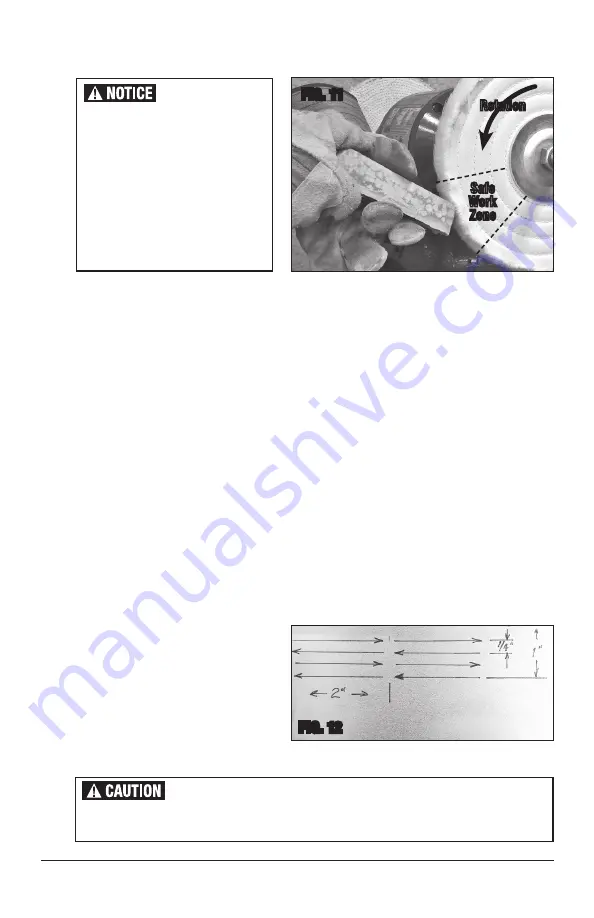
• Remove the Compound Bar from the package and holding it firmly, gently apply Compound
to the “Work Zone” area of the rotating wheel
(FIG 11)
. Apply sparingly, one or two seconds
against the wheel every few minutes is enough. More is not better, and it is best to apply a
small amount more frequently than too much at once.
FIG. 11
FIG. 12
Safe
Work
Zone
Rotation
The compound will appear to
be hard and dried out which is
quite normal. The compound is
formulated of specifically graded
abrasive in a hard-wax binder.
The heat generated by contact-
ing the rotating buff wheel melts
the binder and spreads the
abrasive on the wheel.
Never lose focus in keeping the edge of the object in the direction of wheel rotation
and in the “Work Zone” of the Wheel (Fig 13).


