


Caution:
Before plugging in the unit, make sure that all the cords are uncoiled
and free to move (do not depress the activation switch).
Hold the gun at various positions and angles to get the best application of
powder over the entire part.
• Plug the power supply into a grounded outlet.
• Maintain approximately 4 inches between the gun tip and part being coated.
• Depress the activation switch while triggering the gun. Depressing the
activation switch energizes the gun, charging the powder. Releasing the
switch turns the power off. Once the activation switch has been released,
a slight charge will remain in the gun until the emitter is touched to the
ground clip. Be sure to touch the emitter to the ground clamp before
touching the emitter.
• Move the gun in slightly different angles and in a circular motion to ensure
that all areas of the part are covered (as shown above). Be sure to coat
deeper crevices and inside corners first to prevent uneven coating. The
coated surface will have a dull opaque coating of powder. Make sure all
areas of the part are coated evenly. Bare metal should no longer be seen.
• Powder is difficult to apply in deep recessed areas or into corners. Try
repositioning the part to allow gravity to help assure coverage in corners
and reposition the gun. Practice on some scrap pieces of metal to obtain
a uniform coating.
• If you accidentally knock some powder off the part, it is usually best to blow
all the powder off and start over. This is particularly important for the
translucent colors which easily show blemishes.
• Inspect part with a high intensity light to make sure you didn’t miss any
areas. Touch up as necessary.
A
PPLICATION
OF
P
OWDER
To order parts and supplies, call 1-800-345-1178 or www.eastwood.com
11
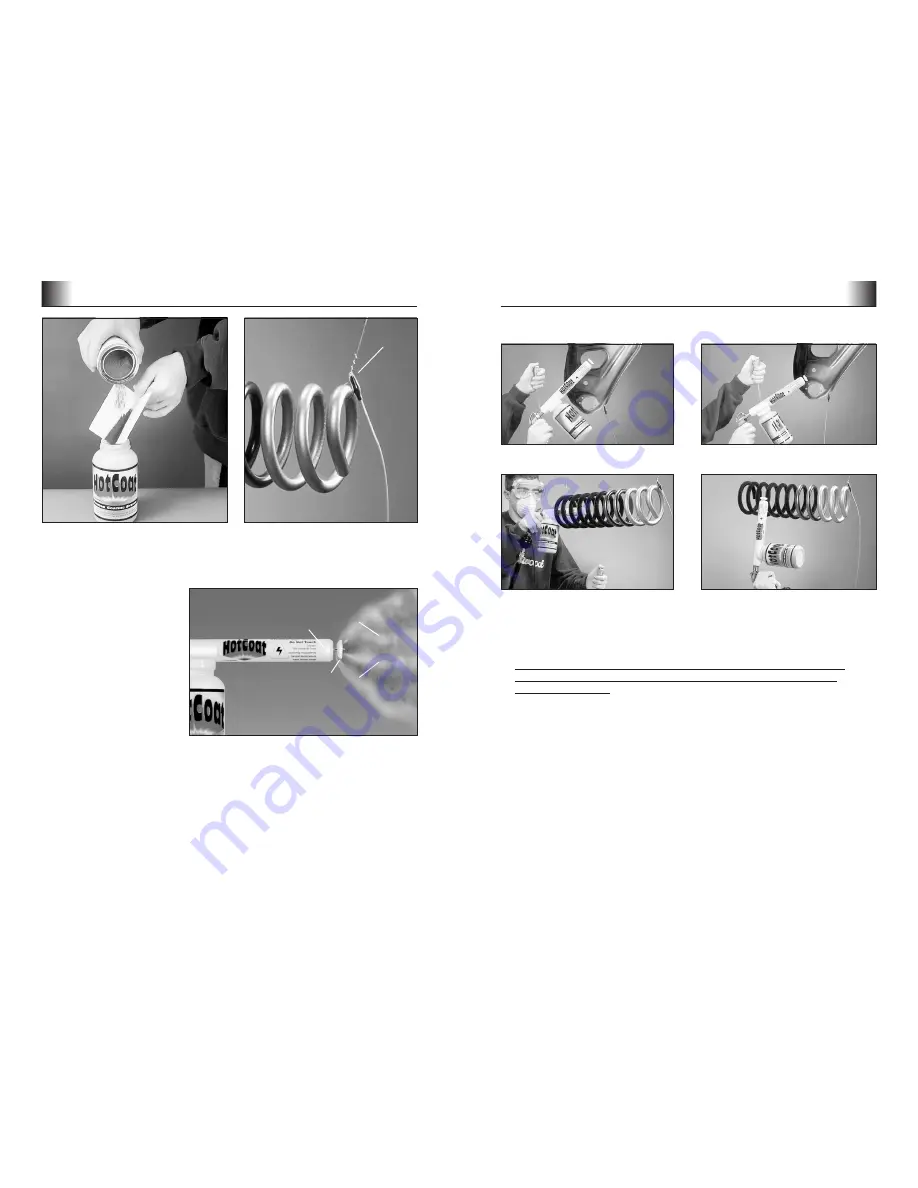
Checking the
Gun Spray Pattern
Note:
Before using the gun
make sure the 3 static tubes
are in place and deflector
installed. Pull the gun trigger
to check the pattern. Unlike
regular paint guns, the
HotCoat™ gun creates
a fog of charged particles.
Use a
clean
sheet of
glossy
paper or
spoon to
fill cup
Attach ground
clamp to part
Connecting the Ground Clip
Connect the ground clip to the part you are powder coating. Grounding the part
provides a path for static charges to dissipate and attracts the powder.
Touch
gun emitter to ground clip after each time activation switch is released!
Insert the 3
Static Tubes
into the barrel
Mount Deflector
onto emitter
(emitter should extend out
about
3
/
16
” from the front of
the deflector)
Spray
pattern
P
REPARING
T
O
P
OWDER
C
OAT
10
For technical assistance e-mail: techelp@eastwood.com


