To order parts and supplies: 800.343.9353 >> eastwood.com
5
COMPRESSOR SET-UP
STEP 1 – CHECK OIL LEVEL
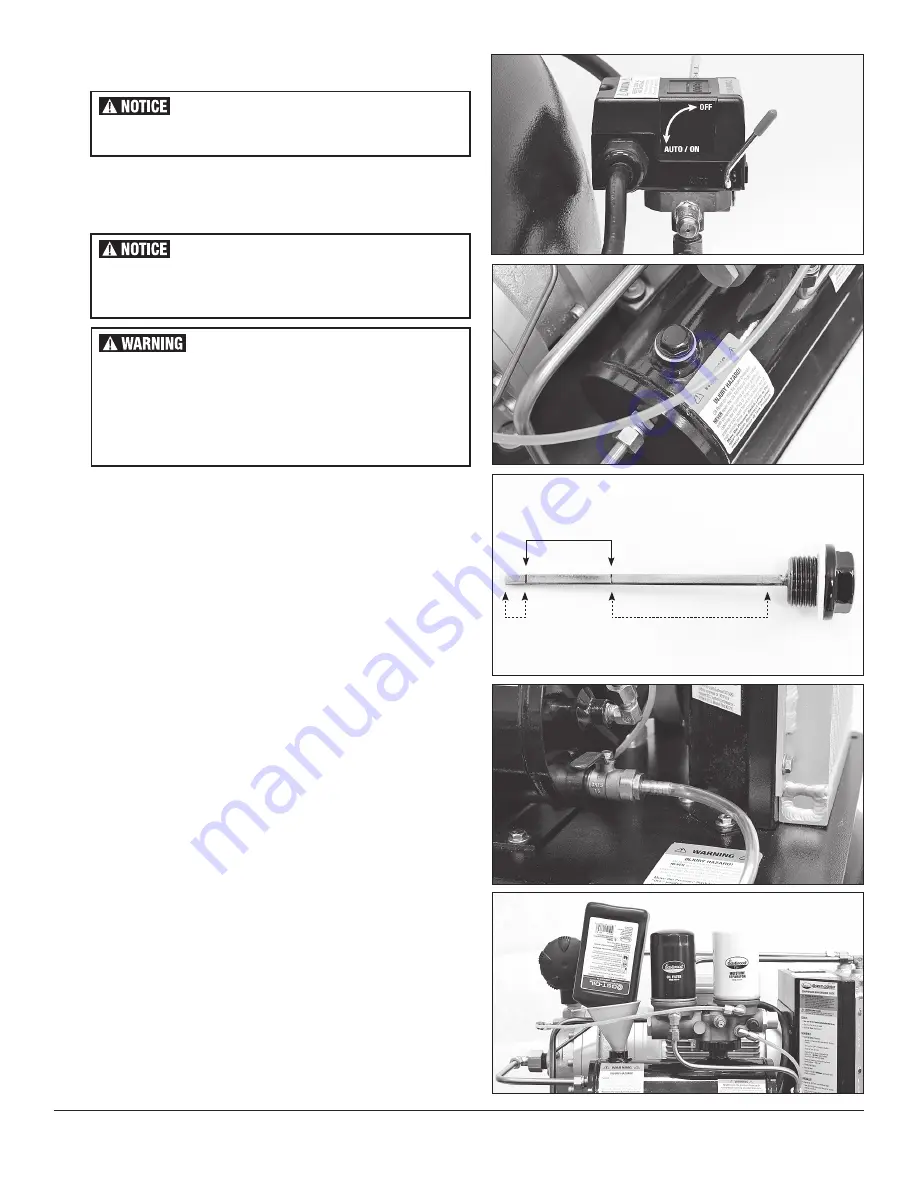
• Move Power Switch to the “OFF” position
(FIG 1)
.
• Release pressure from the Tank until Tank Pressure Gauge indicates 0 PSI.
• Disconnect Compressor from power supply.
• Remove the Oil Fill Plug/Dipstick from the upper front area of the
Oil Reservoir
(FIG 2)
.
NOTE:
Do not lose the Oil Fill Plug/Dipstick Seal.
• Check oil level by observing the level on the Dipstick. The oil level is
acceptable when it is
BETWEEN
the top mark and bottom mark
(FIG 3)
. If necessary, carefully add or remove oil until the level is
BETWEEN
the marks.
• Check for full closure of the Drain Valve located on the Oil Reservoir
(FIG 4)
.
• If needed, add #31718 Eastwood Synthetic Scroll Compressor Oil to the fill
port of the Oil Reservoir using a suitable funnel
(FIG 5)
.
• Check the condition of the Seal then replace Oil Fill Plug/Dipstick and
tighten securely.
Before starting and running the Eastwood Elite QST 30/60,
the following brief steps MUST be performed:
• Place the Compressor on a level surface.
Oil is extremely critical to the operation and performance
of the Compressor. The oil must first be checked before any
other steps are taken.
FIG. 1
FIG. 1
FIG. 3
FIG. 3
FIG. 5
FIG. 5
FIG. 4
FIG. 4
FIG. 2
FIG. 2
INJURY HAZARD!
The Oil Tank may be under pressure. Opening the Drain Valve
or removing the Fill Plug under pressure can cause oil to be
blown out at high velocity. Move Power Switch to the “OFF”
position. Release pressure from the Tank until Tank Pressure
Gauge indicates 0 PSI. Disconnect Compressor from power
supply. Always wear appropriate eye protection.
Acceptable
Add Remove


