ADDITIONAL SPACE
17
English
Putting up the X10T awning
Carefully read the setup instructions of the sup-
plier of the awning.
When positioning the TakeOff, in case
you are going to use the awning, always
ensure enough space for pegging.
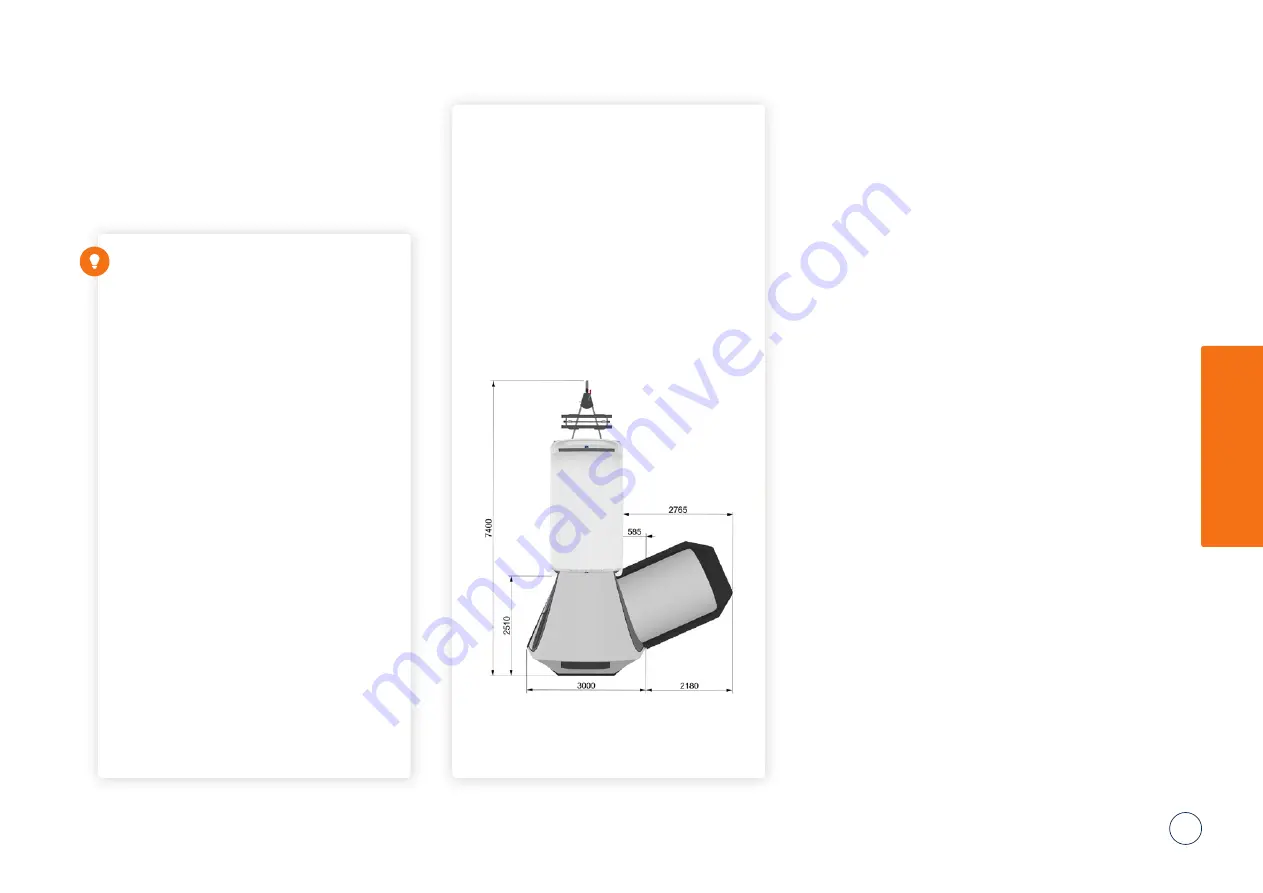
Important measures to take into account
are displayed in the adjacent image. In
addition, space will be required for the
pegging of the tent, by use of guy ropes.
Always first make sure that the TakeOff
is leveled in both transverse and longi-
tudinal direction (see ‘Positioning on the
camp site’ in the chapter ‘Arriving at your
destination’). Firmly turn the corner studs
down and ensure that the TakeOff is al-
ways sufficiently above the ground level.
Ensure that the roof is completely ex-
tended and that the storm stabiliser bars
are well tensioned. The X10T awning uses
1 aluminium arch in the back wall.
The tent includes a specific template that
guarantees that the legs of the aluminium
arch are positioned at the right width.
The attachment of the awning to the
TakeOff takes place by means of zips on
the canvas flex-wall
Zipping the sidewalls
In case the awning is going to be used at the
campsite, as a closed tent, it is advisable to zip
the side walls in during the set up of the tent.
This will guarantee that the tent is tensioned
at the right design dimensions and that the
sidewalls can be opened and closed without
tension interfering.
Sleep-tunnel tent
If you use a sleep-tunnel tent, always take
account of the additional required space at the
camp site. The use of a sleep-tunnel tent re-
quires a special right side wall of the main tent
in order to be able to attach it.
Additional space


