


18
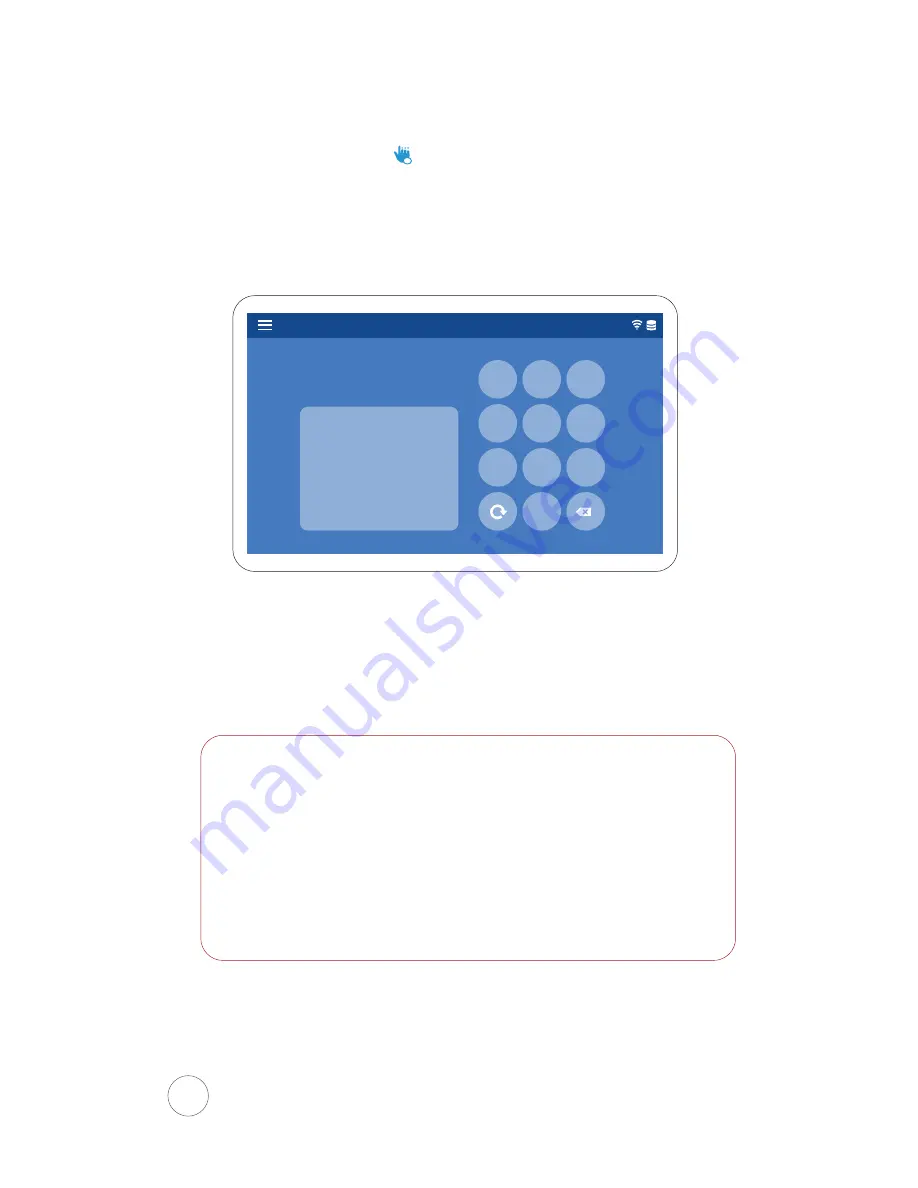
III. Passcode
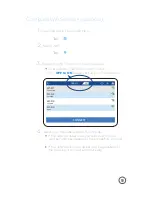
Step 1
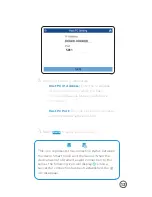
Select the passcode option.
Step 2
Enter your passcode. 4-6
characters in length.
Once you have successfully enrolled the User, they may begin
clocking in/out on the Xenio smart clock.
To remove a User from the Xenio Time Clock, log into your
software and remove the user’s Clocking Permissions to the
device.
To delete a User from the Xenio Smart Clock, inactivate or
terminate the User directly from the Easy Clocking software.
NOTE:
X
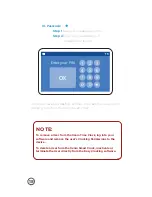
1 2 3
4 5 6
7 8 9
0
OK
Enter your PIN


