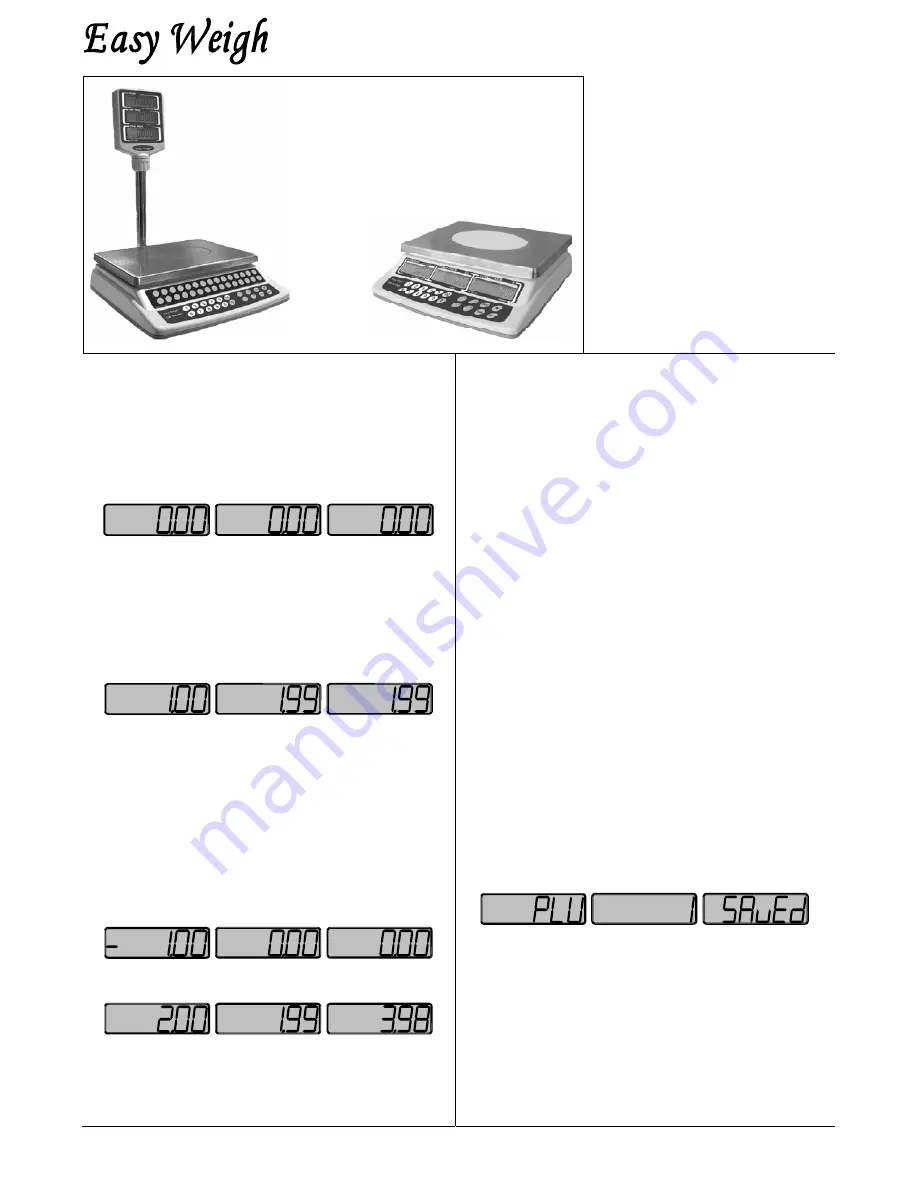
CK-Series Price Computing Scale
Side A
®
Pole Display
Standard Display
CK-P12,
CK-P30, CK-12,
CK-30,
&
CK-P60 &
CK-60
12
x
0.002
lb
30
x
0.005
lb
60
x
0.01
lb
Installation & Assembly
Pole Display:
CK-P
model scales
require assembly of the pole display.
Insert the pole into the display bracket
(rear of scale) and slide it down until it
is securely fastened.
Platter Assembly:
Place the ABS
plastic platform on the scale. Then
place the stainless steel platter on top.
Initial Setup:
Plug the AC adapter
into the scale & then into an AC outlet.
The adapter plugs underneath the
right side of the scale next to the
power switch.
Power Switch:
The power switch
must be held down for more than one
second for the scale to turn ON.
Operating the Scale
Make sure the platter is sitting properly on top of the
platform and that there is nothing on top of the platter.
Also, make sure that the scale is plugged into the proper
outlet. Hold down the power switch until the scale
displays run through a self test, count down to zero, and
then beep. This is the Initial State and displays appear
like this:
Weighing:
1. Enter a unit price using the numeric keys
2. Place an item on the platter
3. Remove the item from the platter
Steps 1 & 2 can be interchanged. After step 2 you will
notice that the Total Price display will show the calculated
Total Price.
For example:
After step 3 you will notice that the displays will return to
there initial state of “0.00”
Weighing Using Known Tares:
1. Enter a tare weight using the numeric keys
2. Press TARE
3. Enter a unit price using the numeric keys
4. Place an item on the platter
5. Remove the item from the platter
Steps 3 and 4 can be interchanged. Once you press the
TARE key you will notice that the NET light will come on
indicating to you that the weight shown is a net weight.
For example:
After you place an item on the scale and enter a price the
displays may look like this:
After step 5 you will notice that the displays will return to
there initial state of “0.00”
Weighing Using Unknown Tares:
1. Place the empty container on the platter
2. Press TARE
3. Enter a unit price using the numeric keys
4. Place an item on the platter
5. Remove the item from the platter
Steps 3 and 4 can be interchanged. Once you press the
TARE key you will notice that the NET light will come on
indicating to you that the weight shown is a net weight.
Weighing Using the Speed Keys:
1. Press the Speed key on the keyboard and change the
price if desired
2. Place an item on the platter
3. Remove the item from the platter
Steps 1 and 2 can be interchanged. You can learn how to
program the Speed Keys in the next section.
Using the Save Key & the Auto-Clear Feature:
If you press the SAVE key before any operation, the SAVE
Lamp will come on. This will prevent the Weight and Unit
Price displays from auto-clearing.
Programming PLUs with the Speed Keys:
1. Enter a tare if desired
2. Enter a Unit Price if desired
3. Press and hold down any of the 4 Speed Keys until the
Total Price display shows “Saved” and the scale will
give a long beep
For example, if you want to program Speed key 1 with a
Unit Price of 1.00 but without a tare simply:
1. Make sure that you are at the initial state
2. Pres 1, 0, and 0
3. Press & hold down Speed Key 1 until displays show:
Charging the Battery
The BATT Lamp is located on the bottom left side of the
Weight display. When it turns ON you will see an
arrowhead
T
pointing to “BATT”. When this happens, you
need to recharge the battery. The scale can be ON or OFF
when recharging so long as it is plugged into the AC
adapter. The Recharge LED is located on the bottom right
side of the Total Price display and has various states which
are explained on the other side of this guide. An overnight
charge of 12 hours will give you approximately a 90%
charge or about 90 hours of continuous (no-backlight) use.


