

PANTONE 072 C
PANTONE 123 C
Customer service: 0303 031 0777
For more innovative products from Easylife please visit:
www.easylifegroup.com
Dear Customer
Thank you for purchasing the Trolley Power Sprayer.
Washing the car has just got simpler, quicker and more economical. And it’s all down to this
super Portable Trolley Power Sprayer. No outside tap, no mains electricity outlet? No problem.
Just fill the 12 litre water tank, pump the handle to create pressure and you’re in business.
Ideal for cars, motor cycles and caravans and boats too, it’s supplied with two cleaning
attachments.
Use the trigger-operated spray nozzle attachment for an initial power hose-down, then the
specially designed cleaning brush attachment that seeks out dirt like a magnet. Finally, spray
again for rinsing. Can be used with car shampoo.
Our wash and rinse Portable Trolley Power Sprayer will give you a showroom finish in no time.
Includes a fully adjustable handle, cleaning brush, all terrain wheels, trigger nozzle and a two-
metre hose.
BEFORE USE
Check for any visible damage to the tank and all components before using.
INSTRUCTIONS FOR USE
FILLING THE TANK
1. Press down and turn the pump handle to lock it in place.
2. Unscrew the pump assembly by turning the locked pump handle to the right.
3. Fill the tank with the required amount of water. Do not exceed 12 litre limit. Guidelines are
visible on the main tank.
4. Replace the pump and tighten.
USING TO WASH/CLEAN
1. Release the pump handle locking mechanism by pressing down and turning
the pump handle.
2. Pump the handle around 25 times to obtain working pressure. If good
pressure has not been reached at this point pump 5 more times and test.
Continue until desired pressure is reached. Do not pump excessively as too
much pressure build up could be dangerous.
3. The pump is equipped with a safety valve which releases excess pressure.
4. The Portable Trolley Power Sprayer is ready for use.
5. Screw handle firmly onto the hose.
6. Attach the lance by screwing firmly into place
7. Press the trigger to spray, release it to stop.
8. For a continuous flow of liquid, push the trigger lock until it clicks into place
(Fig 1). Push the trigger lock back to it’s original position to stop
the flow of liquid.
9. Change attachments as required.
No need
for an
outside tap,
electricity or
batteries
Paper weight 60gsm
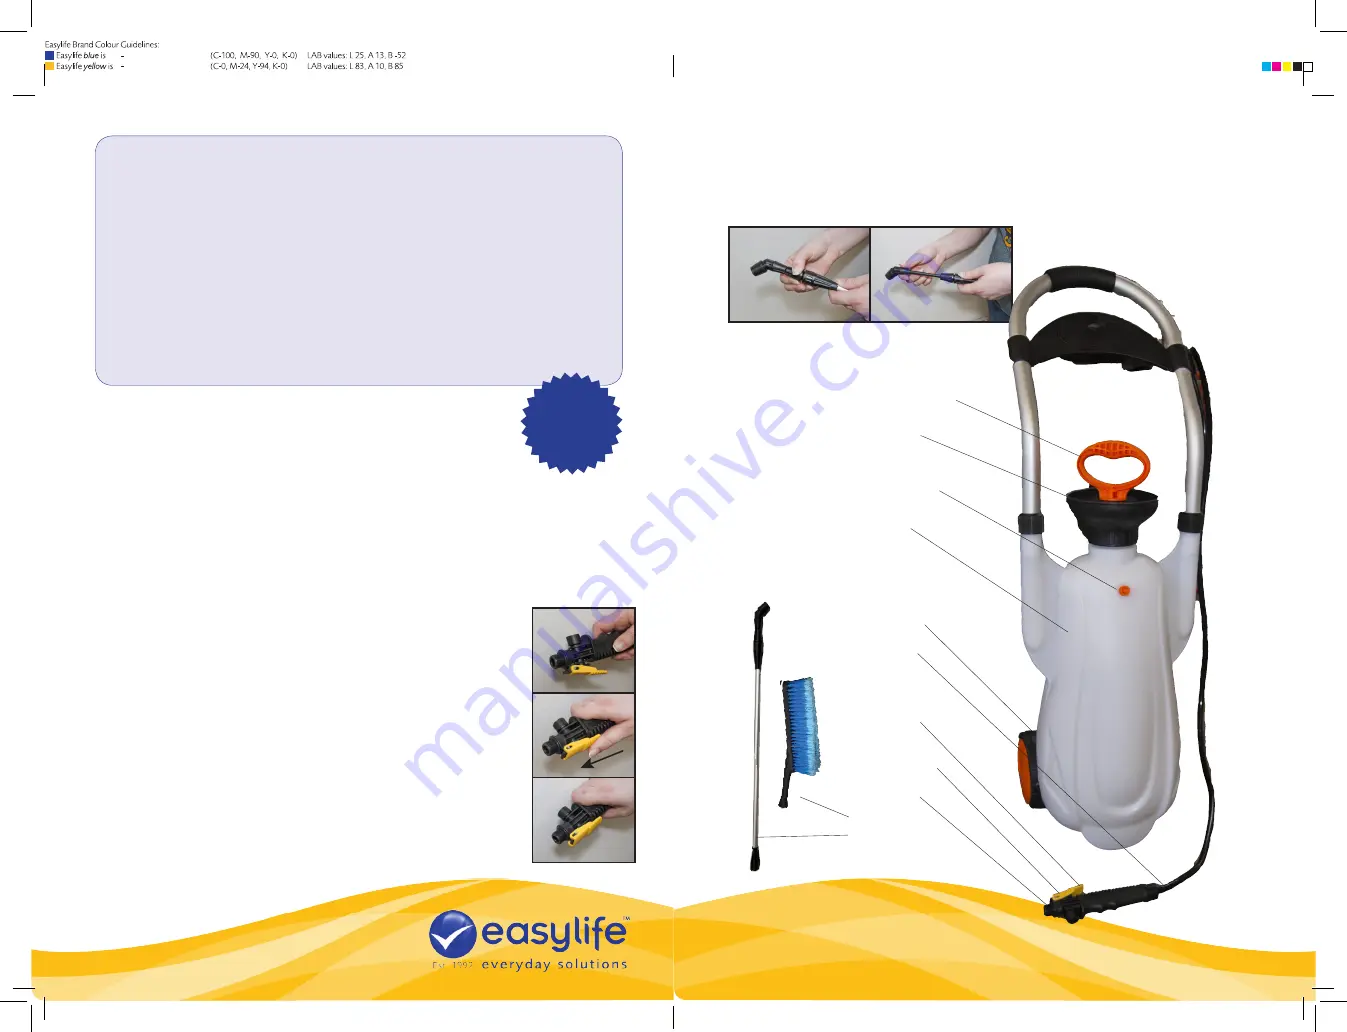
1. Pump Handle
2. Funnel
3. Safety Valve
4. Tank
5. Wheels
6. Hose
7. Trigger
8. Trigger Lock
9. Nozzle
10. Brush
11. Lance
Fig 1
EXTENDING LANCE FITTING
Unscrew connector to free the inner pole. Do not fully unscrew these connections, you only need
to loosen them to release the extending section of the lance.
Retighten when lance is extended to desired length.
STRUCTURE/COMPONENTS


