background image

Basic Settings 
 
Date and Time

The system will automatically use the network to provide the date,  
time zone and time.

Note:


If you use the automatic function to set the time and date, you cannot set your 
own date, time and time zone.

Adjusting the Time and Date

1. In the home desktop, press the “menu” button for the popup menu.

2. Click Settings.

3. Scroll down the screen, then click on the date and time settings.

4. Clear the Automatic check box.

5. Click the choose time zone, and then select the list of time zones.  
  Scroll down the list to see more time area, then click on Settings

6. Click to set the time. Then click the up or down buttons to adjust the hours  
  and minutes. Select AM or PM to change the morning or afternoon.  
  Click set to complete.

7.  Select the check box to use 24-hour format.

8. Click Select a date format 
 

Set language

1. In the home desktop, press the “menu” button for the popup menu.

2. Click Settings.

3. Click on the region and text.

4. Click Select, and select the language you require.  
  Scroll down the list to see more languages.

Summary of Contents for EasyPad 1000

Page 1: ...User Guide ...

Page 2: ...w the instructions in this manual carefully Statement If the final version of this product has any differences from the description of the user guide please subject to the final product as we are eager to provide you the newest software updates Thank you ...

Page 3: ...Contents List 1 7 Inch Touch Digital Touch Screen Easypad 2 Adapter 3 Manual ...

Page 4: ... strong magnetic or electrical fields 5 DO NOT expose to or use near liquids rain or excessive moisture 6 SAFE TEMP This device should only be used in environments with ambient temperatures between 5 and 40 7 ONLY USE the power adaptor provided with this device Transportation Precautions When travelling with your EasyPad always switch off the unit and place it into the protective bag provided If p...

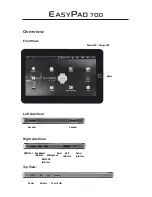
Page 5: ...ront View Speaker Speaker Left side View Right side View Top View TF card slot Power Volume Power LED Charge LED Home HDMI Out USB Interface Mini USB Interface Headphone interface Reset Power interface Microphone ...

Page 6: ...Adapter Charging the battery 1 Plug in the power adapter the battery charge indicator turns red indicating charging When the battery is fully charged the indicator shows blue After unpluging the power adapter the indicator always shows green 2 You can operate the EasyPad during the battery charging process Note The charging time will be longer when operating and charging at the same time ...

Page 7: ...rd will be damaged 2 Once the card has been locked it cannot be formatted or written 3 Don t insert and remove the card repeatedly in a short time It may cause the card to be damaged 4 We suggest the use of major brands of memory cards in order to avoid any incompatibility Remove and insert memory card and USB memory stick Please don t remove the memory card and USB memory stick while you are usin...

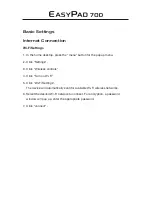
Page 8: ... Connecting to the internet by Ethernet Connect the Ethernet adapter to the Ethernet port and then plug the network ca ble into the Ethernet adapter In the upper right corner of the screen the Ethernet symbol appears The Easypad automatically obtains an IP address via DHCP to connect the network Connecting to the internet by Wi Fi 1 Click MENU key to pop up the menu and then select Settings 2 Sele...

Page 9: ... When you need to enter text and numbers using the program or file the touch screen keyboard will appear automatically Note This device supports an external USB keyboard but when using an external USB keyboard some keys may not work properly Touch Screen The touch Screen senses the finger trajectory Note Please do not place objects on the touch screen surface to avoid its damage Long press By touc...

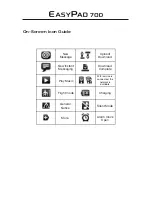
Page 10: ... Icon Guide New Message New Instant Messaging Flight mode More Upload Download Alarm Clock Open WiFi service is connected the network is available Silent Mode Charging Download Complete General Notice Play Music ...

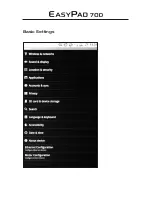
Page 11: ...Basic Settings ...

Page 12: ...up menu 2 Click Settings 3 Click Wireless controls 4 Click Turn on Wi Fi 5 Click Wi Fi Settings The device will automatically scan for available Wi Fi wireless networks 6 Select the desired Wi Fi network to connect For encryption a password window will pop up enter the appropriate password 7 Click connect ...

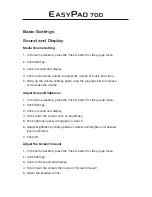
Page 13: ...reen Brightness 1 In the home desktop press the menu button for the popup menu 2 Click Settings 3 Click on sound and display 4 Scroll down the screen click on brightness 5 The brightness panel will appear on screen 6 Adjust brightness by sliding between darker and brighter until desired level is achieved 7 Click OK Adjust the ScreenTimeout 1 In the home desktop press the menu button for the popup ...

Page 14: ... your unlock password you can reset your device back to the original factory settings Restore factory settings means the deletion of downloaded applications and other user settings so all data will be lost Remember to back up your data 1 In the home desktop press the menu button for the popup menu 2 Click Settings 3 Click to restore factory settings 4 The system will enter the erase data function ...

Page 15: ...e Automatic check box 5 Click the choose time zone and then select the list of time zones Scroll down the list to see more time area then click on Settings 6 Click to set the time Then click the up or down buttons to adjust the hours and minutes Select AM or PM to change the morning or afternoon Click set to complete 7 Select the check box to use 24 hour format 8 Click Select a date format Set lan...

Page 16: ...tton next to power port to reset the system Unable to set up E Mail Account 1 Ensure that the network is connected and that you can connect to the Internet 2 Ensure your E mail settings and passwords are correct 3 Make sure your system time and local time are consistent The crossed out wheel bin symbol on this item indicates that this appliance needs to be disposed of in an environmentally friendl...

Page 17: ......

Reviews: