background image


6.


Video   recording   &   setting   configuration   


C.


1
.   

6.1.   Video   recording   

Switch   to   recording   mode   and   you   will   see   the   

    icon   in   the   upper   left   corner   of   the   

screen.   

Press   OK   to   start   the   recording   and   the   

    icon   in   the   upper   left   corner   will   start   to   

flash.   

Press   “OK”   again   if   you   want   to   stop   recording   and   the   

    icon   will   disappear.   


6.2.   Photo   shooting   &   settings   

Switch   the   camera   on   and   press   “Mode”   to   select   “Photo   shooting   Mode”,   you   will   see   the   

    icon   in   the   upper   left   corner   of   the   screen   display   and   the   camera   is   in   photo   shooting   

mode.   
Press   “OK”   to   take   photos.   
Shooting   Pattern   options   include:   Single   shot   /   Self-­‐timer   (2s/5s/10s)   and   Continuous   
Shooting   
   

6.3.   Data   storage   &   playback   

You   can   use   the   USB   cable   to   transfer   your   files   to   the   computer   or   you   can   remove   the   
micro   SD   card   with   the   card   reader.   
Always   ensure   the   camera   is   powered   off   before   inserting   or   removing   the   micro   SD   card.   


7.   WiFi   connection


To   connect   the   camera   to   your   Android   or   iOS   smart   device   please   take   the   following   steps:   
   

Using   the   GooglePlay   or   iOS   App   Store,   install   the   

“CANANY”

   or   

“Finalcam“

   app   on   your   smartphone   

or   tablet.   After   powering   the   camera   on,   press   the   WiFi   key   on   the   camera   -­‐   the   WiFi   icon   displays   on   
the   screen.   
Ensure   the   WiFi   function   is   active   on   your   smart   device,   go   to   settings   and   search   for   the   cameras   WiFi   
account.   Connect   the   smart   device   and   camera   using   password   “12345678”   which   will   display   on   
screen.   This   action   is   only   required   on   initial   set   up   or   following   a   system   reset.   
When   the   WiFi   is   connected,   “WiFi   Connection   Ready”   displays   on   the   screen,   
The   app   allows   you   to   view   and   download   your   images   and   video   to   your   smartphone   or   tablet.   The   
apps   on   screen   icons   allow   you   to   perform   various   app   functions   or   set   function   parameters   of   the   
camera.   
Please   note:   
Using   the   app   on   your   smart   device   it   is   possible   to   select   and   switch   between   the   following   video   
resolution   settings:   Full   HD   1080p,   HD   720p,   WVGA   and   VGA.   Due   to   certain   WiFi   restrictions   it   is   not   
possible   to   select   or   transfer   files   of   2.5k   or   4k   Ultra   HD   resolution.   

Summary of Contents for GoXtreme Vision 4k

Page 1: ...eep the device out of reach of children while charging 8 The device should be stored in a dry and dust free location at normal room temperature and out of direct sunlight 9 The product should only be...

Page 2: ...ailable out of the box the GoXtreme Vision 4K is ready for your next adventure Product features l Includes waterproof case allowing you to record HD video at up to 30M depth l HD screen display for co...

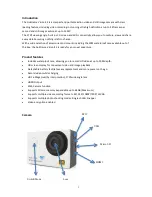
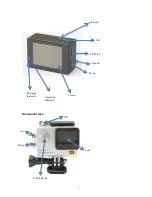
Page 3: ...3 Waterproof case OK Indicator UP WiFi Speaker Down Screen Operation Indicator Charging Indicator OK Lens Switch Mode Up Down...

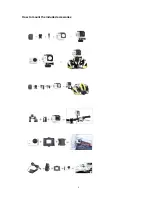
Page 4: ...4 How to mount the included accessories...

Page 5: ...ull out the battery 3 Charging A You can recharge the camera by connecting it directly to the computer B It can be also charged with a car charger Max output 1 0mAh C The camera can record video while...

Page 6: ...camera to your Android or iOS smart device please take the following steps Using the GooglePlay or iOS App Store install the CANANY or Finalcam app on your smartphone or tablet After powering the cam...

Page 7: ...720P 120fps 720P 60fps 720P 30pfps WVGA P 30 VGA P 240 VGA P 30 QVGA P 30 Selects your video resolution and frame rate setting Time Lapse Record Off 1 Seconds 2 Seconds 5 Seconds 10 Seconds 30 Seconds...

Page 8: ...Capture Mode Single 2S Timer 5S Timer 10S Timer 20S Timer When activated the camera automatically takes a photo every 2 5 10 or 20 seconds Quality Fine Normal Economy Selects the quality of the store...

Page 9: ...ife the camera can be set to power off automatically after 5 or 10 minutes Beep Sound Off On Turn beep On or Off Language Selects the language displayed for all menu items Frequency 50 Hz 60 Hz Select...

Page 10: ...ID Format Internal Memory SD Card WARNING Formatting your memory card will erase all files stored on the card Default Setting Cancel OK Resets your camera and all settings to default factory settings...

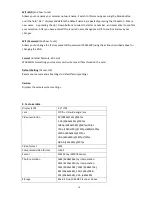
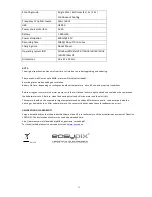
Page 11: ...e up to 90 min under optimal conditions Before using your camera in the water please verify that all lids and locks are tightly closed and sealed on the camera and the underwater case After use clean...

Reviews: