General Instructions
All of the other compressors have weather resistant housing, but we strongly suggest
that you protect them from the elements in some way.
1. Place compressor on level surface above the water level.
2. Compressor must be protected and housed from the elements. Do not place
compressor in low spots where water may puddle. Place compressor in shaded area
that is free from excessive dust or moisture.
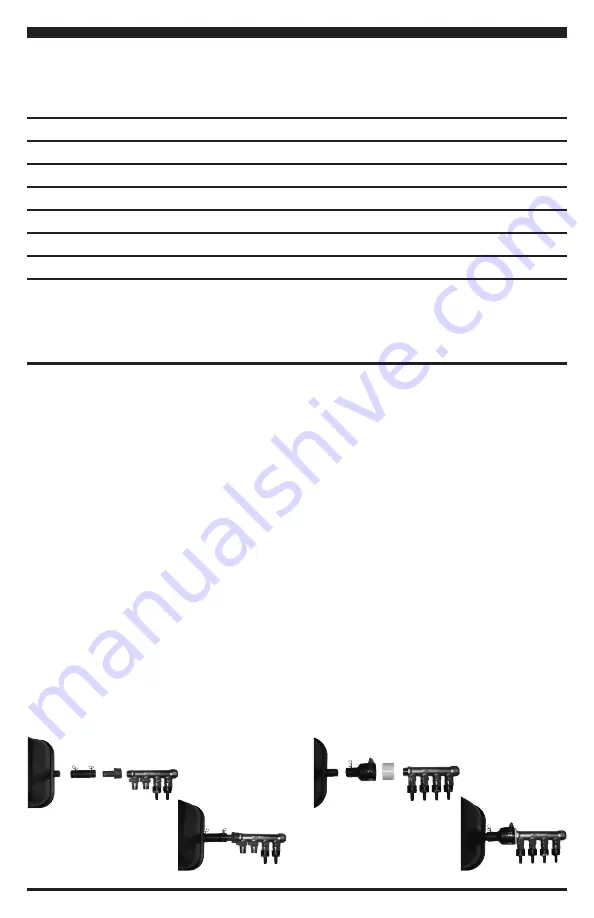
3. Connect the rubber elbow to the compressor with pinch clamps. See pictures below
for connecting manifold to compressor on LA15N and LA20N kits.
4. Connect the one end of airline to outlet of the compressor and secure with provided
hose clamp. If kit has a manifold system, connect the manifold to the compressor
and then ends of airline runs to manifold system, the secure with provided hose
clamps.
5. Connect other end of tubing to diffuser(s) and secure with provided hose clamps.
The LA15W has a tee that the two diffusers are screwed into and tubing connects to
the barbed male adaptor which is installed in the short side of the tee.
6. Place diffuser(s) in pond in desired locations for best aeration.
7. Plug compressor into 120v AC GFCI protected outlet.
Koi and Ornamental Pond Aeration Kit Features:
Kit
Maximum
Compressor Maximum CFM
Maximum*
Part #
Pond Size
Warranty** (cubic feet per minute) Recommended Depth
LA5N
3000 Gallons
2 Years
.8 cfm
6 feet
LA10N
8000 Gallons
2 Years
1.8 cfm
6 feet
LA15N 17500 Gallons
2 Years
2.5 cfm
6 feet
LA20N 40000 Gallons
2 Years
5.2 cfm
6 feet
LA5W
3000 Gallons
3 Years
1.4 cfm
6 feet
LA10W 7500 Gallons
3 Years
1.8 cfm
6 feet
LA15W 20000 Gallons
3 Years
3.1 cfm
6 feet
Fish load, filtration capacity and other factors affect actual maximum pond size
*Various compressors will perform in deeper water, this is the recommended
maximum depth for ideal performance
**See compressor instructions for warranty details
LA15N
LA20N