4
When placing rocks — start in the
middle and work outward.
Be sure to use a large bead
of silicone around opening.
Hold face plate in place and
line up holes with an awl.
Insert bolts through holes
and secure with nut on
inside of skimmer.
ADDING ROCKS - Steps 6 & 7
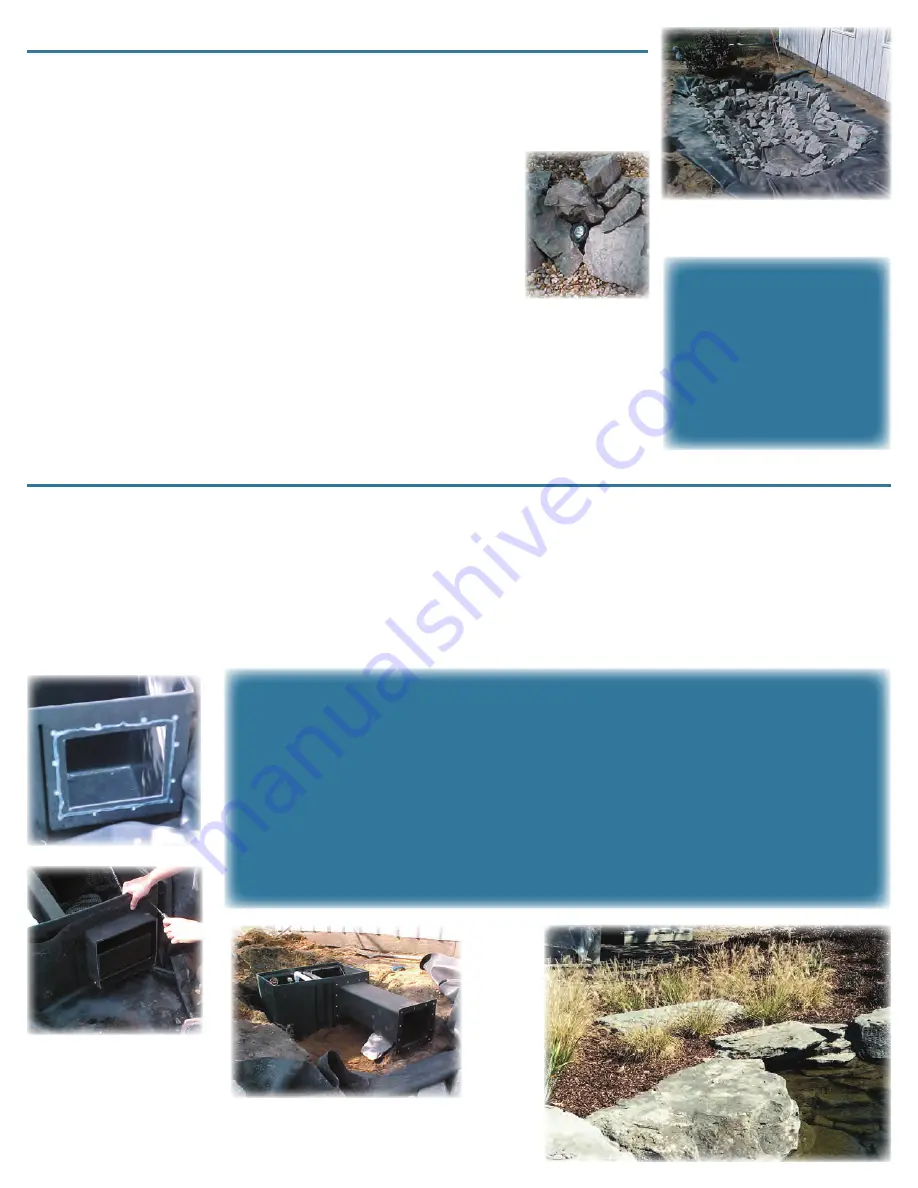
Covering the entire liner with rocks is a relatively new concept in water gardening but one
that certainly has its benefits. By covering the liner in rock you are creating a much more
natural looking pond, protecting the liner against punctures and creating additional sur-
face area for beneficial bacteria to grow on. Typically 6" - 12" rocks are used on the vertical
ledges in the pond, care should be taken when placing the larger rocks
so they do not damage the liner (use scrap liner or underlayment pieces
under large rocks). Start from the middle of the pond and work your way
outward placing rocks along the vertical walls of the pond (see photo at
right). Once the large rocks are in place, cover flat ledges in small rock.
Usually 1" - 2" stone or “septic stone” is used for this. As you are plac-
ing the large rocks, hide any underwater lights in between the rocks.
When hiding them always leave extra cable behind the light so it can be
lifted to the surface when the bulb needs to be changed. Be sure to locate
lights so they provide maximum lighting but do not shine towards viewing
area. If multiple lights are used, position them so each light’s 20' power
cord can reach back to the skimmer area where power is available. As
soon as all the rock and lights are in place rinse dirt down from rocks if
necessary so pond will be clean when filled and begin to fill pond. If rock
is not rinsed, water will likely be cloudy when pond is first filled. This will
settle out within one to two days giving you clear water.
Rock Requirements:
A typical 11' x 16' pond will
use approximately:
• 3 - 4 tons of 6" - 18" rock
• 1 - 2 tons of 1" - 2" rock
• Several large rocks are
often used as focal points.
Additional rock may be
needed for streams and
waterfall areas.
INSTALLING SKIMMER - Step 8
It is now time to install skimmer. Earlier when digging the pond you located the skimmer into position and backfilled partially to
hold the tub in place. Double check to make sure skimmer is still level. Place a large bead of silicone around the opening on the
face of the skimmer, then hold liner up (this is best done by a second person) in front of opening. Place the face plate against the
skimmer with the flange sticking out towards pond (see picture below) and line up the top holes with an awl. Secure in place
with a bolt and washer. Install the four corner bolts first, then install all remaining bolts. After all bolts are in, reach inside face-
plate opening and cut away the liner. See below for instructions if using an extension tube. Silicone should dry for at least one
hour before being submersed in water. Install 1
1
/
2
" bulkhead fitting in hole on right side of skimmer (when facing skimmer from
front), this is your overflow outlet. A PVC fitting (male adapter) for use with 1
1
/
2
" and one for 2" are included to connect
PVC drain pipe.
EXTENSION TUBE...
EasyPro skimmers are the only skimmer available with an extension
tube. This tube allows you to locate the skimmer 24" away from the pond
making it much easier to hide! The extension tube bolts to the front of
the skimmer just like the face plate would. Use a thick bead of silicone
around the opening on the skimmer then bolt tube to skimmer. The
opposite end of the extension tube has inserts to secure the face plate
bolts. Place a heavy bead of silicone on the face of the extension tube
then place liner over opening and bolt on face plate. Finally, trim out liner.
Be sure the opposite end of the extension tube is
well supported with either compacted dirt or rocks.
Locate underwater
lights in between
larger rocks to
conceal them.


