ERQ12-U4R2 & ERQ12-F2R2
Serial ATA Disk Array Systems
29
3
M
a
in
te
na
n
c
e –
Up
gr
a
d
in
g Me
m
o
ry
5
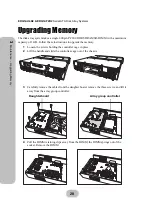
Gently push the new DIMM into the socket at 45 degrees, then push the corners of the
DIMM down. The DIMM is secured by the DIMM retaining clips.
6
Replace the daughter board on the array group controller, taking care to align the con-
nectors.
7
Push the disk controller back in, lower the handle, and tighten the retaining screws.
Note
The DIMM module will fit in only one direction. Do not force the
DIMM into place.
Fan 1
Power 1
oGGwGGY
Fan 1
Power 1

