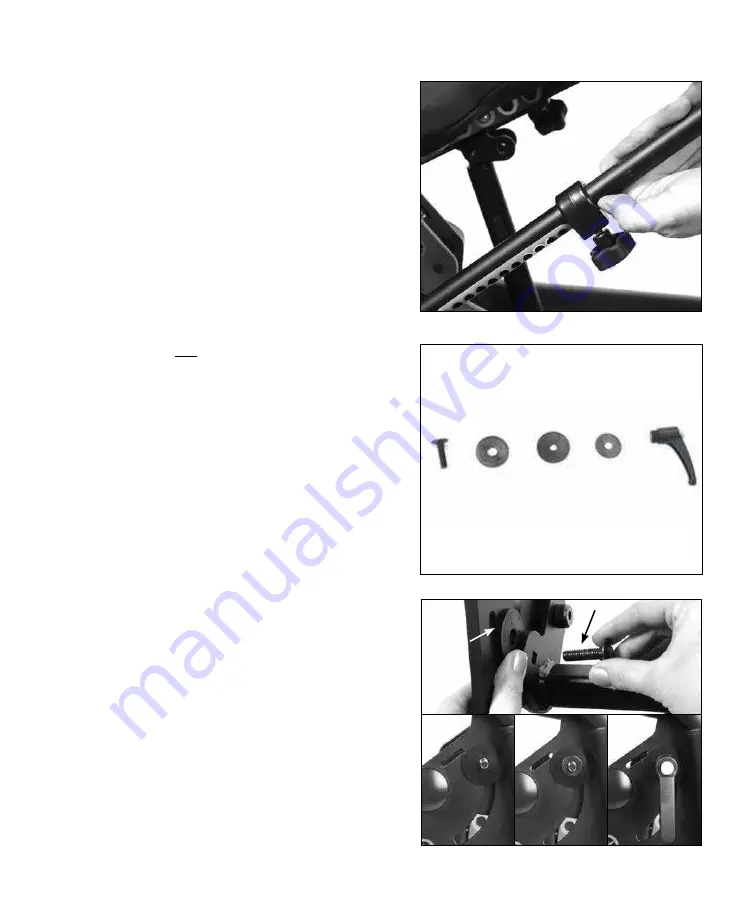
10.
Depress the spring button to allow the following
arm to slide into place. Match the following arm
position color with the corresponding seat depth
color (for more information on seat adjustments
see pg. 15).
11.
If you did not order the Supine option, skip to
step 13.
To assemble the Supine option, put
hardware in order as shown:
A
. Bolt
B
. Nylon Washer
C
. Beveled Metal Washer
D
. Small Metal Washer
E
. Red Supine Locking Handle
One for each side of the unit.
12.
Follow the steps for placing hardware on unit:
A & B
- Insert nylon washer in between the
brackets as shown. Insert the bolt into the
square hole making sure the bolt is in all the
way.
C
- Place beveled metal washer onto the bolt
with the domed end facing outward.
D
- Place the small metal washer onto the
beveled metal washer.
E
- Place the red supine locking handle onto
the
bolt.
Repeat these steps for the opposite side.
A
B
C
D
E
C
D
E
B
Nylon
Washer
A
Assembly
Page 6


