19 . Place the collar onto the frame until the plunger
locks into place. The plunger handle needs to be pulled
out to lock into place.
20 . Place the tray upside down, remove the knob, nut,
and washers from both tray slides and set aside. Place
the tray bracket onto the bolts with the shorter ends of
the bracket facing the chest pad.
21A . Place the knobs onto each bolt and tighten snug.
21B . Place the two washers onto each bolt, then place
the nut onto each bolt and tighten until you expose a
thread, the washers should still be able to spin freely.
Plunger Handle
A
B
2 Washers
Remove
Head Support Adjustment
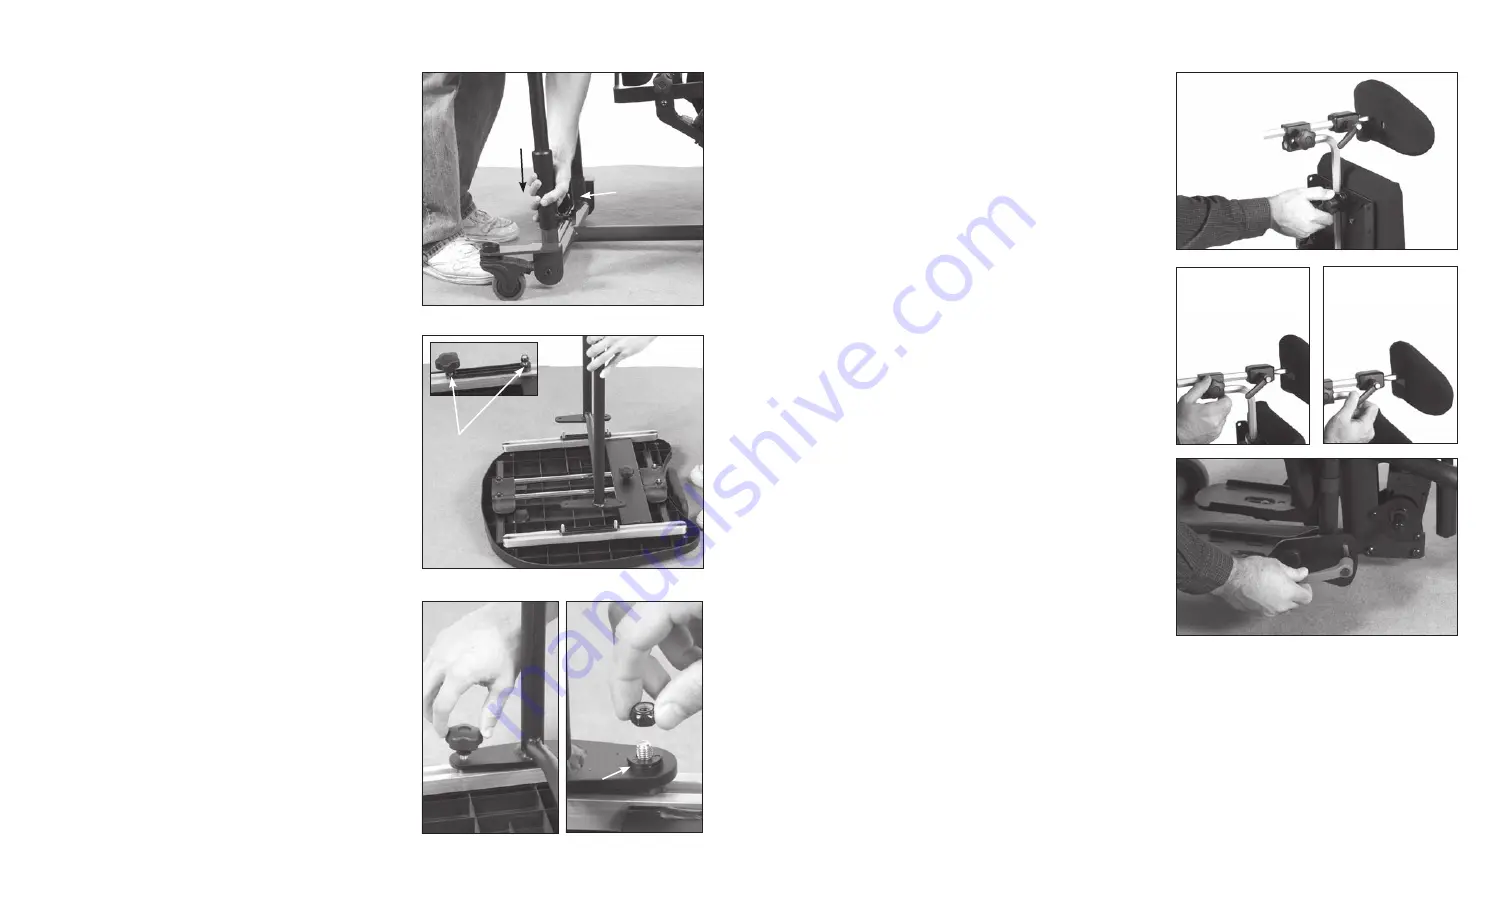
56 . To adjust the head support height, loosen the knob
on the back of the back option, move to desired position
and tighten securely.
57A . To adjust the head support depth, loosen the knob
on the back of the headrest and slide into desired posi-
tion, tighten securely.
57B . To adjust the head support angle, loosen the
ratchet handle and place into desired position. Tighten
securely.
Foot Plate Adjustment
58 . Adjust the foot plate by loosening the red ratchet
handle on the foot plate, up or down and to the desired
angle, tighten securely. Foot plates may be inverted for
increased range.
56.
58.
57A.
57B.
Page 9
Page 22


