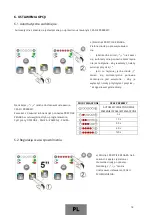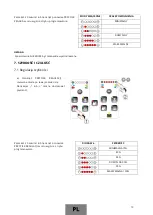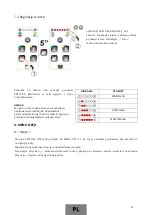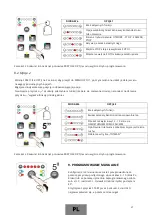
2.5 Front connector fastening types
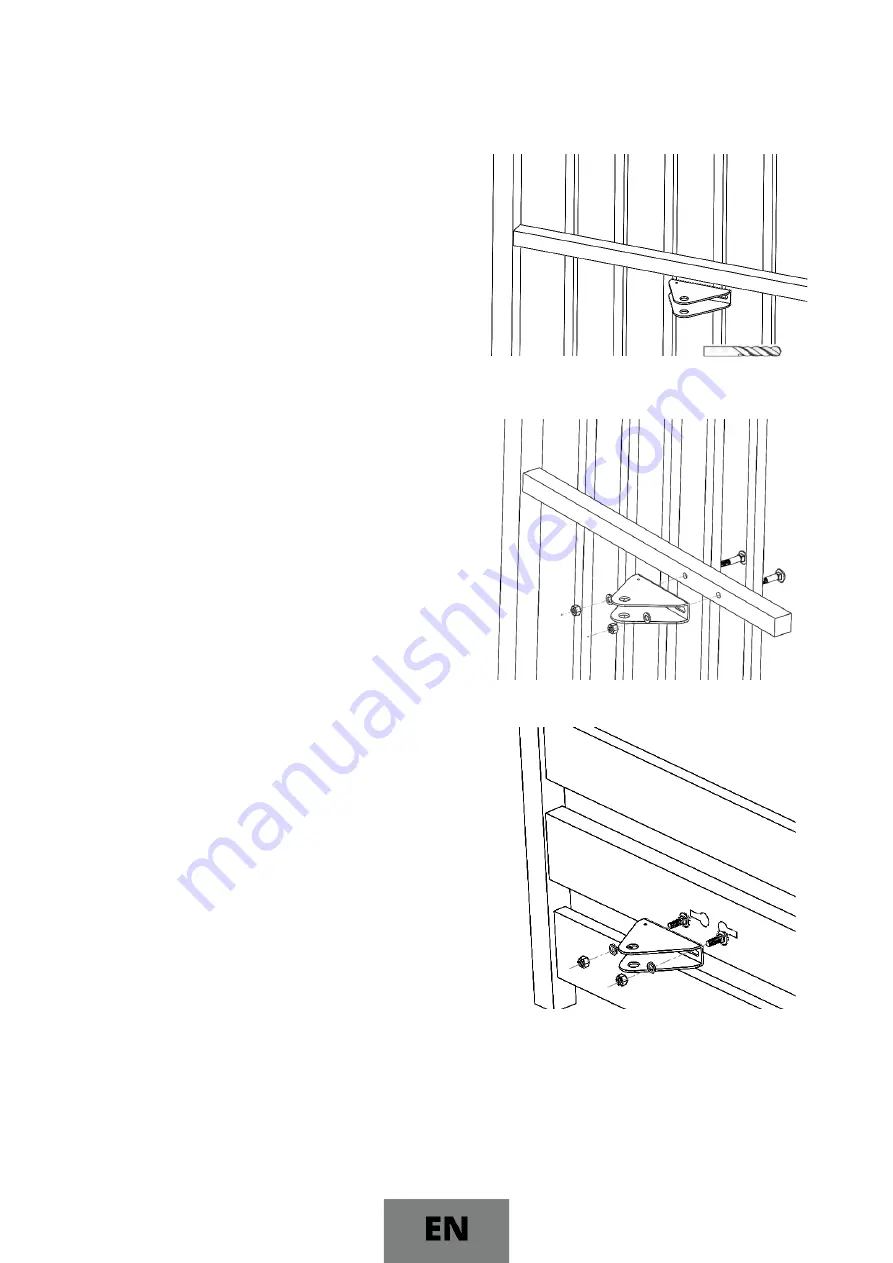
2.5.1 Gate with a rail without holes
- Place the connector in the appropriate position
following the guidelines above, then mark the drilling
location in the centre axis of the connector
’
s long slotted
holes. Drill with an
∅
8.5 drill bit, then ream with a
∅
10.5
drill bit from the opposite side (from the roadside).
- Attach the connector with carriage bolts of the
appropriate length, depending on the size of the rail. Use
M8 washers and nuts to tighten the connector.
ATTENTION:
In the case of gates with holes for the connector provided by
the manufacturer, attach the connector following the
guidelines above.
2.5.2 Gate with longitudinal holes
- pre-tighten the M8x16 carriage bolts on the connector using
M8 nuts with washers to ensure slack between the bolt head
and the connector,
- insert one bolt (attached to the connector) into the hole in
the rail and move it as far as possible to the edge, then insert
the second bolt into the other hole,
- slide the bolts fully outwards, then tighten the M8 nuts.
- by loosening the nuts,
it’s possible to
adjust the position of
the connector on the
connector’s
long slotted holes.
32
Summary of Contents for 210
Page 1: ......
Page 13: ...3 INSTRUKCJA MONTAŻU JEDNOSTKI STEROWNICZEJ 12 ...
Page 15: ...3 3 Połączenie elektryczne 14 ...
Page 39: ...3 CONTROL UNIT INSTALLATION INSTRUCTIONS 38 ...
Page 41: ...3 3 Electrical connections 40 ...
Page 65: ...3 MONTAGEANLEITUNG FÜR DIE STEUERUNG 64 ...
Page 67: ...3 3 Elektrische Verbindung 66 ...
Page 91: ...3 NÁVOD NA MONTÁŽ OVLÁDACÍ JEDNOTKY 90 ...
Page 93: ...3 3 Elektrické připojení 92 ...
Page 117: ...3 MONTÁŽ RIADIACEJ JEDNOTKY 116 ...
Page 119: ...3 3 Elektrické zapojenie 118 ...
Page 143: ...3 VEZÉRLŐ EGYSÉG SZERELÉSI UTASÍTÁSA 142 ...
Page 145: ...3 3 Elektromos bekötés 144 ...

