background image

Polar Compressor Rotary Screw Compressors  

Revision July.2015


www.eatoncompressor .com  

877.283.7614 


35 | 

P a g e


Summary of Contents for Polar Air PRS0050001

Page 1: ...OMPRESSORS Polar Air designs and manufactures products for safe operation However operators and maintenance persons are responsible for maintaining safety All safety precautions are included to provide a guideline for minimizing the possibility of accidents and property damage while equipment is in operation Keep these instructions for reference ...

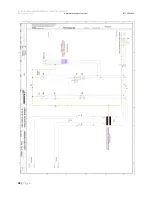
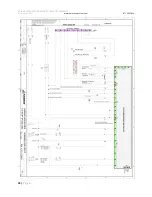
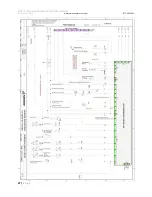
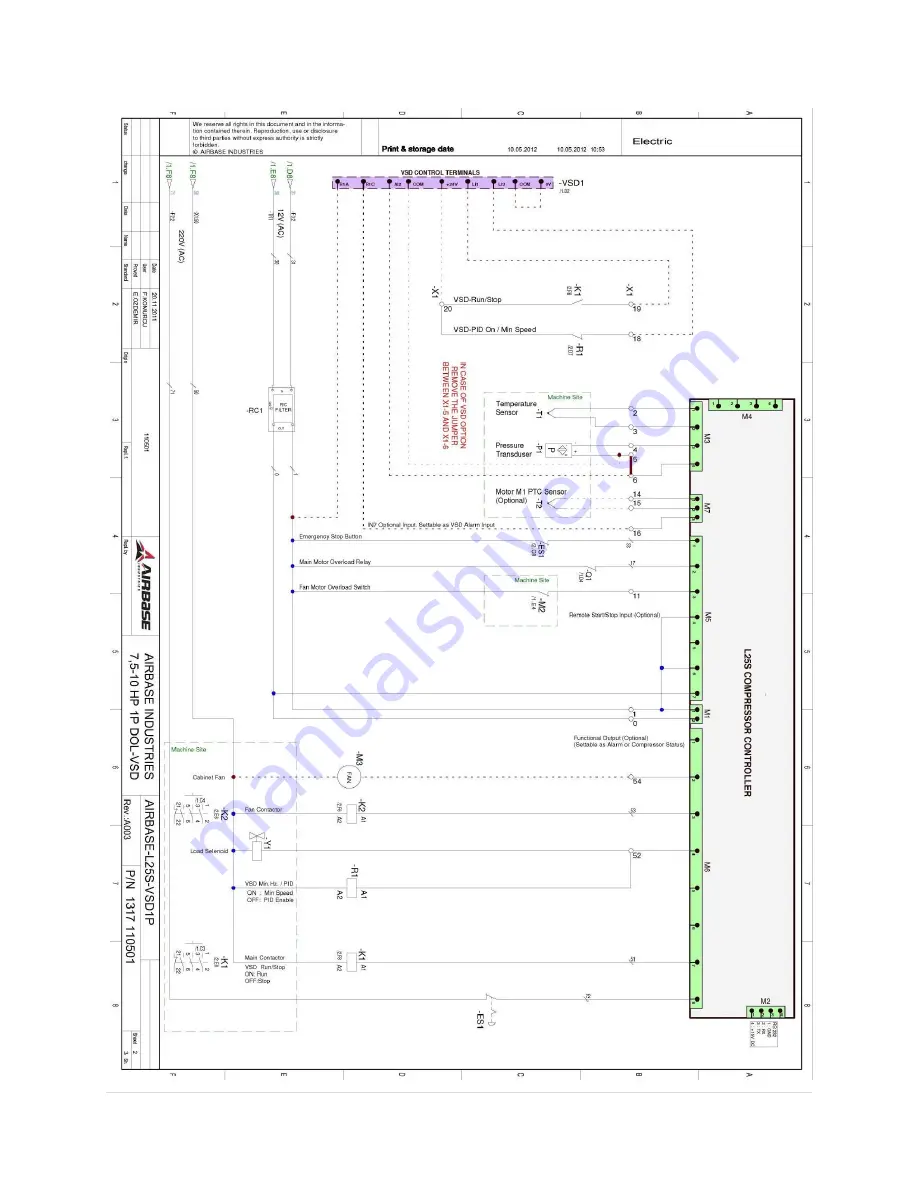
Page 2: ...Up 21 Power Outages 21 Storage 21 Restarting Procedure 21 Maintenance 21 Safety Steps 21 22 Lubricating Oil 22 Belts 22 Changing Oil 22 Oil Capacities 22 System Pressure 23 Safety Valve 23 Air Oil Separator Filter 23 OPTIONAL Cabinet Intake Filter s 23 Maintenance Schedule 24 Troubleshooting 25 29 Wiring Diagrams 29 Warranty 34 Variable Speed Drive The variable speed drive is an auxiliary feature ...

Page 3: ...age Three Phase Dual Voltage Dual Voltage 460V 41 208V 152 230V 138 460V 69 208V 178 1750 Model No PRS0050001 PRS0070001 PRS0100001 PRS0070003 PRS0100003 PRS0150003 PRS0200003 Description Single Phase Single Phase Single Phase Three Phase Three Phase Three Phase Three Phase Dual Voltage Dual Voltage Dual Voltage Dual Voltage Dual Voltage Motor 5 H P 7 5HP 10HP 7 5HP 10HP 15HP 20HP Amp Draw SF 24 3...

Page 4: ...8V 361 230V 327 460V 163 460V 188 Three Phase Three Phase Dual Voltage 230V 196 460V 98 208V 216 208V 290 230V 262 460V 131 Before installing your compressor it is imperative due to varying local wiring codes to consult a professional licensed electrician Installation of electrical wire can be extremely hazardous if done improperly it can result in personal injury or property damage Eaton Compress...

Page 5: ...medical assistance promptly in case of injury Avoid infection by caring for any small cuts and burns promptly Breathable Air 1 NEVER use air from this compressor for breathable air except in full compliance with OSHA Standards 29 CFR 1910 and any other Federal State or Local codes or regulations DEATH OR SERIOUS INJURY CAN RESULT FROM INHALING COMPRESSED AIR WITHOUT USING PROPER SAFETY EQUIPMENT S...

Page 6: ...lent and is properly attached to lifting feature 2 Make sure lifting points are in good condition and tighten any loose nuts or bolts before lifting 3 Use provided lifting feature or appropriate sling A sling must be used when moving compressor with a helicopter or other air borne equipment Be sure to follow OSHA standards 29 CFR 1910 Subpart N 4 Use guide ropes or equivalent to prevent twisting o...

Page 7: ...ide dust free operating area voids the warranty For Cold Weather Use Open shop vent and close outside vent to use exhaust heat from compressor For Warm Weather Operation Close shop vent and open outside vent to divert exhaust heat outdoors 2 Clearances around compressor At least 36 inches sides and back 3 feet in front of compressor This compressor unit is equipped with internal rubber vibration i...

Page 8: ...t can withstand operating temperatures and retain pressure Minimum Pipe Size For Compressed Air Lines Pipe Size Shown in inches Length Of Piping System SCFM 25 ft 50 ft 100 ft 250 ft 20 3 4 3 4 3 4 1 40 3 4 1 1 1 60 3 4 1 1 1 100 1 1 1 1 1 4 125 1 1 4 1 1 4 1 1 2 1 1 2 150 1 1 2 2 2 2 200 2 2 2 2 Never use plastic PVC pipe for compressed air Serious injury or death could result Rotary Screw Compre...

Page 9: ... 75 100 HP 8 Gallon 125 150 HP 18 Gallon 175 200 HP 24 Gallon DO NOT OVERFILL Residual oil may still be in the compressor The above capacities can be used for guidelines but use the upper arrow fill line on the sight glass See page 7 Over filling causes oil to blowout the inlet valve and through the air filter also oil could push past the separation system resulting in oil in the air lines Oil Che...

Page 10: ... GROUNDED ELECTRICAL COMPONENTS ARE SHOCK HAZARDS MAKE SURE ALL THE COMPONENTS ARE PROPERLY GROUNDED TO PREVENT DEATH OR SERIOUS INJURY 1 Refer to amp load information on motor tag and use correctly sized wiring Be sure to consider distance between power supply and machine 2 Install surge protection device between power supply and compressor electrical cabinet 3 Make sure to install properly sized...

Page 11: ...o the compression chamber from the lower end of the rotary compressor body to cool the compressed air The other part passes through the two ends of the compressor body and is used to lubricate internal roller bearings of rotary compressor pump and gear drive The two parts meet at the bottom of the compression chamber and are drained out with the compressed air System Components PLC Programmable Lo...

Page 12: ...display Use the Up Down arrows to change if desired and then press Enter to set the value 5 The current language setting now shows in the display Use the Up Down arrows to change to the desired language and then press Enter 1 ON Button Press to start compressor 2 OFF Button Press to stop compressor 3 Emergency Stop Use only for emergency to stop compressor immediately Use normal stop at all other ...

Page 13: ... manual 1 To access these settings start with the main screen shown below 2 Press the two arrow keys at the same time to bring up the Password Level Selection Press down arrow 2 times to select Level 3 then press enter 3 Enter in the 6 Digit Password 6 6 6 6 6 6 by using the Up Arrow to set the digit to 6 then press Enter to move to the next digit and press the Up Arrow to set to 6 repeat until la...

Page 14: ...e 17 of the PLC manual for more details Working Timer Unloading Delay To reduce wear tear of the compressor components an unloading delay time is set in the controls that shuts down the compressor after the unloading delay time has counted down If the compressor is running in slow periods of the day the compressor could run for long periods in the unloading stage causing unnecessary component wear...

Page 15: ...entered 3 Arrow down to 5 WORKING TIMER and press Enter 4 Arrow down to Wt4 Unload delay time Press Enter and the time flashes and can be changed by using the Up Down Arrows Press Enter again to confirm the setting See chart on page 13 of PLC manual 5 Once satisfied with all settings press Down Arrow until you are back to the Main Screen Following replacement times are important for safe operation...

Page 16: ... digit to 6 then press Enter to move to the next digit and press the Up Arrow to set to 6 repeat until last digit is set to 6 then press Enter Press both Up Down Arrows again if the wrong password is entered 9 Arrow down to 6 OIL FILTER HOURS and press Enter 10 CHANGE AIR FILTER shows in the display and press Enter 11 Using Enter move over to NO and use the Up Arrow to change it to YES then press ...

Page 17: ...S then hit Enter and it resets the hours Separator filter should be set at 2000 hours 16 Press down Arrow and CHANGE OIL FILTER shows in the display but the first Line is C This is the screen for the oil life Press Enter 17 Using Enter move over to NO and use the Up Arrow to change it to YES then hit Enter and it resets the hours 18 Press down Arrow and CHECK COMPRESSOR shows in the display Check ...

Page 18: ...ter and it resets the hours 20 Press down Arrow and BEARING LUBRICATE shows in the display Press Enter 21 Using Enter move over to NO and use the Up Arrow to change it to YES then hit Enter and it resets the hours 22 After resetting the Bearing Lubricant timer you can return to the Main Screen by Pressing the Down Arrow until you are back to the Main Screen Change NO to YES Change NO to YES ...

Page 19: ...ns the motors must be reset manually Reasons for tripped overload protection a Operator error Improper regulations of air exhaust pressure or other parts of the system b Branch circuit not sized correctly c Mechanical failures Internal motor failure Improper motor phasing System setting error Blocked air oil separator filter Resetting Overload Protection Disconnect Tag Lock out Electrical power to...

Page 20: ...e online offline min max pressure control Both control methods are available so appropriate features can be selected for Different air demands It is important to monitor air demand since it takes 15 more power to operate compressor for every10 PSI of pressure increase 6 Air End Two rotor shafts are mounted on bearings parallel to each other in the machine casing The casing has an air inlet at the ...

Page 21: ...ating time and remember to reset maintenance timer when filter is replaced An automatic alarm can be set to remind operator of service times 10 Air Oil Separator Tank This is a steel pressure vessel used to store lubricating oil and to separate the compressed air and the lubricating oil An oil sight gauge is installed on one end of the air oil separator tank Make sure oil level is at high oil leve...

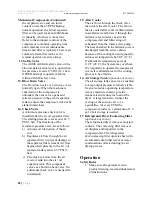
Page 22: ...ents back flow from the air receiver tank into the air oil separator tank This component serves as a built in check valve No additional check valve is needed for installation 15 After Cooler The air flows through the check valve then enters the after cooler The fan on the air cooled after cooler radiator draws in ambient air and blows it through the radiator cores to reduce heat in the compressed ...

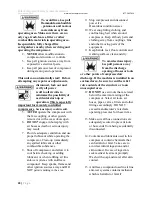
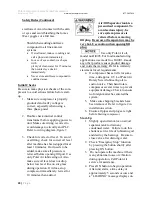
Page 23: ...o cool before checking or adding lubricant or when refilling air line anti icer systems with antifreeze compound Keep sparks flames and other ignition sources away and DO NOT permit smoking in the area 9 Stop compressor and disconnect power if a Hazardous condition arises 10 Wear snug fitting clothing and confine long hair when around compressor Keep all body parts and clothing away from couplings...

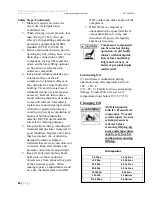
Page 24: ...it does stop compressor immediately let rest for 10 minutes then add oil Air Oil Separator tank is a pressurized component To avoid serious injury be sure system pressure is relieved before removing fill plug Be aware oil temperature may be very hot Use caution when opening fill plug Use only Polar Air oil model no Oil003 For food manufacturing applications use model no Oil001 Use of any other pro...

Page 25: ... weeks a Wrap electrical equipment such as the control panel with plastic or oil paper to avoid condensation b Completely drain water in the oil cooler the back cooler and the oil air separator tank c Make sure any unsafe conditions are clearly stated or repaired 2 If the machine is not run for more than two months a Seal all ports to prevent moisture or dust accumulation b Wrap safety valve contr...

Page 26: ...ectors in good condition Replace any wiring that has cracked cut or otherwise damaged insulation Replace terminals that are worn discolored or corroded Keep all terminals and pressure connectors clean and tight 6 Keep all body parts and any hand held tools or other conductive objects away from exposed live parts of the electrical system When making repairs or adjustments stand on a dry insulated s...

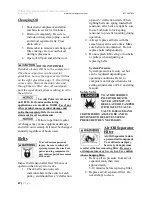
Page 27: ...pressor to prevent unexpected movement of the unit Inspect belt tension after first 30 hours of operation then every two weeks 1 Check belt tension on each individual belt in the center of each pulley and should have deflection up and deflection down When tighting belts use spring loaded belt tensioner after belts are tight be sure to use both nuts to lock spring tensioner to prevent loosening dur...

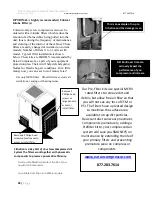
Page 28: ...to preserve pneumatic efficiency Our New PrefilterKit will protect the life of your new Eaton Compressor Available from 5hp up to 400hp models Our Pre Filter kits use special MERV rated filters to remove dirt and debris but allow free air flow so that you will not see any loss of CFM or PSI The filters have a pleated design to maximize the surface area available to trap dirt particles Desiccant du...

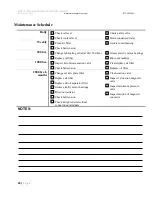
Page 29: ...ilter Grease electric motor bearings Blow out radiator 1000 hrs Inspect lubricate suction valve Check belt tension Clean replace air filter Replace oil filter 2000 hrs 6 months Change oil replace filter Replace air filter Replace air oil separator filter Grease electric motor bearings Blow out radiator Check belt tension Check tighten all electrical connections terminals Clean suction valve Inspec...

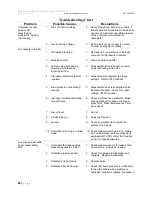
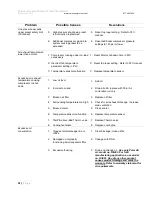
Page 30: ... settings Refer to PLC manual 5 Load solenoid not operating properly 5 Disassemble and clean solenoid valve Replace if needed Check for proper voltage 220V required 6 Improper maintenance Failed to reset hours 6 Check maintenance parameter Make sure operating time does not exceed preset limit Reset Maintenance Timer see page 14 7 Low oil level 7 Add oil 8 V belts slipping 8 Adjust belt tension 9 A...

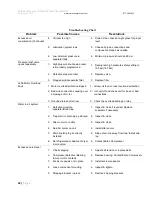
Page 31: ...xcessive air exhaust temperature causing compressor to shut down 1 Low oil level 1 Add oil 2 Incorrect oil used 2 Drain all oil replace with Polar Air compressor oil only 3 Blocked oil filter 3 Replace oil filter 4 Surrounding temperature too high 4 Check for air exhaust blockage Increase area ventilation 5 Blocked cooler 5 Clean cooler 6 Temperature sensor malfunction 6 Replace temperature sensor...

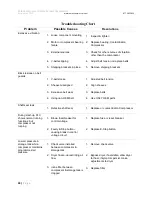
Page 32: ...eset overload protection 2 Bad wire connections causing over amperage of motor 2 turn unit off and check unit for loose or bad connections 3 Overload relay set too low 3 Check the overload setting on relay Water in air system 1 Defective moisture separator Drain trap 1 Inspect clean if required Replace separator if necessary 2 Trap drain or drain piping blocked 2 Inspect clean 3 After cooler core ...

Page 33: ...misaligned 2 Align sheaves 3 Excessive belt wear 3 Replace belts 4 Using non OEM belt 4 Use ONLY OEM parts Shaft seal leak 1 Defective shaft seal 1 Replace or contact Eaton Compressor During start up PLC shows normal running functions but compressor not running 1 Blown fuse breaker for control voltage 1 Replace fuse or reset breaker 2 Faulty E Stop button causing break in control voltage circuit 2...

Page 34: ...Polar Compressor Rotary Screw Compressors Revision July 2015 www eatoncompressor com 877 283 7614 34 P a g e ...

Page 35: ...Polar Compressor Rotary Screw Compressors Revision July 2015 www eatoncompressor com 877 283 7614 35 P a g e ...

Page 36: ...Polar Compressor Rotary Screw Compressors Revision July 2015 www eatoncompressor com 877 283 7614 36 P a g e ...

Page 37: ...Polar Compressor Rotary Screw Compressors Revision July 2015 www eatoncompressor com 877 283 7614 37 P a g e ...

Page 38: ...l sample kit provided by Eaton Compressor and Fabrication Co Inc at no cost with the unit purchase The oil sample kit will contain 20 oil sample containers One oil sample is to be sent for analysis by an oil analysis lab chosen by Eaton Compressor and Fabrication Co Inc every six months so that oil is tested twice annually Oil samples are obtained by draining 4 ounces of oil into the provided cont...

Reviews: