10
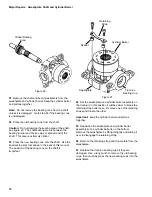
Low Pressure
Relief Valve
High Pressure
Relief Valve
Gauge Port
Plugs
Valve
Block
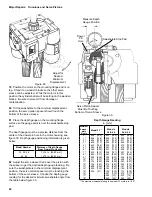
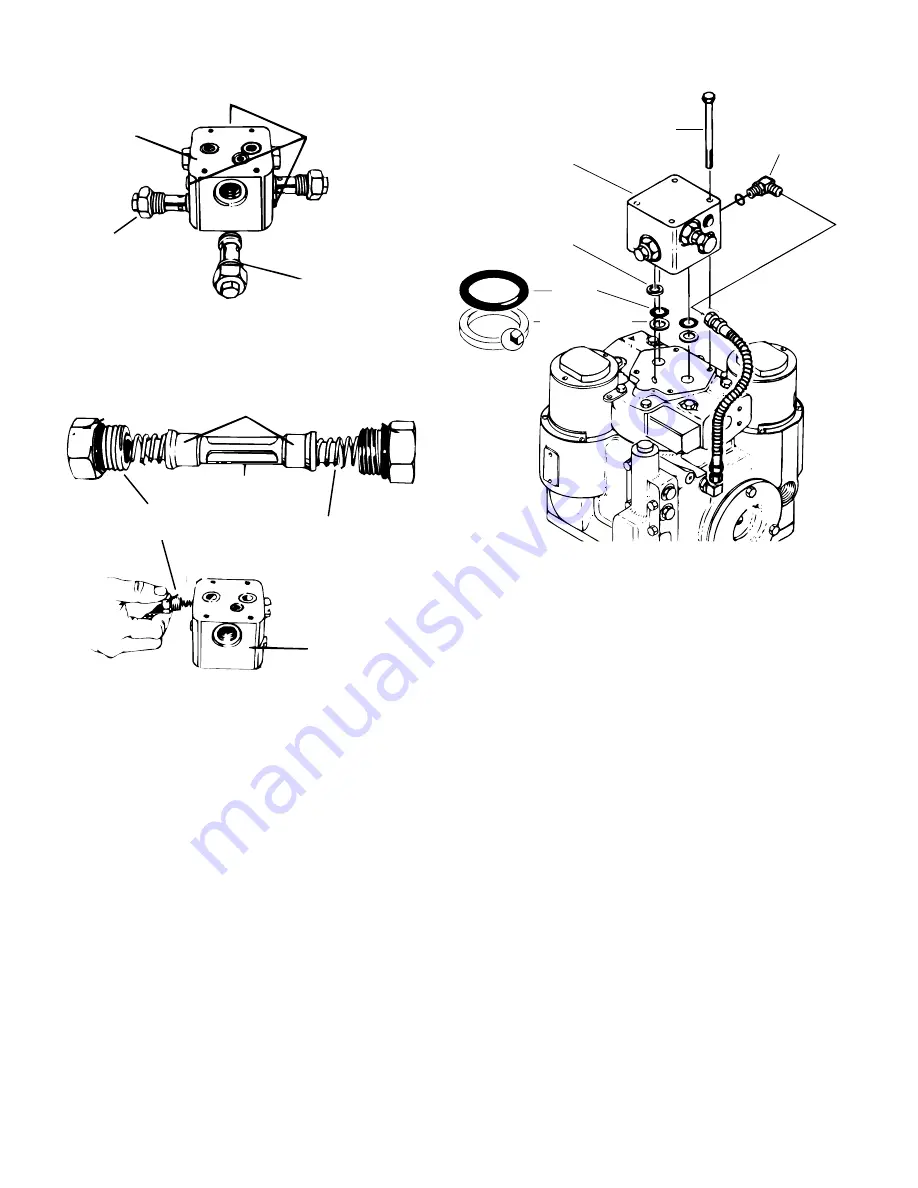
13 Remove the gauge port plugs and o-rings.
Figure 5
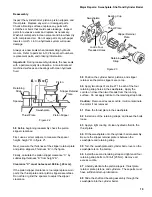
Figure 6
Spool
Shuttle Valve
Plug
Valve Block
Shuttle Valve
Spring
Shuttle Valves
14 Remove the shuttle valve plugs and o-rings.
15 Remove the shuttle valve springs, spool, and valves.
16 Wash the relief valves, plugs, and shuttle valve in
clean solvent. Flush out the valve block. Blow dry the
parts with compressed air. Be sure to blow through the
internal passages of the valve block. Inspect the parts
for damage and replace as necessary.
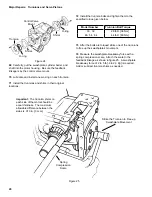
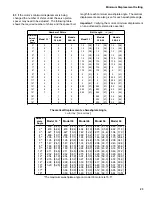
17 Install the relief valves, shuttle valve, and plugs. Use
new o-rings and back-up rings.
Install back-up rings around the small o-rings on the high
pressure relief valves, see figure 4.
Lubricate the new o-rings with petroleum jelly before
installation.
Tighten all plugs and relief valves finger tight. They will
be torqued after the valve block is mounted on the
motor.
Back-up Ring
O-ring
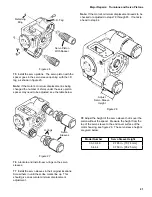
Sq. Cut Seal
Hose Fitting
Figure 7
Bolt (4)
Valve Block
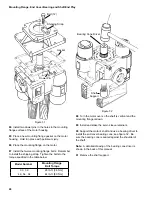
18 Install new o-rings and back-up rings in the grooves
around the high pressure ports as shown in figure 7.
Install a square-cut seal in the groove around the low
pressure port. Use petroleum jelly to hold these sealing
rings in place while the valve block is installed.
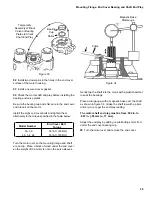
19 Position the valve block on the motor. Install the four
hex head bolts and tighten them to 28 lb-ft [38 Nm].
20 Tighten the high pressure relief valves to 25 lb-ft [34
Nm].
Tighten the low pressure relief valve, and shuttle valve
plugs to 80 lb-ft [108 Nm].
Tighten the gauge port plugs and control pressure fitting,
if used, to 17 lb-ft [23 Nm].
21 Connect the control pressure hose to the valve block
fitting, if used.
Note: The control pressure hose is now obsolete. Poor
motor control characteristics may be experienced when
the motor gets control pressure from the valve block. It
is best to run a separate control pressure line from the
charge pump to the motor. If possible re-plumb the
application so the control pressure hose is no longer
used. Be sure to plug the port in the valve block.
Minor Repair: Valve Block Inspection
Summary of Contents for 1 Series
Page 31: ...31 Notes...


