11
Disassembly
This section describes the complete disassembly,
inspection,and reassembly of the motor. Due to the
complexity of the heavy duty motor certain
subassemblies are disassembled, inspected, and
reassembled upon removal from the motor. This
procedure insures repair accuracy and helps avoid the
loss of small parts.
When major repairs are planned it is recommended that
the process laid out in this section be followed from start
to finish.
1 Clean the exterior of the motor and drain the oil.
2 Position the motor so the shaft seal is accessible.
Important: Cleanliness is extremely important; be sure
that no contaminates get into the motor.
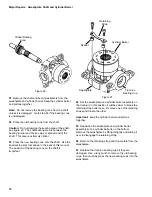
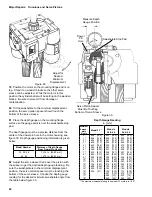
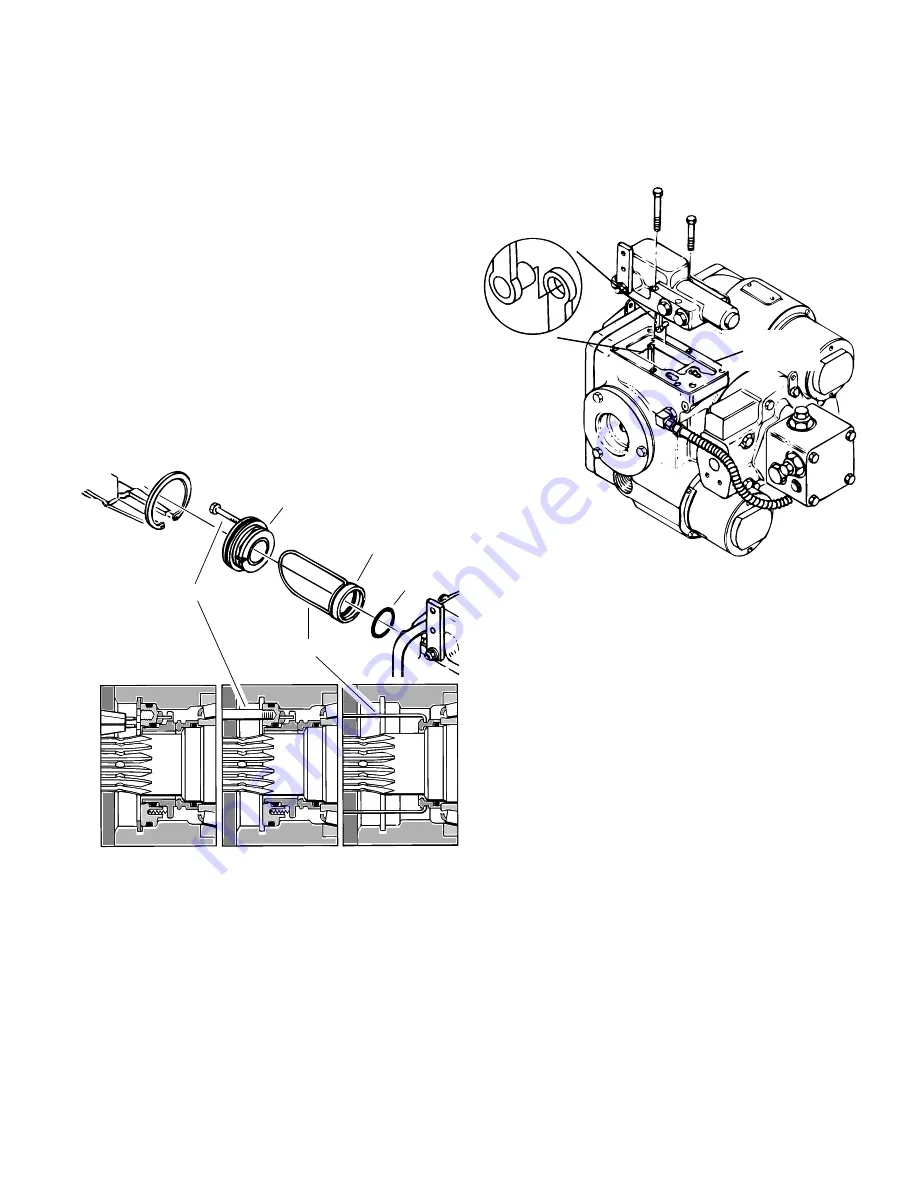
Figure 8
Pulling Tool
O-ring
Rotating Seal
Stationary Seal
Bolt
3 Using a retaining ring pliers remove the retaining ring.
4 Screw a 3 in. X 1/4-20 bolt into the threaded hole in
the stationary seal. Pull on the bolt to remove the seal.
5 Use the special pulling tool, Owatonna Tool Co. P/N
CAS 1844, to remove the rotating seal, see figure 8. If
the special tool is not available pull out the rotating seal
with a wire bent to the shape of the puller.
Note: Detailed drawings of all special tools are given in
the back of this manual.
6 Remove the o-ring; it will either be in the rotating seal
or on the shaft.
7 Remove the six hex head bolts that hold the control
valve to the motor.
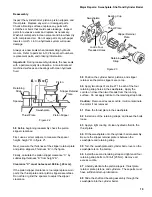
8 Lift the control valve away from the motor and
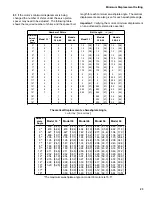
disengage the feedback linkage, see figure 9.
9 Remove the control valve gasket.
10 Inspect the control valve: Start by thoroughly
flushing the control valve with clean solvent. Then blow
it dry with compressed air. Be sure to blow through all of
the control valve’s internal passages.
Inspect the control valve linkage. Move the control lever
back and forth; it should move freely without binding.
There should be no free play in the feedback link or
control lever.
Check the control valve orifice; if it is plugged after
flushing replace it.
Feedback
Linkage
Control Valve
Gasket
Figure 9
Major Repairs: Shaft Seal and Control Valve
Summary of Contents for 1 Series
Page 31: ...31 Notes...


