IOM 53 3/4-4 10/2013
REV B.
Page 2 of 6
Eaton Hydraulics LLC, Filtration Division, 44 Apple Street, Tinton Falls, NJ 07724, www.filtration.eaton.com, Phone732-212-4700
Model 53BTX Duplex Strainer
, Sizes ¾” – 4”
RECEIVING, HANDLING, AND INSPECTION
1.
Unpack the strainer and inspect for damage occurring
during transit. Report damage to the carrier. If the strainer
is not installed immediately, see “
Storage”
instructions.
2.
Remove any preservatives with solvent-dampened cloths.
Exercise care when using solvent and follow solvent
manufacturer’s instructions.
3.
Verify that the rating of the strainer is greater than or
equal to the maximum pressure and temperature of the
installation.
4.
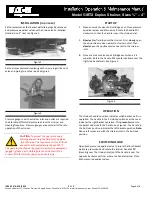
Open each basket well cover by turning the eye nut
counterclockwise to end of studs. Lift cover up by the tabs
until cover is free of basket well and rotate cover
counterclockwise, clearing the basket well.
5.
Remove all flange or nozzle protectors. Check the inside of
the body for any foreign or loose material that could be
carried downstream when fluid is introduced into the
strainer. Install the strainer baskets. Reset the covers by
reversing procedure above. To tighten, turn eye nuts
clockwise until the cover is seated and secured at the top
of the basket well.
6.
The cover to basket handle contact holds the baskets in
place. If the basket handle is not in contact with the cover,
bend the handle to a higher position to insure greater
compressions when cover is seated.
STORAGE
Replace protective wrap, flange protectors etc. that may have
been removed during receiving, handling and inspection. Store
the strainer in a clean, dry environment.
INSTALLATION
CAUTION:
Before installation, review the
application and chemical compatibility of the
process fluid to all the materials of construction
and components of the strainer.
INSTALLATION (
CONTINUED
)
1.
Remove protective wraps, caps, plugs etc. before installing
the strainer. Be sure to inspect cover gasket or O-ring for
possible damage and replace as required. Position the
strainer in the pipeline so that the fluid enters the
connection marked “IN” or “INLET.”
CAUTION:
To lift flanged duplex strainers, put
slings under the inlet and outlet connections and
secure above strainer. To lift duplex strainers
with threaded connections, put slings under the
center body section and secure above strainer.
2.
Be sure sufficient clearance is provided for easy opening of
the cover and removal of the basket. Refer to the Sales
Drawing for removal clearances. Support the strainer to a
firm foundation by using the footpads. Refer to sales
drawing for footpad layout.
3.
Connect the strainer to the pipeline. On flanged strainers,
be sure to use the same type of flange faces.
Do not bolt a
raised face flange to a flat face flange.
Be sure flange
gaskets are in place and fasteners are tight.
4.
On threaded strainers with other line connections, use
standard piping practice when installing the strainer.
CAUTION:
Duplex strainers are not designed to
be anchor supports in the piping line. Be sure to
properly support process piping on both sides of
the strainer. Use care to prevent piping forces
and movements from acting on the strainer connections.
Damage may occur to the strainer if improperly connected.


