4
Technical Application Note
September 2014 www.eaton.com
The example used in this procedure assumes that the
IP address of the 615M is “192.168.1.52”, and that you want
NMS to generate a warning notification if the RSSI reaches
–100 dBm and a critical notification if the RSSI reaches
–110 dBm. You can change these settings at any time.
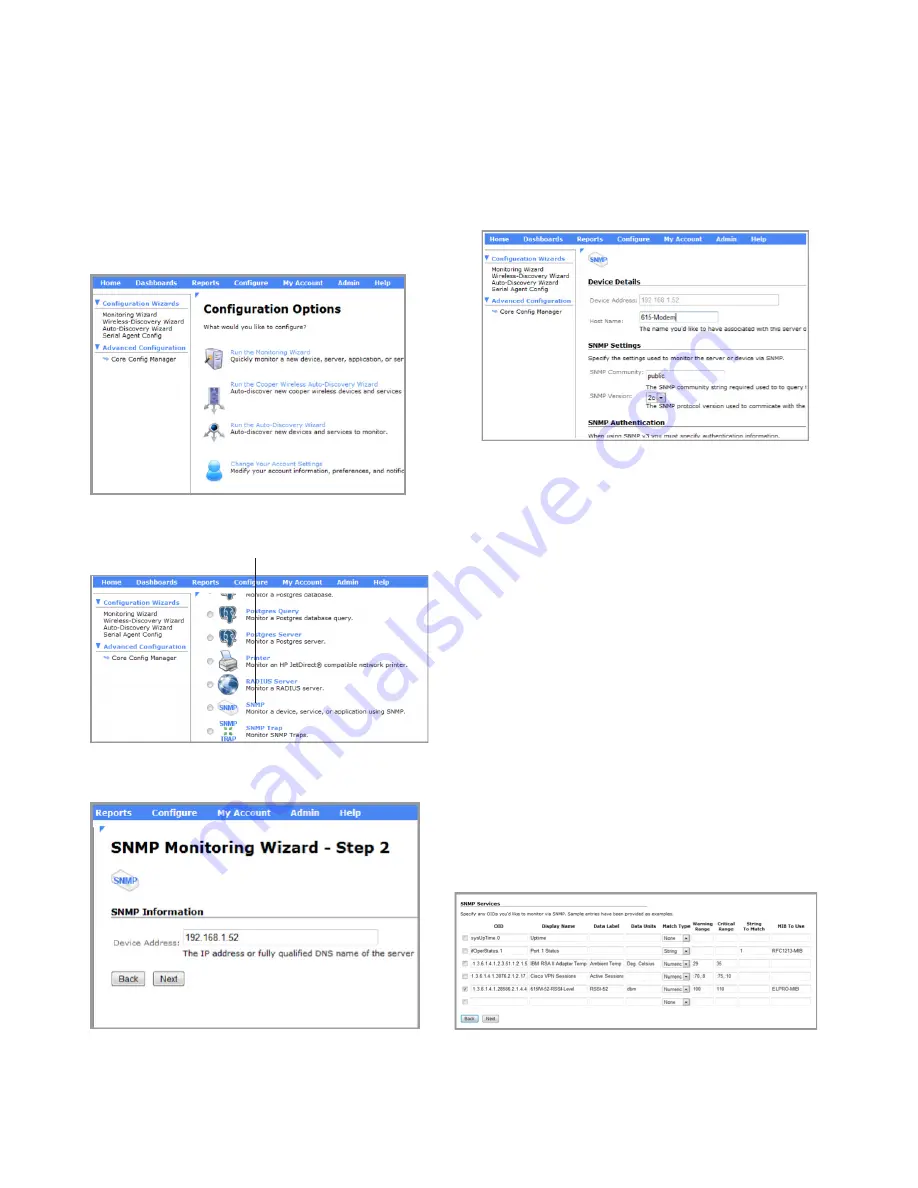
1. On the NMS screen, open the Configure page.
2. Click “Run the Monitoring Wizard”.
3. Click SNMP, and then scroll to the bottom of the page
and click Next.
SNMP
4. Check that the device address is the IP address of the
615M you are currently configuring, and then click Next.
5. Under Device Details, type a name for the 615M host
in the Host Name field.
Create a name that you can easily identify when you
view the system map. For example, 615M-52-<site
name>.
6. Under SNMP Settings, make sure that the SNMP
Community, and SNMP Version settings match what
you configured when you set up the 615M to enable
SNMP earlier in this document.
7. Under SNMP Services, enter the following information:
•
OID: the object identifier for the service. For RSSI,
the OID is “.1.3.6.1.4.1.28586.2.1.4.4.0”.
•
Display Name: enter the name of the service as it
appears in the Service Status table.
•
Data Label: enter “RSSI”.
•
Data Units: the units of measurement to be used for
the monitoring test. Enter “dBm”.
•
Match Type: select “Numeric”.
•
Warning Range: set the RSSI threshold that will
trigger a warning notification. Enter the threshold
as a positive value. For example, to specify an RSSI
threshold of “–100”, you would enter “100”.
•
Critical Range: set the threshold that will trigger a
critical notification.
•
String To Match: leave this field blank. It is not
needed for RSSI monitoring.
•
MIB To Use: the MIB to be referenced. Enter
“ELPRO-MIB” (this is the name for 615M OID
entries).


