4.
Route the wiring to the terminal block.
a.
Remove the small parts from the knockout in the right side plate.
b.
Route the wiring to the wiring access, see Figure
. Secure the
wiring to the four mounting clips provided using Zip ties.
c.
Reinstall the cover panels.
d.
Install the power terminal cover up and down sides using the provided
hardware.
5.
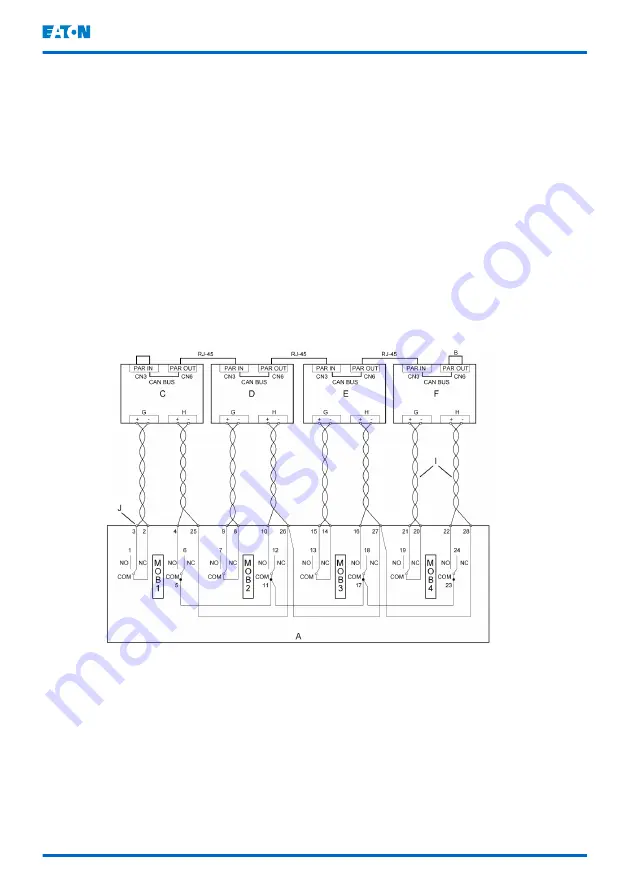
Route and install the RJ-45 Controller Area Network (CAN) cables between
for wiring information.
6.
Route and install pull chain wiring (twisted wires 0.5-2.0 mm2) between the
UPS cabinets and cabinet MOBs. See Figures
and
information.
7.
If you are wiring MiniSlot connections, proceed to Section
8.
Install the power terminal cover right and left sides using the provided
hardware.
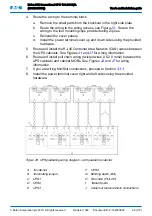
Figure 25. UPS paralleling wiring diagram – with parallel tie cabinet
A Tie cabinet
F
UPS 4
B Terminating jumper
G Building alarm (BA)
C UPS 1
H Pull chain (PUL CH)
D UPS 2
I
Twisted pairs
E UPS 3
J
Customer terminal block connections
Eaton 93E Generation 2 UPS 100-200 kVA
(380/400/415V)
User's and installation guide
©
Eaton Corporation plc 2019. All rights reserved.
Revision: 002
Document ID: P-164000848
66 (118)


