62
4–20kVA Users Guide P-164000669 4–20kVA Users Guide P-164000669—Rev 09
•
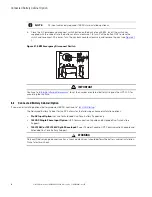
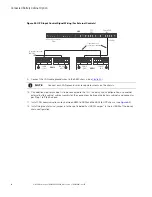
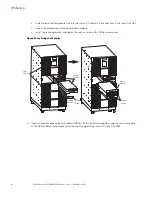
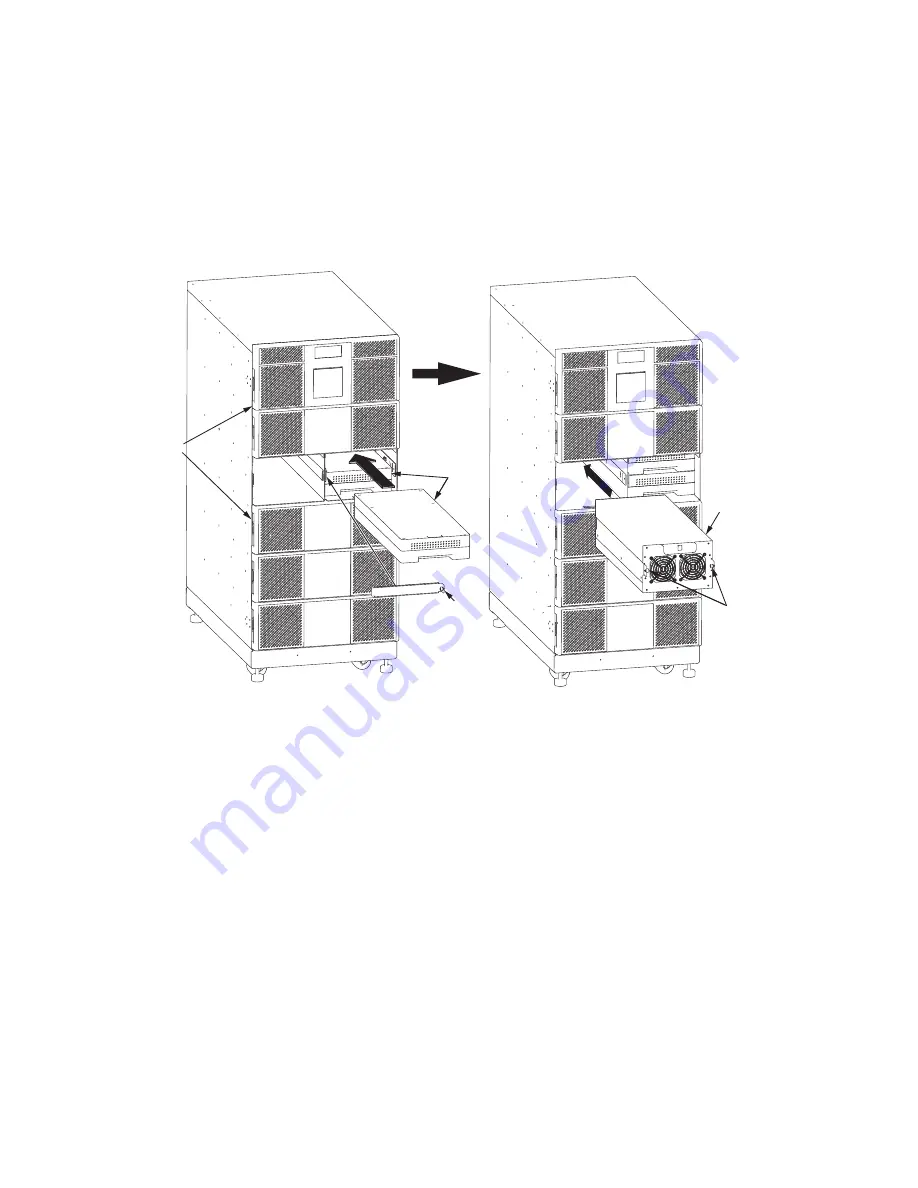
Slide the lower battery module fully into the slot until it contacts the connections in the rear of the slot.
•
Repeat the procedure with the upper battery module.
•
Install the retaining bracket and tighten the captive screw with a Phillips screwdriver.
Figure 53. Inserting the Modules
Captive
Screws
Power
Module
Front
Covers (6)
Retaining
Bracket
Battery
Modules
Captive
Screw
5.
If you installed the optional battery cabinets (EBMs), install the battery modules using the same procedure
as the UPS modules. If applicable, install the super charger in the lower left slot of the EBM.
Summary of Contents for 9PXM
Page 1: ...p n P 164000669 Revision 09 Eaton 9PXM UPS 4 20kVA Users Guide Eaton 9PXM UPS ...
Page 4: ......
Page 8: ...viii 4 20kVA Users Guide P 164000669 4 20kVA Users Guide P 164000669 Rev 09 Table of Contents ...
Page 12: ...xii 4 20kVA Users Guide P 164000669 4 20kVA Users Guide P 164000669 Rev 09 List of Figures ...
Page 14: ...xiv 4 20kVA Users Guide P 164000669 4 20kVA Users Guide P 164000669 Rev 09 List of Tables ...
Page 22: ...8 4 20kVA Users Guide P 164000669 4 20kVA Users Guide P 164000669 Rev 09 Physical Features ...
Page 110: ...96 4 20kVA Users Guide P 164000669 4 20kVA Users Guide P 164000669 Rev 09 Communication Slots ...
Page 130: ...P 16400066909 P 164000669 09 ...

