background image

Technical Data 

PR202-50-502-22

Effective June 2017 
Supersedes April 2016

CF2000 System

Installation Manual

Summary of Contents for CF2000

Page 1: ...Technical Data PR202 50 502 22 Effective June 2017 Supersedes April 2016 CF2000 System Installation Manual...

Page 2: ...36 View Disabled Address 37 View Disabled Zone 39 View Disabled I O 40 View Log 41 Operations Soft Reset 42 Operations Evacuate 43 Operations Silence Alarms 44 Operations Lamp Test 45 Operations Weekl...

Page 3: ...System Notice The operating system of the CF2000 may be revised as a result of enhancements to the system software or hardware An updated issue of this manual is available on request The current issue...

Page 4: ...for rear or top cable entries It is available as a two loop panel A comprehensive range of ancillary devices is available to operate with the CF2000 panel including Optical photo thermal and heat sen...

Page 5: ...all the relevant requirements of BS5839 part 1 2002 Installation planning is simplified by the fact that every address able CF2000 device contains an integral short circuit isolator Care must be taken...

Page 6: ...CAS381 Addressable Wall Sounder 105H x 105W x 95D 654013FULL 0066X CAS381WP Addressable Weatherproof Wall Sounder 108H x 109W x 103D 654041FULL 0230 CAS381AU Addressable Australian Wall Sounder 105H x...

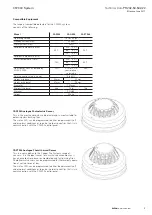
Page 7: ...base 86g 78g 76g Material PC ABS Colour White CAP320 Analogue Photoelectric Sensor This is the most commonly used detector and is most suitable for detecting slow burning fires The status LED can be p...

Page 8: ...el CAB300 Analogue Sensor Base Short Circuit Isolators Each of the sensors in his range contain an integral short circuit isolator which operates between the VE COM IN terminal and the VE COM OUT term...

Page 9: ...of loop powered sounders and beacons are available to operate with the CF2000 consisting of a combined sounder base with a maximum output of 95 dB A a standalone sounder with a maximum output of 100 d...

Page 10: ...sembly After the body has been clicked into place and connected a sensor or front cover is then added to complete a very simple quick and neat installation The cover enables the CAS380 to be used as a...

Page 11: ...as areas of high ambient noise or buildings which are used by people who are hard of hearing Dedicated Stand Alone Sounders Stand alone sounders are ideal for applications where greater sound outputs...

Page 12: ...r open and short circuits A specific resistance is required to activate an alarm condition fully open or short circuit conditions are monitored and generate a system fault signal Inputs are suitable f...

Page 13: ...o accept a Zener barrier and a zone of intrinsically safe detectors End of line for this zone now becomes 6K8 and the diode in the detector base must be removed Shop Unit Interface MSU840 accepts a zo...

Page 14: ...e area to be covered by a single spur zone 4 Way Sounder Circuit Controller CSC354CPR provides power for 4 separately controllable conven tional sounder circuits each circuit can be separately program...

Page 15: ...ogue fire detec tion panels It is suitable for interfacing a zone of up to 20 conven tional Cooper detectors onto a Cooper analogue fire panel It will operate with any Cooper conventional detector in...

Page 16: ...uitable for operation between 18V and 28V 2 They are polarised and suppressed 3 The total alarm load is less than the rating of the panel Alarm Power Interface Note It is possible to use devices outsi...

Page 17: ...fy the installation and commissioning processes Once the system has been installed and the autolearn menu selected the CF2000 control panel will automatically scan the detection loops and allocate eac...

Page 18: ...s Number of Batteries 2 Manufacturer YUASA NP7 12 Capacity 7Ah Battery Fuse 6 3A Anti Surge F4 Maximum battery current 3 0A Standby current mA 125 2 loops Maximum Charging Current to the Batteries 0 6...

Page 19: ...x Load 24V 1A Fuse PTC5 1 1A polyswitch Auxiliary 24V Supply Nominal Voltage 24V 10 Fuse PTC3 300 mA polyswitch Maximum current 30 mA This output is not to be used for Fire protecting equipment or Fir...

Page 20: ...ition this output remains energised until the fire alarm is reset Ensure the polarity of the connections is observed at all times and end of line resistors 6K8 5 are fitted to ensure correct operation...

Page 21: ...to the wall using the drill template provided Do not drill through the panel to the wall as dust will contaminate the circuitry Installation Guide Never carry out insulation tests on cables connected...

Page 22: ...BS5839 part 1 2002 The electronic components within the fire panel are Static Sensitive Do not touch the electronics directly Mounting the Backbox The CF2000 can be flush mount or surface mounted 1 F...

Page 23: ...23 Technical Data PR202 50 502 22 Effective June 2017 CF2000 System EATON www eaton com System Wiring Figure 3 shows a typical system wiring arrangement Figure 3 Typical System Wiring diagram...

Page 24: ...2017 CF2000 System EATON www eaton com Commissioning CF2000 Up downloading using PC software The PC Software enables the address location text device type and any comments to be downloaded to the CF2...

Page 25: ...ndition Used in conjunction with isolates Day Night Option enables day night mode on compatible heat and opto heat detectors Optical Heat Mode switches between heat or optoheat mode Heat Mode switches...

Page 26: ...The output of a device when triggered can be delayed based on a user defined value in minutes This programming option is enabled when a value other than zero is entered inside the Delay window Delay O...

Page 27: ...on Each panel output can be assigned a unique list of zones derived from the zones available on the loop To activate this output two unique zones from this list have to be in fire Alternatively any zo...

Page 28: ...28 Technical Data PR202 50 502 22 Effective June 2017 CF2000 System EATON www eaton com Panel Fault Finding...

Page 29: ...e device in question Full Protocol Format With the command bits set for the Normal command and the MSB of the three mode bits set at 1 the long version of the Normal communications can be sent to any...

Page 30: ...ral Disable Monitors panel for disablements Report Fault to Service Dept Test Supervisor Engineer is testing the system Check with System Supervisor Delay Active Part of the system has been disabled C...

Page 31: ...tem EATON www eaton com System Healthy CF2000 is operated via an 8 button keypad The default healthy screen is shown below From this screen all the panels functions can be operated Press any key to pr...

Page 32: ...s screen is shown below The events screens are accessed from the healthy screen by first pressing any button You will then be prompted to enter the passcode which will show the screen below by default...

Page 33: ...22 Effective June 2017 CF2000 System EATON www eaton com Fire Event The Fire screen is shown below From this screen all the panels functions can be operated Press any key to prompt the passcode scree...

Page 34: ...en is accessed as shown below The events screens are accessed from the healthy screen by first pressing any button You will then be prompted to enter the passcode which will show the screen below by d...

Page 35: ...reen is accessed as shown below The events screens are accessed from the healthy screen by first pressing any button You will then be prompted to enter the passcode which will show the screen below by...

Page 36: ...en is accessed as shown below The events screens are accessed from the healthy screen by first pressing any button You will then be prompted to enter the passcode which will show the screen below by d...

Page 37: ...s screen is accessed as shown below The events screens are accessed from the healthy screen by first pressing any button You will then be prompted to enter the passcode which will show the screen belo...

Page 38: ...38 Technical Data PR202 50 502 22 Effective June 2017 CF2000 System EATON www eaton com View Disabled Address continued Figure 17 View Disabled Address continued...

Page 39: ...screen is accessed as shown below The events screens are accessed from the healthy screen by first pressing any button You will then be prompted to enter the passcode which will show the screen below...

Page 40: ...screen is accessed as shown below The events screens are accessed from the healthy screen by first pressing any button You will then be prompted to enter the passcode which will show the screen below...

Page 41: ...n is accessed as shown below The events screens are accessed from the healthy screen by first pressing any button You will then be prompted to enter the passcode which will show the screen below by de...

Page 42: ...essed from the healthy screen by first pressing any button You will then be prompted to enter the passcode which will show the events screen by default Press the Scroll Down button until the Soft Rese...

Page 43: ...ssed from the healthy screen by first pressing any button You will then be prompted to enter the passcode which will show the events screen by default Press the Scroll Down button until the Evacuate s...

Page 44: ...accessed from the healthy screen by first pressing any button You will then be prompted to enter the passcode which will show the events screen by default Press the Scroll Down button until the Silen...

Page 45: ...cessed from the healthy screen by first pressing any button You will then be prompted to enter the passcode which will show the events screen by default press the Scroll Down button until the LampTest...

Page 46: ...cessed from the healthy screen by first pressing any button You will then be prompted to enter the passcode which will show the events screen by default Press the Scroll Down button until the WeeklyTe...

Page 47: ...ning screen is accessed as shown below The events screens are accessed from the healthy screen by first pressing any button You will then be prompted to enter the pass code which will show the screen...

Page 48: ...en is accessed as shown below The events screens are accessed from the healthy screen by first pressing any button You will then be prompted to enter the passcode which will show the screen below by d...

Page 49: ...reen is accessed as shown below The events screens are accessed from the healthy screen by first pressing any button You will then be prompted to enter the pass code which will show the screen below b...

Page 50: ...reen is accessed as shown below The events screens are accessed from the healthy screen by first pressing any button You will then be prompted to enter the pass code which will show the screen below b...

Page 51: ...en is accessed as shown below The events screens are accessed from the healthy screen by first pressing any button You will then be prompted to enter the passcode which will show the screen below by d...

Page 52: ...reen is accessed as shown below The events screens are accessed from the healthy screen by first pressing any button You will then be prompted to enter the pass code which will show the screen below b...

Page 53: ...een is accessed as shown below The events screens are accessed from the healthy screen by first pressing any button You will then be prompted to enter the passcode which will show the screen below by...

Page 54: ...een is accessed as shown below The events screens are accessed from the healthy screen by first pressing any button You will then be prompted to enter the passcode which will show the screen below by...

Page 55: ...creen is accessed as shown below The events screens are accessed from the healthy screen by first pressing any button You will then be prompted to enter the pass code which will show the screen below...

Page 56: ...creen is accessed as shown below The events screens are accessed from the healthy screen by first pressing any button You will then be prompted to enter the pass code which will show the screen below...

Page 57: ...LED screen is accessed as shown below The events screens are accessed from the healthy screen by first pressing any button You will then be prompted to enter the pass code which will show the screen b...

Page 58: ...s screen is accessed as shown below The events screens are accessed from the healthy screen by first pressing any button You will then be prompted to enter the pass code which will show the screen bel...

Page 59: ...en is accessed as shown below The events screens are accessed from the healthy screen by first pressing any button You will then be prompted to enter the passcode which will show the screen below by d...

Page 60: ...een is accessed as shown below The events screens are accessed from the healthy screen by first pressing any button You will then be prompted to enter the pass code which will show the screen below by...

Page 61: ...creen is accessed as shown below The events screens are accessed from the healthy screen by first pressing any button You will then be prompted to enter the passcode which will show the screen below b...

Page 62: ...62 Technical Data PR202 50 502 22 Effective June 2017 CF2000 System EATON www eaton com Appendix System Wiring A typical wiring arrangement is shown in Figure 41 Figure 41 Typical System Wiring...

Page 63: ...nded 3 Suitable for mounting to mounting boxes with 50 80mm fixing centres General If difficulty is experienced when mounting the sensor this may be due to the following 1 Wiring causing an obstructio...

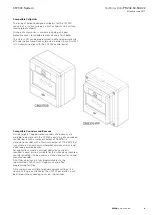
Page 64: ...64 Technical Data PR202 50 502 22 Effective June 2017 CF2000 System EATON www eaton com Call Point CBG370 CBG370 S CBG370 WP Figure 43 Call Point...

Page 65: ...Cable Size type 0 5 2 5mm FIRETUF FP200 or MICC Standby current 320 uA Operating temperature 10 to 55 degrees C 95 RH Sound output 3dB Low volume 84dB 4mA set by panel Medium volume 92dB 8mA High volu...

Page 66: ...System EATON www eaton com Loop powered beacon CAB382 Connection Details Earth screen of cable to be continuous between beacons Figure 45 WARNING DO NOT USE HIGH VOLTAGE TESTERS IF ANY EQUIPMENT IS C...

Page 67: ...e rear gasket fits underneath the base and the sounder gasket fits inside the base Connect the device as shown in Figure 46 WARNING DO NOT USE HIGH VOLTAGE TESTERS IF ANY EQUIPMENT IS CONNECTED TO THE...

Page 68: ...ll the device 1 Drill required holes for the cable gland fixing 2 Drill out the required fixing holes 3 Fix to mounting surface using two suitable screws WARNING DO NOT USE HIGH VOLTAGE TESTERS IF ANY...

Page 69: ...and pass the wires into it 4 Connect the unit according to the diagram below Note No addressing of the interface is required See control panel operation for details Figure 48 shows the standard connec...

Page 70: ...le entries in the surface mounting backbox 3 Fit the back box in position and pass the wires into it 4 Connect the unit according the diagram in Figure 49 Note N No addressing of the interface is requ...

Page 71: ...Figure 50 Note N No addressing of the interface is required See control panel operation for details Figure 50 Zone Monitor Unit CZMU352 Notes N 1 This unit can only be used with CDBB300 detector base...

Page 72: ...e FIRETUF FP200 MICC Note N No addressing of the interface is required See control panel operation for details There are no serviceable parts so no maintenance procedures apply Figure 51 Standard conn...

Page 73: ...Figure 52 Note N No addressing of the interface is required See control panel operation for details Figure 52 Shop Monitor Unit MSU840 Notes N 1 This unit can only be used with CDBB300 detector base...

Page 74: ...addressable panel loop Without this unit the self addressing features of the system will not function correctly 2 No addressing of the interface is required See control panel operation for details Th...

Page 75: ...age the circuit board 3 Connect the unit according to the diagram below Note N No addressing of the interface is required See control panel opera tion for details This unit requires a permanent 230V A...

Page 76: ...s required See control panel operation for details There are no serviceable parts so no maintenance procedures apply Figure 55 Standard connections MIU872 1 This unit can only be used with Cooper FXN5...

Page 77: ...igure 56 3 Recommended Cable Type FIRETUF FP200 MICC Note N No addressing of the interface is required See control panel operation for details There are no serviceable parts so no maintenance procedur...

Page 78: ...rolled conditions using specialised equipment No attempt should be made to repair any batteries they should be treated as disposable when they have outlived their use Batteries must be disposed of in...

Page 79: ...utput to fire alarm routing equipment Output to automatic fire protection equipment type A Delays to outputs Dependencies on more than one alarm signal Type C Alarm counter Output to fault routing equ...

Page 80: ...Eaton uk com Tel 44 0 1302 303 350 www cooperfire com www eaton com Made in the UK Eaton Industries Manufacturing GmbH Electrical Sector EMEA Route de la Longeraie 7 1110 Morges Switzerland Eaton eu...

Reviews: