CAUTION
Bushing damage . The split aluminum ring must be
replaced if damaged . The clamping ring cushions and
distributes the pressure between the bushing flange and
the bushing . If bushing clamps are assembled without a
new clamping ring, the bushing may be damaged when
clamp hardware is tightened .
T234 .1
4. Install new bushing assembly. Position a new bushing
gasket between bushing flange and head casting.
5. Position aluminum clamping ring, so split will be
centered between two clamping bolts.
6. Replace bushing clamps and tighten cap screws evenly,
a little at a time, to 6-10 lbs-ft (8-13 Nm).
CAUTION
Dielectric failure, bushing damage . To prevent gasket
leaks or bushing damage, clamping force must be
applied gradually and equally in rotation to each bolt .
If the clamping force is not evenly applied, seal leakage
can result, compromising the dielectric capabilities of the
recloser and can cause possible personal injury . Unequal
clamping force can cause bushing breakage .
T235 .2
7. Reconnect bushing lead and tank recloser.
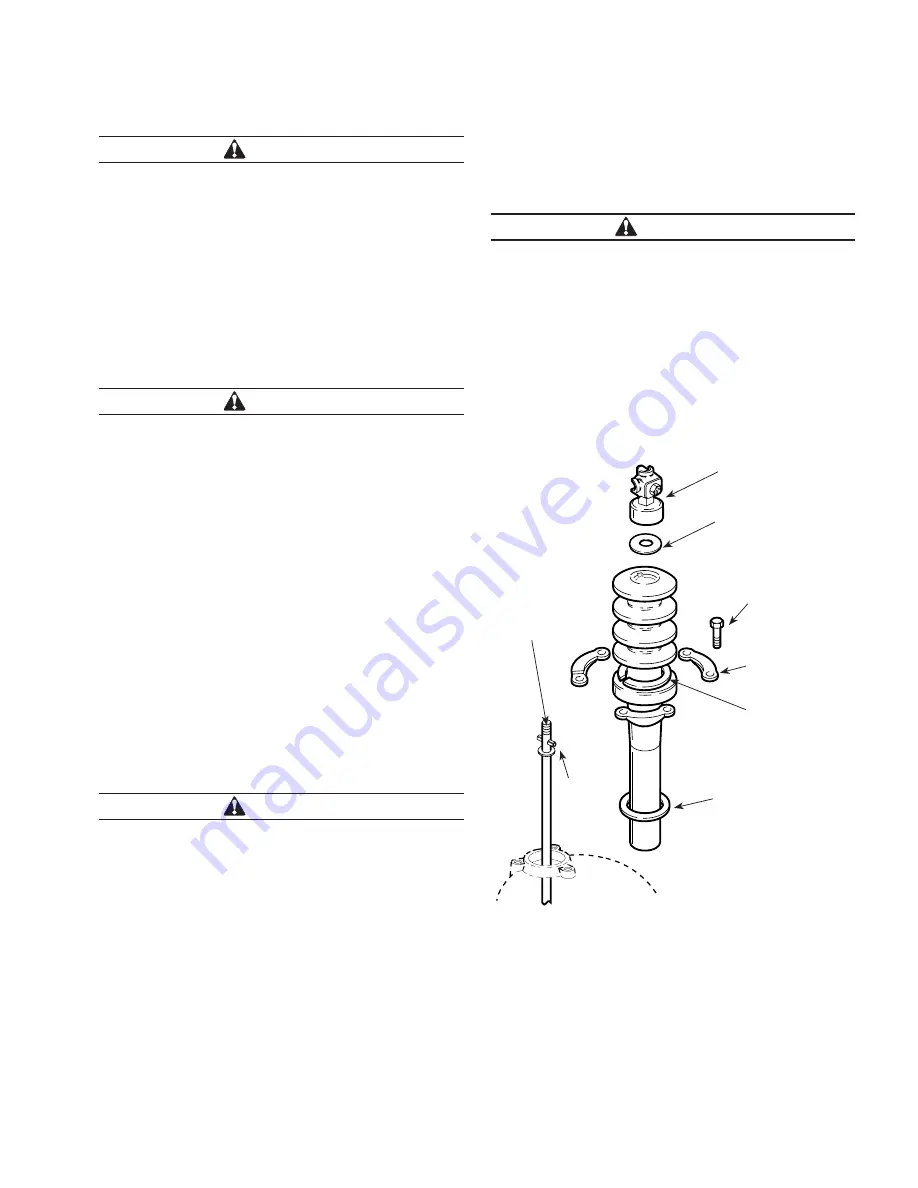
Bushing porcelain replacement, recloser tanked,
Type V4L only
1. Unscrew bushing terminal, discard terminal gasket,
see Figure 3.
2. Remove three hex-head cap screws and bushing
clamps that secure bushing porcelain to head
casting. Lift bushing porcelain from head, discard
bushing gasket.
3. Twist aluminum clamping ring and remove from
old bushing porcelain. If ring is in good condition,
it may be reused. If ring is damaged it must
be replaced.
CAUTION
Bushing damage . The split aluminum ring must be
replaced if damaged . The clamping ring cushions and
distributes the pressure between the bushing flange and
the bushing . If bushing clamps are assembled without a
new clamping ring, the bushing may be damaged when
clamp hardware is tightened .
T234 .1
4. Install new bushing porcelain. Position a new
bushing gasket between bushing flange and head
casting. Turn porcelain until locking key (roll pin
through bushing lead) is properly seated.
5. Position aluminum clamping ring, so split will be
centered between two clamping bolts.
6. Replace bushing clamps and tighten cap screws
evenly, a little at a time, to 6-10 lbs-ft (8-13 Nm).
CAUTION
Dielectric failure, bushing damage . To prevent gasket
leaks or bushing damage, clamping force must be
applied gradually and equally in rotation to each bolt .
If the clamping force is not evenly applied, seal leakage
can result, compromising the dielectric capabilities of the
recloser and can cause possible personal injury . Unequal
clamping force can cause bushing breakage .
T235 .2
7. Install new terminal gasket.
8. Apply a very small amount of petroleum jelly to
the knurled inside surface of the bushing terminal.
Screw terminal onto lead and tighten to 20-25 lbs-ft
(27-34 Nm).
Lower bushing
gasket
Bushing clamps
Locking
key
Bushing
rod
Split aluminum ring
Hex head
capscrews
Bushing gasket
Bushing terminal
Figure 3 . Bushing porcelain replacement
Types V4L and V4E single-phase maintenance instructions
7
MAINTENANCE INSTRUCTIONS
MN280055EN May 2017


