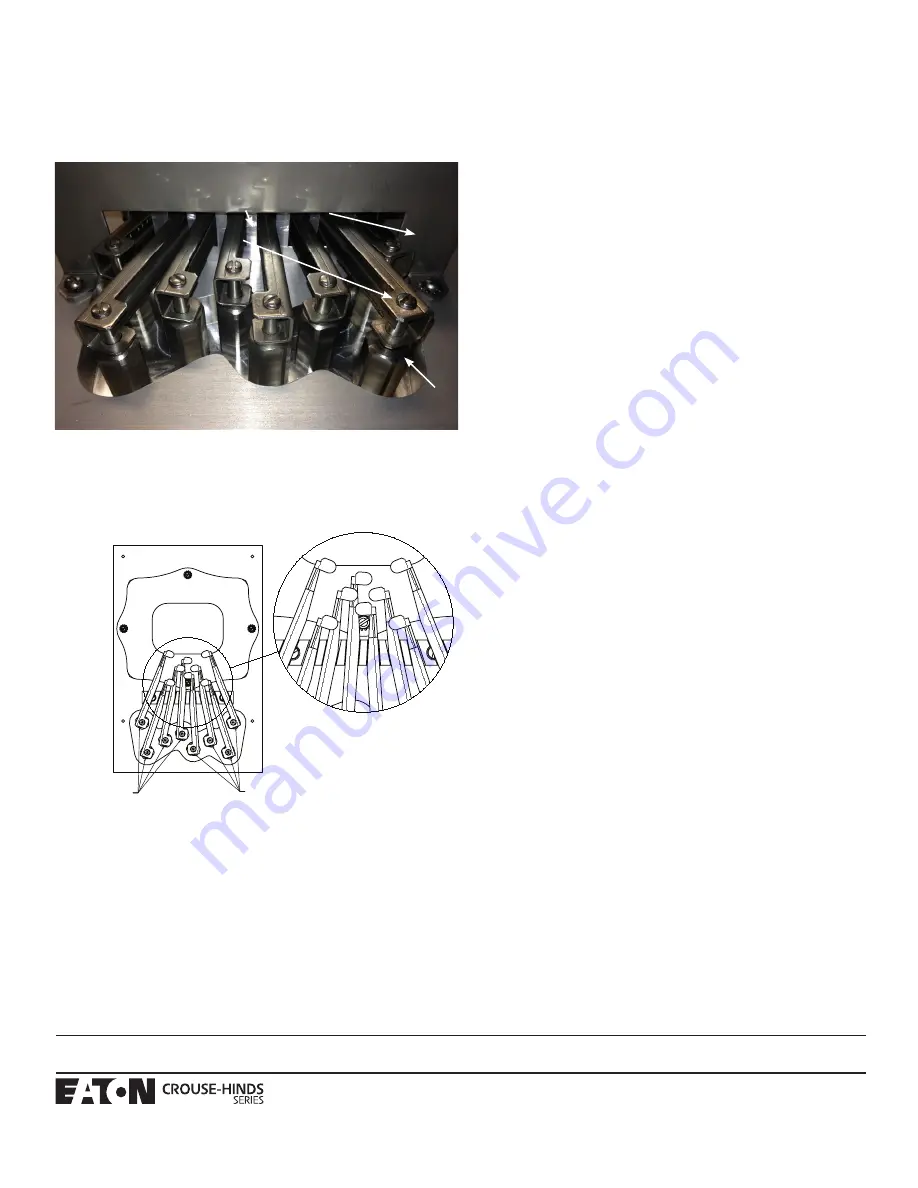
8.4 PUSHBUTTON OPERATOR KIT
ACE KIT4: pushbutton operator, finger and hardware (8 pc.)
8.4.1 PUSHBUTTON INSTALLATION INSTRUCTIONS
1. Loosen and remove four (4) screws and lock washers from keypad bracket.
Remove keypad and bracket.
Pushbutton
assembly
Keypad fingers
Keypad bracket
All statements, technical information and recommendations contained herein are based on information and tests we believe to be reliable. The accuracy or completeness thereof are not guaranteed. In
accordance with Eaton’s Crouse-Hinds Division’s “Terms and Conditions of Sale,” and since conditions of use are outside our control, the purchaser should determine the suitability of the product for his
intended use and assumes all risk and liability whatsoever in connection therewith.
Eaton’s Crouse-Hinds Division
IF 1619
1201 Wolf Street, Syracuse, New York 13208 • U.S.A.
Revision 4
Copyright
©
2018
Revised 05/18
Supersedes 01/14
2. Loosen and remove eight (8) screws and lock washers from keypad fingers.
Remove fingers.
3. Loosen and remove pushbutton assemblies.
4. Apply Eaton’s Crouse-Hinds series STL lubricant lightly to the external threads of
the pushbutton assembly.
5. Install new pushbutton assemblies and tighten wrench tight.
6. Re-install keypad fingers and orient fingers as shown in Detail A.
7. Install lock washers and screws retaining keypad fingers and tighten wrench
tight.
8. Re-install keypad bracket and fasten using existing hardware. Tighten screws
wrench tight.
DETAIL A
4X
PUSHBUTTON FINGER (LEFT)
0208611-1
4X
PUSHBUTTON FINGER (RIGHT)
0208611-2
Finger guide
block


