FP-5000
IL17569C
Page 7-3
Effective Date: 12/05
Effective Date: 12/05
For more information visit:
www.eatonelectrical.com
Page 7-3
7.4 Voltage Checks
The voltage inputs should be checked prior to closing the breaker.
The voltage inputs should be confirmed by looking at either the
phasor voltage angles or looking at the voltage sequential compo-
nents to make sure that the phase rotation and polarity is being
measured properly.
7.5 Draw-Out Checks
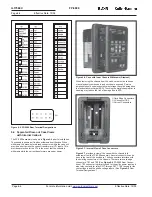
The drawout design consists of an “outer chassis,” which is mounted
into the distribution gear or control panel and then wired into the
system. The operational electronic hardware is assembled into a
separable “inner chassis,” which may be inserted or withdrawn for quick
replacement. The inner chassis makes electrical contact with the
wired outer chassis by means of engaging contacts in the back of
the case. The contacts providing the current transformer signals
short upon withdrawal of the chassis (make-before-break). The
remaining contacts remain or become open.
The outer chassis frame has provisions for a wire seal loop that must
be cleared for extraction of the inner chassis. Once this impediment
is removed, the top and bottom handles must be depressed
simultaneously to release internal latches and pull out the inner
chassis. It is suggested that an individual’s thumbs be placed
against the outer chassis frame while the fingers grasp the front
overlay bezel using the finger hold space provided by the release
depression. Hot removal and replacement of the inner chassis on
activated circuits is possible. However depending on the design of
the alarm circuit the healthy alarm may be engaged.
On removal of the inner chassis verify that all the CT connections
have shorted. Inspect for obvious damage to the connectors both in
the Outer Chassis and at the rear of the Inner Chassis. Carefully
reinsert the chassis, being careful to engage the latches at the sides
into the slots. As the inner chassis is pushed into the outer chassis
the outer frame will capture the latches causing the release handles
to pop in and out. When the inner chassis is fully inserted it should
be ~ flush with the outer chassis mounting frame. Verify that the FP-
5000 energizes and proper metering display is activated.
7.6 Trip Test with Built-in Function
The FP-5000 has a self-test function, which allows voltages and
currents, both rms and phasor values, to be applied to the internal
firmware in a simulation process. The unit can be placed in a trip or
no trip mode to verify coordination trip times, demonstrate tripping
and indicate trip times under user selected overload conditions.
Refer to Section 11.2.5.1.
7.7 Checks After Closing the Breaker
CAUTION
IT IS POSSIBLE TO GET A TRIP ON THE INITIAL CLOSING OF
THE BREAKER DUE TO MIS-PROGRAMMING AND WIRING
PROBLEMS AND ALL PRECAUTIONS SHOULD BE TAKEN IN
ANTICIPATION OF A TRIP EVENT.
CAUTION
THE BREAKER CONTROL CIRCUIT IS TO BE RECONNECTED.
AT THIS TIME THE LOAD(S) ASSOCIATED WITH THE APPLICA-
TION MAY BE STARTED. IT IS IMPORTANT TO ENSURE THAT
ALL SAFETY PRECAUTIONS ASSOCIATED WITH THE LOAD
EQUIPMENT AND THE ASSOCIATED MECHANISM BE TAKEN.
FAILURE TO DO SO CAN RESULT IN SERIOUS OR FATAL
INJURY AND/OR EQUIPMENT DAMAGE.
• Disconnect all control power from the system.
• Reconnect the breaker lead to FP-5000 trip relay terminals 116
and 118.
• Clear away any loose or foreign objects.
• Clear all personnel from the area of the breaker and loads.
• Turn on all control power.
• Make sure the FP-5000 green Operational LED is flashing on and
off, and that the display shows the normal Currents/Voltages
values.
• Follow any startup procedures for the load equipment.
• Close the breaker, the external Start Switch or contacts.
• Using the information supplied by the application engineer or
equipment manufacturer, verify that the breaker is operating
properly and the load is energized.
• With a load on the breaker, use a clamp-on type ammeter to
measure the ac current on each of the line phases.
• Verify that the IA, IB, and IC currents as indicated by the FP-5000
on the Default Monitor Page are within about 5% of the ammeter
values.
• Verify the voltage and current phase rotation and the polarity of
the wiring for correctness.
• If the CTs are far from the optimum ratio, errors may be larger. This
test is intended to show incorrectly set CT ratios or faulty wiring,
rather than precision of measurements.
• If the IX CT is connected, check the magnitude of IX. Consider the
cause of any anomalies. For instance, if ground current is being
measured, investigate the cause of any abnormal ground leakage
current flow.
• If a PowerNet data communications host is connected, upload an
oscillographic sample of the operating currents and voltages.
Review for inconsistencies or problems.

