16
User Manual
MN032006EN
Effective December 2017
415U Condor-long-range
wireless I/O and gateway
EATON
www.eaton.com
Configuration
The 415U-2 modules can be configured using the Windows
®
-based
Mesh and I/O Gateway Configuration Utility (CConfig), or via the
embedded Web-based management utility. The following section
shows how to connect to the device using the Windows
®
-based
Configuration Utility. To access the embedded webpages, refer to
the section “Configuring using the embedded Web Configuration
Utility” on
page 49
.
Connecting to the device using the Configuration Utility
On first connection, you must connect to the device through its USB
port. Once you have configured the device for the first time, you can
enable access through the Ethernet port and remotely through the
Wireless port
otee:
N
Before enabling the Ethernet Port or Wireless port for
Configuration access, read the section “Recommended secure hardening
guidelines” below.
Downloading and installing CConfig
The CConfig utility is provided as a zip file from the download
section of the Eaton website. Configuration of the 415U-2
module can be performed via USB or Ethernet connection, and all
appropriate USB drivers are installed during installation. If you have
a problem installing the drivers, you can install them manually using
Windows Device Manager.
•
Go to the Eaton website: www.eaton.com/wireless
•
Under Resources, click Technical Resources Library, and then click
ELPRO Configuration Software.
•
Download the zip file “415U Wireless I/O and Modem
Configuration” to your PC and extract the zip file.
•
Open the file “INST_CFG_CCconfig<version>.exe.” This runs the
Installation Wizard.
•
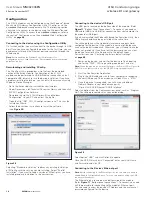
Follow the on-screen instructions to install the software
(see
Figure 28
).
Figure 28.
Selecting “Standard Installation” replaces any existing installation
of MConfig with the version you are installing. Select “Parallel
Installation” if you want to keep a version of MConfig that you have
installed previously in addition to the new version.
Connecting to the device’s USB port
The USB port is located on the bottom side of the module. (Refer
Figure 11
“Bottom Panel Connections”). To connect, you need an
USB cable (USB-A to USB-B) for connecting from your computer to
the module’s USB-B port .
If you have installed the Windows®-based Configuration Utility, then
USB drivers should have been installed at the same time.
You will need to know the credentials (username and password)
configured for the device. If the module is new out-of-the-box you
can use the default credentials. Otherwise, you will need to use the
values set previously. If you have lost the password, you can clear
the device to restore all settings back to the default values.
For instructions, see “Restoring the factory default settings”
on
page 68
.
1. Power on the device, and wait for the device to finish booting
and for the “PWR” LED to go solid green (about 1 minute).
otee:
N
When the module is new from the factory, the Power LED will go solid
RED. Once the radio Locale is set, the OK LED will go green after boot.
2. Start the Configuration Application
3. Plug in the USB cable and wait for your computer to recognize
the new USB device. The new device will identify as a “415U”.
4. Once the device is recognized, you will have an additional
Network Adapter in your device manager list
“Elpro 415U-2 USB Ethernet/ RNDIS Interface”
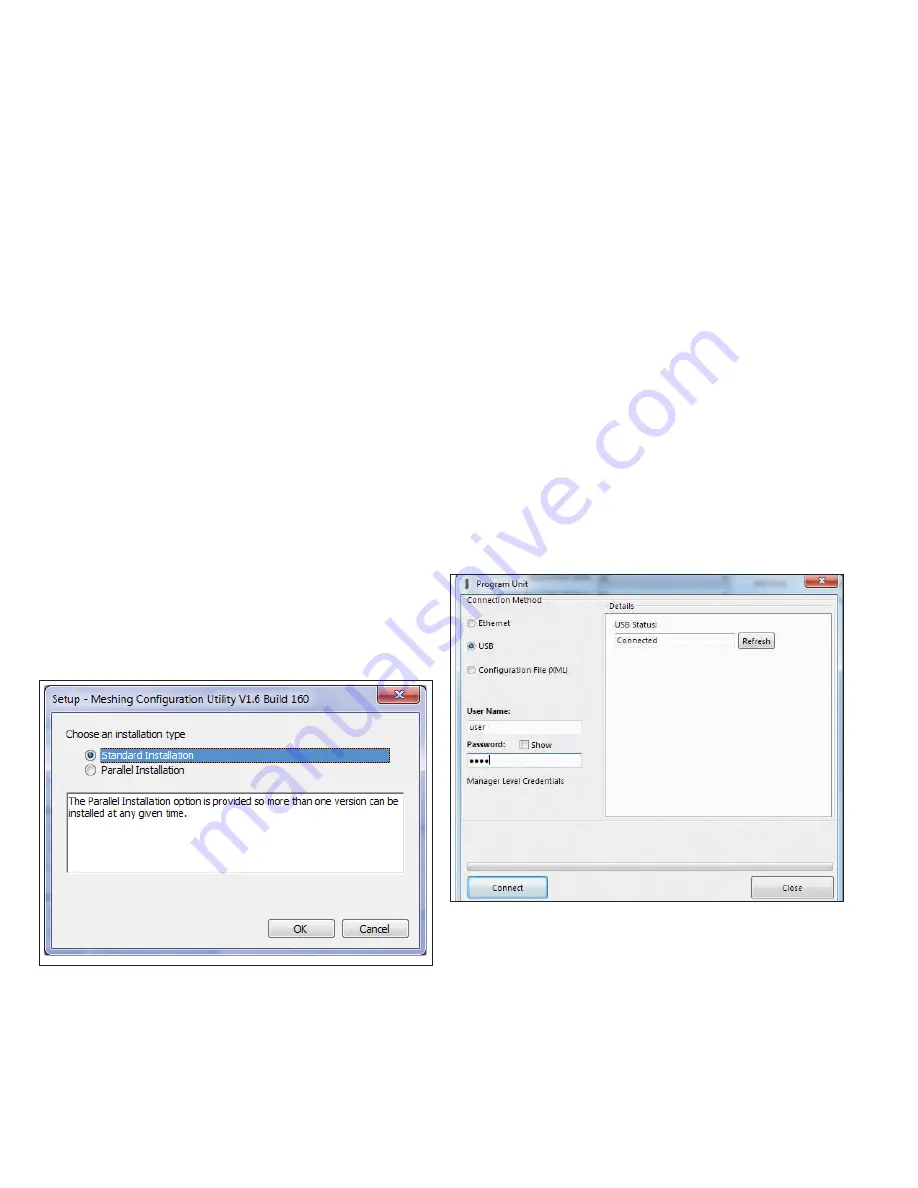
Select an option from the Communications panel, such as “Program
Unit”. You will be presented with a connection dialog.
Figure 29.
Select option “USB” and click Refresh to update.
Once the USB Status shows “Connected”, enter your User Name
and Password, and click OK.
Connecting to the Device’s Ethernet port
otee:
N
Before connecting to the Ethernet port for the first time, you need to
enable Remote Configuration Access. This can only be done using the USB
connection (See above).
The Ethernet port is located on the bottom side of the module.
(Refer
Figure 11
“Bottom panel connections”). To connect, you need
an Ethernet cable for connecting to the module’s Ethernet port.
You also need to know the device’s IP Address and the username /
password configured for the device.


