Before You Begin
i-on40
Page 6
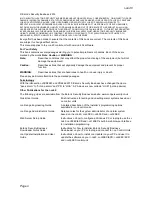
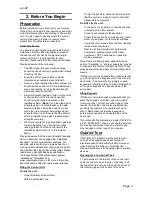
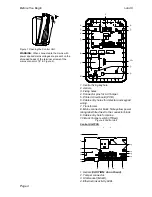
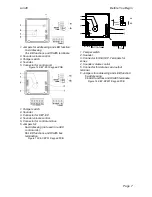
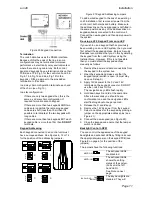
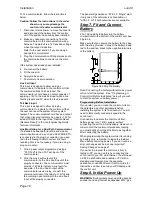
1. Sounder.
2. Sounder volume control.
3. Tamper switch.
4. Jumpers for addressing and LED function:
4a Addressing
4b LED functions
5. RS485 termination jumper
6. Connector for control unit (note that the ET
terminals are inactive).
Figure 8 Keypad PCB
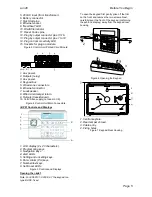
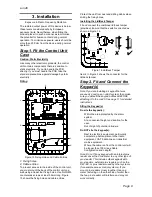
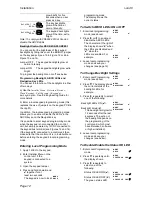
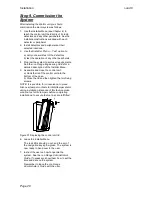
KEY-K01 and KEY-KPZ01 Controls and
Displays
1. LCD display
2. Programming keys.
3. Navigation keys. This key has built-in alert
LEDs.
4. Setting and unsetting keys. The ABCD
keys have built-in status LEDs that can show
the setting status of a part setting system.
These LEDs can be disabled, see page 12.
5. Plastic caps covering screws (shown
closed and open).
6. Hold Up Alarm (HUA) keys.
7. Number/text keys.
Figure 9 KEY-K01/KP01/KPZ01 Controls and
Displays
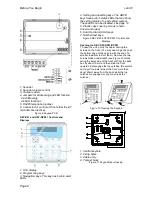
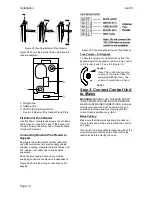
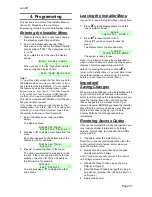
Opening the KEY-K01/KP01/KPZ01
To open the unit, unclip the caps covering the
screws on the front. (You may need to gently push
the bottom edge of the caps in with the end of a
small screwdriver to start them.) Remove the two
screws hidden underneath (see Figure 9). Gently
swing the lower side of the front out from the back
box by about 10mm and then slide the front
upwards to disengage the top catches. (Be careful
not to pull the lower side of the front more than
about 25mm away from the back while the top
catches are engaged, or you may break the
catches.)
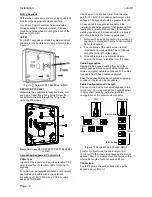
Figure 10 Opening the Keypad
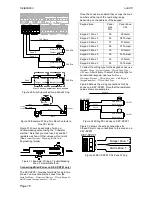
1. Central keyhole.
2. Fixing holes.
3. Cable entry.
4. Tamper block
Figure 11 Keypad Rear Housing
2
3
6
5
5
4
7
1
1
2
3


