


12
TC-1 Timeclock User Guide
www.eaton.com/lightingsystems
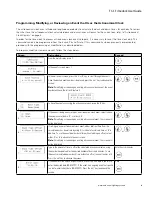
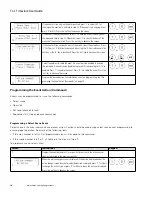
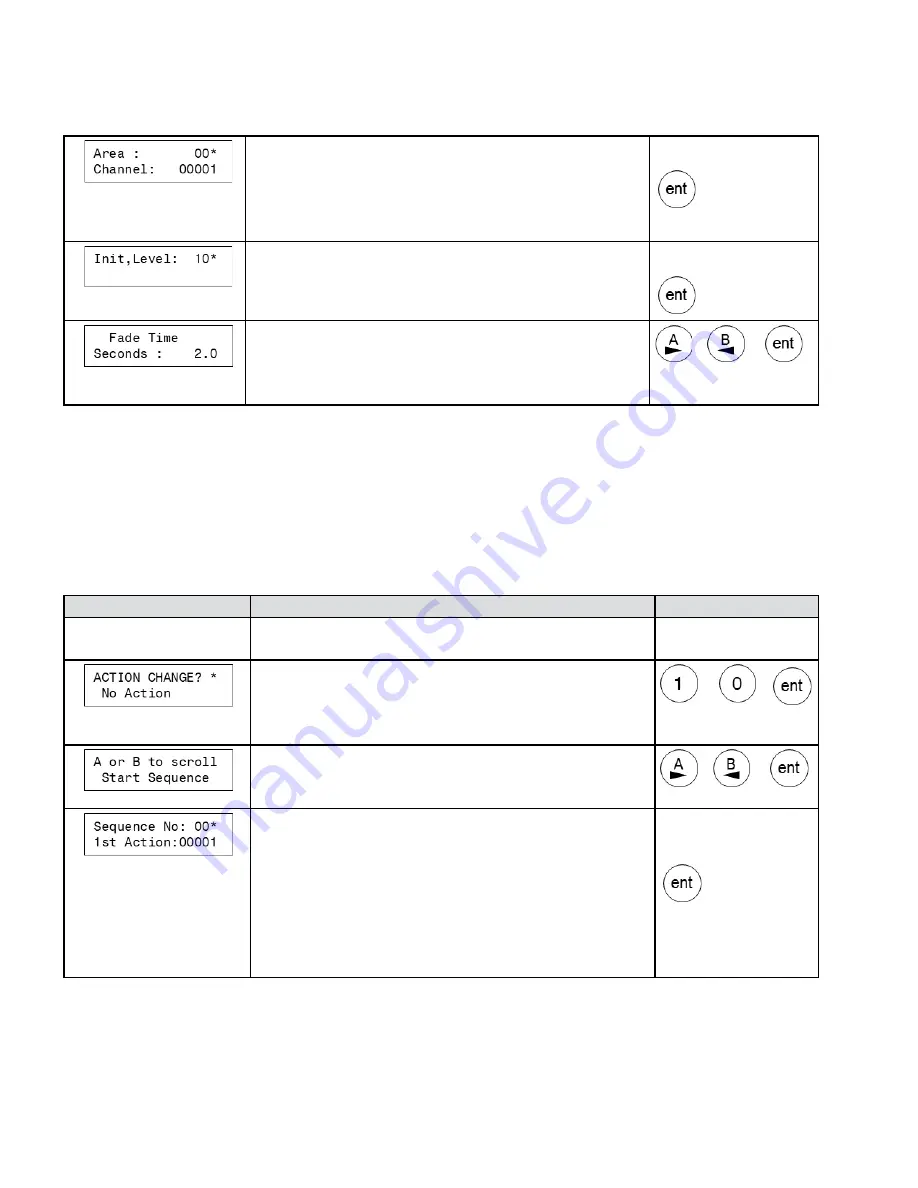
4.
Use the number keys to enter the area number that should be issued the
command (areas 0 through 255 supported). Press ‘ent’ to advance to the zone
(channel) entry field.
Use the number keys to enter the desired zone (channel) (zones 0 through 65535
supported). Press ‘ent’ to advance the screen.
Enter area & zone
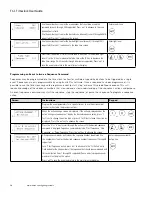
5.
Use the number keys to enter the desired light level (areas 0% through 100%
supported). Press ‘ent’ to advance to the fade time screen.
Enter light level
6.
Next select the period of time it should take to transition to the defined light
level. Use the ‘A’ key to increase the fade time or the ‘B’ key to decrease the
fade time. (range 0 milliseconds through 60 minutes supported). Press ‘ent’ to
save the event and return to the main time clock display.
or
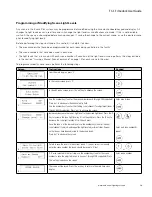
Programming an Event to Issue a Sequence Command
Sequences may be programmed into the time clock to allow for multiple or specialized actions to be triggered by a single
event. Sequences are only programmable by using iLumin Plus software. Once a sequence has been programmed, it is
possible to use the time clock keypad to program an event to start, stop, or pause this pre-defined sequence. This will
require knowledge of the sequence numbers that are used and a clear understanding of the sequence’s actions and purpose.
An event sequence command may start the sequence, stop the sequence, or pause the sequence. To program a sequence
action:
Screen
Instructions
Keypad
1.
Program the event parameters for a specific time or to use the astronomical
clock as instructed in the previous sections.
2.
When the action change screen is displayed, if the action displayed under the
action change screen does not display the desired sequence action, press ‘1’
for Y(yes) to change the action type, or press ‘0’ for N(no) to leave the action as
displayed. Press the ‘ent’ key to advance the screen.
or
3.
Press the ‘A’ or ‘B’ key to scroll through the actions until the desired sequence
command is displayed. Sequence commands include, ‘Start Sequence’, ‘Stop
Sequence’, or ‘Pause Sequence’. Press the ‘ent’ key to advance the screen.
or
4.
All sequence commands will request the sequence number be entered. Use
the number keys to enter the desired sequence number (sequences 1 through 8
supported).
For a ‘Start Sequence’ action, press ‘ent’ to advance to the ‘1st Action’ entry
field and enter the line number of the sequence that should be commanded with
this event (action lines 1 through 29 supported). Pause and stop sequence com-
mands will not display this option.
Press ‘ent’ to save the event and return to the main time clock display.
Enter sequence number &
action line


