


13
TC-1 Timeclock User Guide
www.eaton.com/lightingsystems
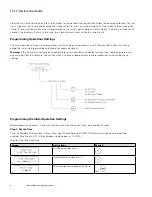
Programming or Modifying Scene Light Levels
Any scene in the iLumin Plus system may be programmed or modified using the time clock onboard keypad and display. All
changes to light levels occur in real-time and will change the light levels as modifications are made. If this is not desirable,
wait until the space is unoccupied before making changes. If saving the change to the current scene, issue the desired scene
prior to modifying light levels.
Before performing the steps outlined in this section, it is helpful to know:
• The area numbers that have been programmed for each room being controlled in the facility
• The scene numbers that have been used in each area
• The light levels that are issued with each scene number (If uncertain of the light levels issued, perform the steps outlined
in the section “Issuing a Manual Scene Command” on page 14 for each scene in the area).
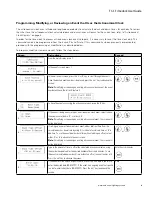
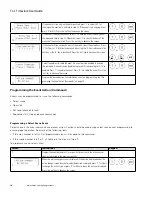
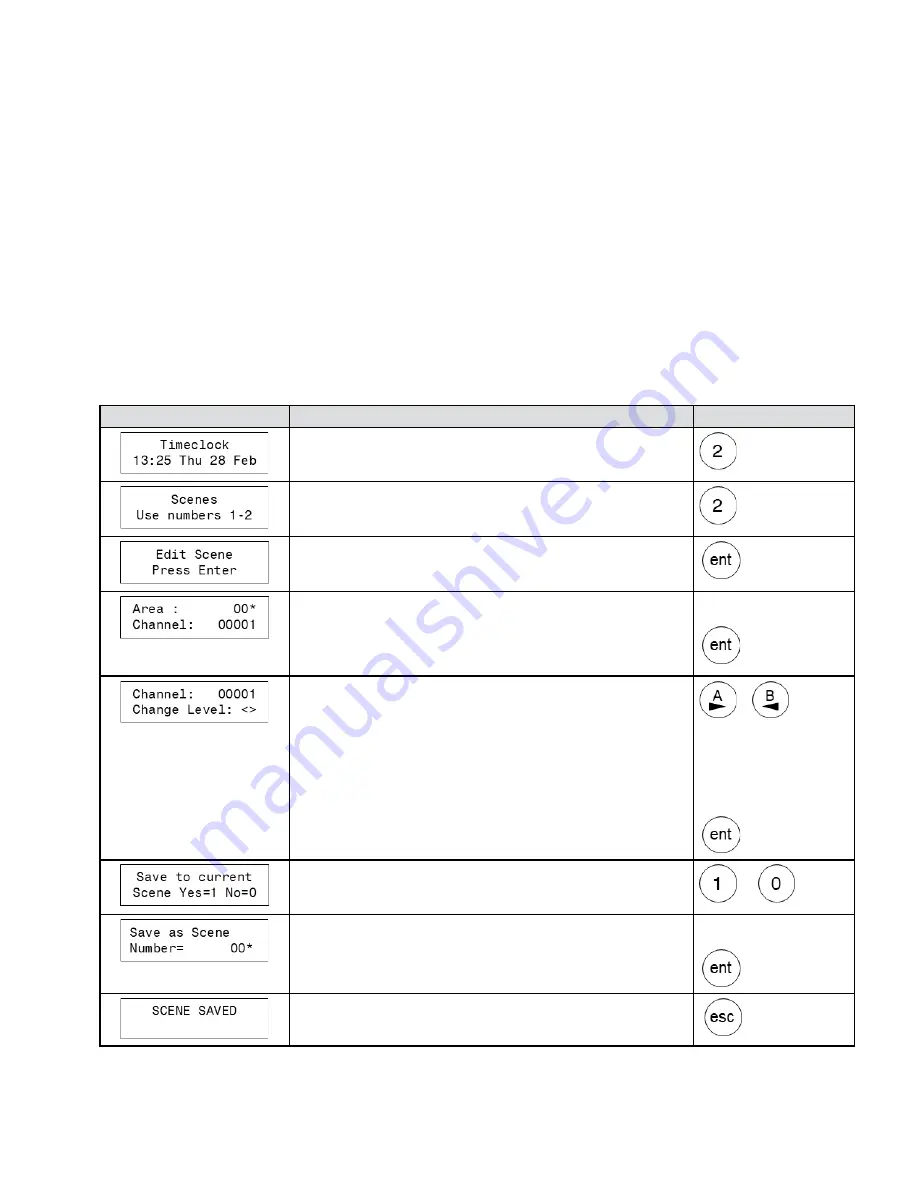
To program or modify scene levels, perform the following steps:
Screen
Instructions
Keypad
1.
From the main display, press ‘2’.
2.
In the scenes screen, press ‘2’.
3.
In the edit scene screen, press the ‘ent’ key to advance the screen.
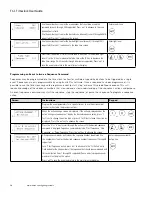
4.
Use the number keys to enter the area number (areas 0 through 255 supported).
Press ‘ent’ to advance to the channel entry field.
Use the number keys to enter the starting zone (channel) for adjustment (zones 0
through 65535 supported). Press ‘ent’ to advance the screen.
Enter area & zone
5.
Increase or decrease the zone’s light level to the desired light level. Press the ‘A’
key to increase the zone light level by 5% with each press. Press the ‘B’ key to
decrease the zone light level by 5% with each press.
Once the zone is at the desired level, use the number keys to enter the next
zone (channel) to adjust and repeat the light level adjustment steps. Repeat
until all zones have been adjusted to the desired levels.
Press ‘ent’ to advance the screen.
or
Enter next zone number &
repeat
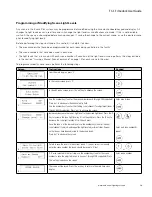
6.
Select to save the levels to the current scene ‘1’ (yes) or select to manually
enter the scene number the levels should be saved to ‘0’ (no).
or
7.
If ‘0’ was selected in the last step, use the number keys to enter the scene
number to save the adjusted levels to (scenes 1 through 128 supported). Press
the ‘ent’ key to advance the screen.
Enter scene number
8.
The scene will be saved. Press the ‘esc’ key to return to the main time clock
display.