


Eaton
1121 Highway 74 South
Peachtree City, GA 30269
www.Eaton.com/lightingsystems
For service or technical assistance:
1-800-553-3879
Canada Sales
5925 McLaughlin Road
Mississauga, Ontario L5R 1B8
P: 905-501-3000
F: 905-501-3172
© 2019 Eaton
All Rights Reserved
Printed in USA
Publication No. IB503042EN
July 2019
Eaton is a registered trademark.
All trademarks are property
of their respective owners.
Procuct availability, specifications, and
compliances are subject to change
without notice.
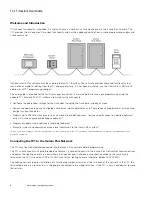
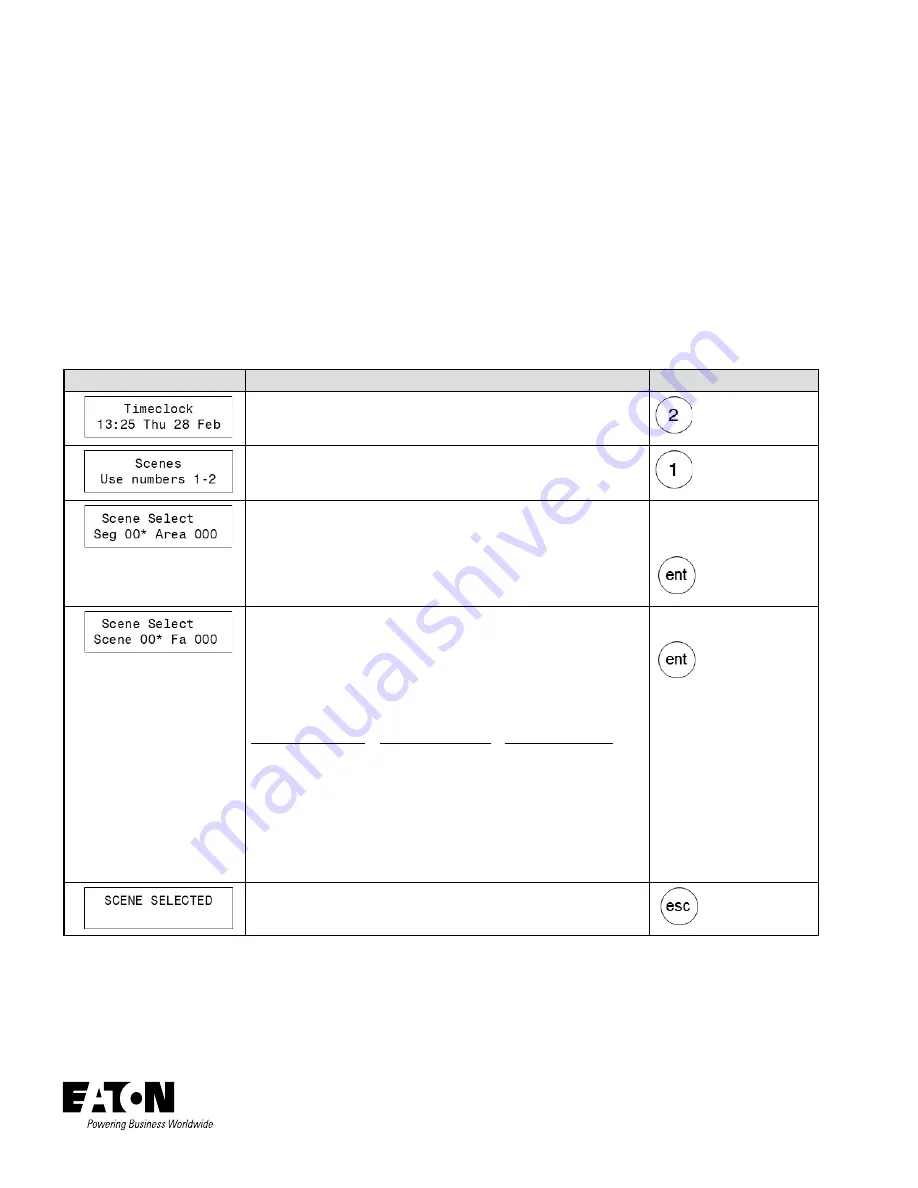
Issuing a Manual Scene Command
The TC1 time clock’s onboard keypad and display can be used to manually issue a scene to the iLumin Plus system.
Warning:
Use extreme caution when sending commands to the system from the TC1 keypad. It is possible to issue a
command to all areas in the facility by commanding area 0. If area 0 is erroneously entered for a scene 0 (off) command, all
lighting in the iLumin Plus system will turn off.
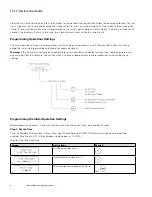
Before performing the steps outlined in this section, it is helpful to know:
• The area numbers that have been programmed for each room being controlled in the facility
• The scene numbers that have been used in each area
To issue a manual scene command, follow the steps below.
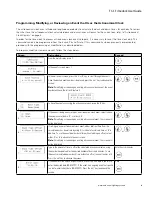
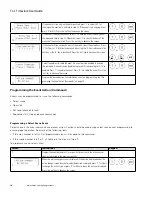
Screen
Instructions
Keypad
1.
From the main display, press ‘2’.
2.
In the scenes screen, press ‘1’.
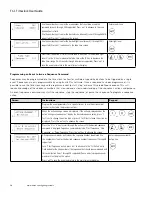
3.
In the scene select screen, leave the ‘Seg’ field at the default 000 setting
(it is typically not necessary to designate a segment unless dealing with an
extremely large system). Press the ‘ent’ key to advance to the area field.
Use the number keys to enter the area number that should receive the command
(areas 0 through 255 supported). Press ‘ent’ to advance the screen.
Enter segment 000 & area
number
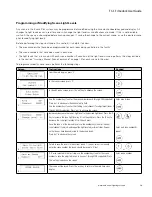
4.
Use the number keys to enter the desired scene number (scenes 0 (off) through
128 supported). Press ‘ent’ to advance to the ‘Fa’ fade entry field.
Use the number keys to enter the fade value number corresponding to the
desired fade time per the chart below:
Fade
Value
Fade
Time
Fade
Value
Fade
Time
Fade
Value
Fade
Time
0
0
140
10 sec
204
15 min
25
0.5 sec
160
30 sec
219
30 min
50
1 sec
190
1 min
234
45 min
70
3 sec
194
5 min
249
60 min
90
5 sec
199
10 min
Press ‘ent’ to advance the screen.
Enter scene & fade value
5.
The scene command will be sent. Press the ‘esc’ key to return to the main time
clock display.


