


8
TC-1 Timeclock User Guide
www.eaton.com/lightingsystems
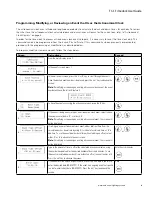
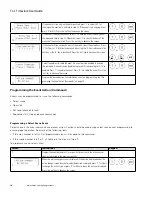
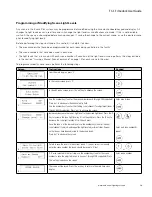
Programming, Modifying, or Reviewing an Event that Occurs at a Specific Time
To program, modify or review an event that issues a command at a specific time, follow the steps below.
Screen
Instructions
Keypad
1.
From the main display, press ‘3’.
2.
In the events screen, press ‘1’.
3.
In the edit events screen, press the ‘A’ or ‘B’ key to scroll through the events.
Once the desired event number is displayed, press the ‘ent’ key to advance the
screen.
or
4.
To have the event occur at a specific time, press the ‘A’ key.
5.
Enter the desired time in 24-hour clock, military time (HH:MM:SS). Press the
‘ent’ key to advance the screen.
Time
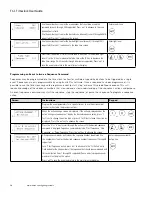
6.
If the event will run only on a specific date, or will start on a date in the future,
enter the desired date (DD:MM:YY). If the event is an ongoing event not specific
to a date, enter today’s date (DD:MM:YY). Press the ‘ent’ key to advance the
screen.
Date
7.
If the event will run only on the date specified, press ‘1’ to select YES for
running on the exact date and skip to step 10. If the event is an ongoing event,
press ‘0’ for NO. Press the ‘ent’ key to advance the screen.
or
8.
If the event is an everyday event, select ‘1’ to have the event run every day of
the week and skip to step 10. Otherwise, select ‘2’ to specify the days of the
week that the event will run. Press the ‘ent’ key to advance the screen.
or
9.
If the event will run on specific days of the week, select the active days. Press
‘1’ for Y(yes) or ‘0’ for N(no) under each day, using the ‘A’ key to advance to the
next day or the ‘B’ key to backtrack. Press the ‘ent’ key to advance the screen.
or
or
10.
Select to enable or disable the event. An event must be enabled to execute
the command. An event can be disabled to prevent it from running until it is re-
enabled. Press ‘1’ to enable the event. Press ‘0’ to disable the event. Press the
‘ent’ key to advance the screen.
or
11.
Program the desired action. For information on action programming, see “Pro-
gramming the Event Action (Command)” on page 10.


