background image

EATON 

Managed ePDU

t

 User’s Guide  

S

  164201xxx Rev 1

 DRAFT 10−OCT−2008

23

Chapter 6

Using the Web Interface

This chapter explains how to use the Web interface to administer a ePDU.

Logging into the Web Interface

To log into the Web interface, you must enter a user name and password. The first
time you log in, use the default user name (

admin

) and password (

pass

). You will then

be prompted to change the password for security purposes.

Once you have logged in, you can create user profiles for your other users. These
profiles define their login names and passwords. (See Creating a User Profile" on
page 32.)

Logging In

To log into the Web interface:

1.

Open a browser such as Microsoft

®

 Internet Explorer

®

 or Mozilla

®

 Firefox

®

 and

point it to this URL:

http://<ip address>

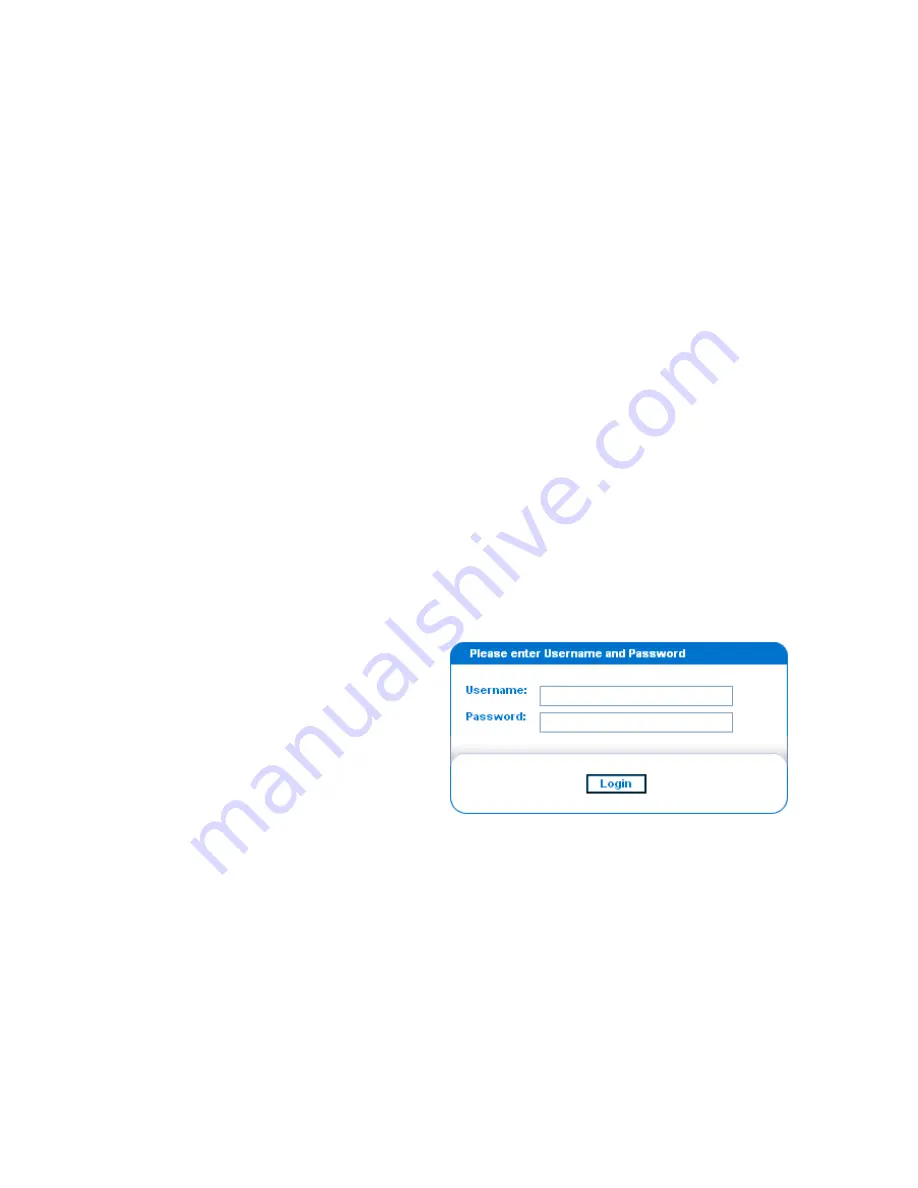
where <ip address> is the IP address of the ePDU. A login page displays
(see Figure 22).

Figure 22. Login Page

2.

Type your user name and password in the 

Username

 and 

Password

 fields. Both

the user name and password are case−sensitive, so make sure you capitalize the
letters correctly.

Summary of Contents for Managed ePDU

Page 1: ...Managed ePDU User s Guide...

Page 2: ...on JavaScript is a trademark of Sun Microsystems Inc Mozilla and Firefox are registered tradmarks of Mozilla Foundation Netscape and Netscape Navigator are registered trademarks of Netscape Communicat...

Page 3: ...radiate radio frequency energy and if not installed and used in accordance with the instructions may cause harmful interference to radio communications Operation of this equipment in a residential en...

Page 4: ......

Page 5: ...eeper and a visual alarm blinking LED to indicate current overload Configurable alarm thresholds Support for SNMP v1 v2 and V3 The ability to send traps using SNMP protocol The ability to retrieve out...

Page 6: ...g a User Profile 33 Deleting a User Profile 34 Setting User Permissions Individually 34 Setting Up User Groups 34 Creating a User Group 35 Setting System Permissions 36 Setting the Outlet Permissions...

Page 7: ...mental Sensors and Thresholds 61 Viewing Sensor Readings 62 Setting Up Alerts 62 Configuring Alert Events 62 Creating Alert Policies 63 About Policies 64 Display Existing Policies 64 Create a Policy 6...

Page 8: ...howing Outlet Information 92 Syntax 92 Attributes 92 Examples 92 Turning an Outlet On or Off 93 Syntax 93 Querying an Outlet Sensor 93 8 Using the IPMI Tool Set 95 Channel Commands 95 authcap channel...

Page 9: ...ommand 103 Set Group Power On Delay Command 103 Get Group Power On Delay Command 103 Set Socket ACL 104 Get Socket ACL 104 Set Sensor Calibration 104 Test Actors 104 Test Sensors 105 Set Power Cycle D...

Page 10: ...TABLE OF CONTENTS EATON Managed ePDUt User s Guide S 164201xxx Rev 1 DRAFT 10 OCT 2008 vi...

Page 11: ...current voltage power and temperature The ePDU offers the ability to recover systems remotely in the event of system failure and or system lockup It eliminates the need to perform manual intervention...

Page 12: ...INTRODUCTION EATON Managed ePDUt User s Guide S 164201xxx Rev 1 DRAFT 10 OCT 2008 2 Front Back Figure 2 1U Size Front Back Figure 3 2U Size...

Page 13: ...visual alarm blinking LED to indicate current overload S Configurable alarm thresholds S Support for SNMP v1 v2 and V3 S The ability to send traps using SNMP protocol S The ability to retrieve outlet...

Page 14: ...EATON Managed ePDUt User s Guide S 164201xxx Rev 1 DRAFT 10 OCT 2008 4 2U Models S ePDU including power cord 1 80m 6 ft S 2U bracket pack and screws S Null modem cable with RJ 45 and DB 9F connectors...

Page 15: ...tal shock hazard and possible damage to Eaton equipment Do not use a 2 wire power cord in any product configuration Test AC outlets at your computer and monitor for proper polarity and grounding Use o...

Page 16: ...SAFETY WARNINGS EATON Managed ePDUt User s Guide S 164201xxx Rev 1 DRAFT 10 OCT 2008 6...

Page 17: ...he rack environment Mount equipment in the rack carefully to avoid uneven mechanical loading Connect equipment to the supply circuit carefully to avoid overloading circuits Ground all equipment proper...

Page 18: ...through Figure 7 for other options Figure 5 Side Fixing Figure 6 End Fixing Figure 7 Blind Fixing NOTE For side and blind fixing S Do not repeatedly slide the bracket along the extrusion This may degr...

Page 19: ...ssist in aligning the silver buttons properly when attaching the claw feet To mount 1 Snap fit the claw feet mounts onto the back of the ePDU Hook one side of the ePDU body into one side of a claw foo...

Page 20: ...RACK MOUNTING THE EPDU EATON Managed ePDUt User s Guide S 164201xxx Rev 1 DRAFT 10 OCT 2008 10...

Page 21: ...h the number on the packing slip located on the outside of the box and make sure they match 3 Inspect the equipment carefully If any of the equipment is damaged or missing contact your Eaton service r...

Page 22: ...uration is complete The computer must have a communications program such as HyperTerminalt Kermit or PuTTy You also need the null modem cable and connectors that were shipped with the ePDU 1 Take the...

Page 23: ...communicate with your DHCP server and allocate an address If using DHCP then this finishes the installation Or Connect the serial configuration cable from the ePDU to the device and follow the below...

Page 24: ...tion method is DHCP and the default IP address is replaced by the address assigned by DHCP or BOOTP or the static IP address you entered as soon as the configuration process is complete To use the fac...

Page 25: ...want and press Enter You are prompted to select the duplex mode for the LAN interface See Figure 16 Figure 16 Duplex Mode Prompt By default the LAN interface duplex mode is set to Auto which allows t...

Page 26: ...each piece of information When the information is correct type y and press Enter to complete the configuration and return to the opening prompt shown in Figure 12 on page 13 S If you want to terminat...

Page 27: ...pplications S HyperTerminal is available on many of Windows operating systems But HyperTerminal is not available on the Windows Vista operating system S PuTTY is a free program you can download from t...

Page 28: ...INSTALLATION AND CONFIGURATION EATON Managed ePDUt User s Guide S 164201xxx Rev 1 DRAFT 10 OCT 2008 18 Reset Hole Figure 19 Reset Hole 1U and 2U Models Reset Hole Figure 20 Reset Hole 0U Models...

Page 29: ...em cable that was shipped with the ePDU connect the end with the RJ 45 connector to the port labeled Serial on the front of the ePDU and connect the end with the DB 9F connector to the serial COM port...

Page 30: ...ith all outlets powered ON Table 2 explains how to interpret the different LED states Table 2 LED Status LED State Outlet Status What it Means Not lit ePDU OFF The outlet is not connected to power or...

Page 31: ...ss the upper row displays FuP to indicate that a Firmware Upgrade is being performed on the ePDU How to Operate the Display Panel S Use the Up and Down buttons to select an outlet Pressing the Up butt...

Page 32: ...nd voltage readings as described above To reset the breakers in the event of an overload On the 1U and 2U models unclip the front molding to access the breaker s On the 0U model the breaker s can be a...

Page 33: ...urity purposes Once you have logged in you can create user profiles for your other users These profiles define their login names and passwords See Creating a User Profile on page 32 Logging In To log...

Page 34: ...example in Figure 23 shows 8 outlets If your ePDU has 20 outlets the Home page will show 20 See Outlets Display on Page 30 for a more information and pictures of both 8 and 20 outlet displays NOTE Ja...

Page 35: ...rd in the Old Password field 3 Type your new password in the New Password and Confirm New Password fields Passwords are case sensitive so be sure to capitalize the same letters each time 4 Click Apply...

Page 36: ...u Move your pointer to the option you want and click it to select it Navigation Path When you select an option from a menu and navigate to a specific page the system displays a navigation path across...

Page 37: ...U including Model name and number IP address Firmware version S Information about all the users currently connected including User name IP address Current state Your current session is included in thi...

Page 38: ...ration has completed successfully Figure 28 Status Messages Operation Successful Figure 29 shows two examples of status messages after an operation has completed unsuccessfully Figure 29 Status Messag...

Page 39: ...ed for a while the information may become stale Click this button periodically to reload the page and update the information displayed Using the Home Page The Home page displays first after a successf...

Page 40: ...power to it do the following 1 Click the On Off or Cycle in the outlet row You will be asked to confirm your action see Figure 33 Figure33 Confirmation Dialog Box 2 Click OK The outlet will then switc...

Page 41: ...profile built in This is the admin profile which was used for the original login This profile has full system and outlet permissions and should be reserved for the system administrator This profile ca...

Page 42: ...selection 2 Type the following information about the user in the corresponding fields in the User Management panel Fields Enter New User Name The name the user will enter to log into the Web interface...

Page 43: ...exact same settings as an existing profile by using the copy function You can then modify the profile so that it differs as necessary from the original This is a quick and easy way to create user prof...

Page 44: ...r No 4 When you are finished click Apply The permissions are applied to the user To set the user s outlet permissions 1 Select User Management and then select User Group Outlet Permissions to display...

Page 45: ...select Users Groups to display the User Group Management page This page is divided into a User Management panel and a Group Management panel See Figure 36 shows the Group Management panel Figure 36 Us...

Page 46: ...nagement and then select Users Group System Permissions The User Group System Permissions page displays see Figure 37 Figure 37 User Group System Permissions Page 2 Select the user group from the Grou...

Page 47: ...user level this group will not be granted to perform power control Setting the Outlet Permissions Setting outlet permissions allows you to specify which outlets members of a user group are permitted...

Page 48: ...he original This is a quick and easy way to create user groups To copy a user group 1 Select User Management and then select Users Groups The User Group Management page displays 2 Select the existing...

Page 49: ...ings page displays The panel at the upper left is labeled HTTP Encryption See Figure 39 Figure 39 Security Settings Page HTTP Encryption Panel 2 Select the Force HTTPS for Web access check box 3 Click...

Page 50: ...licy built in that accepts traffic from all IP addresses This means any IP addresses not dropped by a specific rule will be permitted to access the ePDU You can change the default policy to DROP in wh...

Page 51: ...ings page displays The panel at the upper right is labeled IP Access Control This controls the firewall 2 Select the Enable IP Access Control check box if it is not already selected 3 Follow the steps...

Page 52: ...e field 4 Click Delete The rule is removed from the IP Access Control panel 5 Click Apply The rule is deleted Creating Group Based Access Control Rules Group based access control rules are similar to...

Page 53: ...m Access Control check box This enables the feature 3 Click Apply Group based access control rules are enabled Changing the Default Action The default action is shown in the Group Based System Access...

Page 54: ...lick Append Do NOT enter a rule number This system automatically numbers the rule Insert a rule between two existing rules S Type the higher of the two rule numbers in the Rule field For example to in...

Page 55: ...e how many times a user can attempt to log into the ePDU and fail authentication before the user s login is blocked To set up user blocking 1 Select Device Settings and then select Security The Securi...

Page 56: ...nd then select Security The Security Settings page displays The Login Limitations panel controls this feature see Figure 44 Figure 44 Login Limitations Panel 2 To prevent more than one person from usi...

Page 57: ...Security Settings page displays The Strong Passwords panel displays at the bottom of the page See Figure 45 Figure 45 Strong Passwords Panel 2 Select the Enable strong passwords check box to activate...

Page 58: ...and submit it to a certificate authority CA Once the CA has processed the information in the CSR it will provide you with a certificate which you must install on the ePDU NOTE See Forcing HTTPS Encry...

Page 59: ...iso3166ma 02iso 3166 code lists list en1 ht Email An email address where you or another administrative user can be reached Challenge Password The password that will be required to access the ePDU the...

Page 60: ...Authentication For security purposes users attempting to log into the ePDU must be authenticated You can use the local database of user profiles in the ePDU or you can use the Lightweight Directory Ac...

Page 61: ...3 Type the IP address of the LDAP server in the User LDAP Server field 4 To encrypt traffic to and from the LDAP server select the SSL Enabled check box NOTE The SSL port is enabled if only if the SS...

Page 62: ...ectory in Step 6 enter the domain name in the Active Directory Domain field 10 Click Apply LDAP authentication is now in place Setting Up RADIUS Authentication To set up RADIUS authentication 1 Select...

Page 63: ...col from the drop down list in the Global Authentication Type field Your choices are S PAP Password Authentication Protocol S CHAP Challenge Handshake Authentication Protocol CHAP is generally conside...

Page 64: ...red on Setting an individual outlet startup state to something other than Device Default see Naming Outlets on page 57 overrides this default state for that outlet To set this default 1 Select Device...

Page 65: ...in seconds it takes for the outlets to turn back on after they are shut down during the power cycle The default is 10 seconds NOTE The number you enter here applies to all outlets on the ePDU However...

Page 66: ...ee Figure 52 To change the priority of an outlet select it from the list and click one of four options S First moves the outlet to the top of the list and makes it the first outlet to receive power S...

Page 67: ...how setup of outlet list 3 Type a name for the outlet in the Outlet Name field It is a good idea to give the outlet an easily recognizable name that helps you identify the device connected to it You c...

Page 68: ...The number you enter here determines the length of time in seconds it takes for the outlet to turn back on after is shut down during the power cycle If left blank this outlet will use the value set i...

Page 69: ...Outlet Details The Outlet Details page displays see Figure 54 2 Select an outlet from the Show details of outlet list The outlet must be ON 3 Click Cycle The outlet turns OFF and then back ON NOTE Th...

Page 70: ...connected to the ePDU they must be mapped to the unit s logical sensors before the ePDU recognizes and displays the readings from them To do this 1 Select Device Settings and then select Environmenta...

Page 71: ...s more useful you should rename the logical sensors that are in use and configure their threshold settings Configuring thresholds for these sensors allows the ePDU to generate an alert whenever enviro...

Page 72: ...g Up Alerts The ePDU can be configured to issue an alert whenever a threshold is crossed either for the ePDU as a whole or for a specific outlet The alert can be programmed to send an administrator an...

Page 73: ...above a lower non critical one S If set to Assert Deassert this alert will trigger when a measured value crosses any threshold state 5 Select a policy from the Policy list 6 Click Add The alert is add...

Page 74: ...Syslog policy They trigger entries in the event log but do not send email messages or traps Policies Red Syslog Destinations Event Log eMail SNMP Switch Outlets Events 1 2 3 4 5 Figure 59 Policies Dis...

Page 75: ...Managed ePDUt User s Guide S 164201xxx Rev 1 DRAFT 10 OCT 2008 65 Create a Policy To create a policy 1 Select Alerts and then select Alert Policy Editor The Alert Policy Editor displays see Figure 61...

Page 76: ...ify a policy 1 Select Alerts and then select Alert Policy Editor The Alert Policy Editor displays 2 Select the policy to be modified from the Existing Policies list 3 Make any necessary changes to the...

Page 77: ...age 80 for details 2 Select the destination from the drop down list in the Destination Type field Your choices are Event Log Switch Outlets eMail and SNMP 3 Do one of the following S Event Log This is...

Page 78: ...system events and saves them in a local internal event log You can expand the scope of the logging to also capture events in the NFS SMTP and SNMP logs Configuring the Local Event Log To configure the...

Page 79: ...n event types display in the Event Log Assignments panel to the right All are enabled by default To disable any of these event types clear the appropriate check boxes See Figure 64 Figure 64 Event Log...

Page 80: ...each entry the event log shows S The date and time of the event S The type of event board message security host control or authentication S A brief description of the event For example for an authenti...

Page 81: ...Enabled check box 3 Type the IP address of the NFS server in the NFS Server field 4 Type the name of the shared NFS directory in the NFS Share field 5 Type the name of the NFS log file in the NFS Log...

Page 82: ...ck box 3 Type the receiver s email address in the Receiver Email Address field 4 By default when SMTP logging is enabled seven event types display in the Event Log Assignments panel to the right All a...

Page 83: ...Log Settings page displays The Syslog Forwarding panel controls the forwarding of system logs see Figure 70 Figure 70 Syslog Logging Panel 2 Select the Enable Syslog Forwarding check box 3 Type an IP...

Page 84: ...ts SMTP settings so it can send email messages when alerts are issued Displaying Basic Device Information 1 To display basic information about an ePDU select Maintenance and then select Device Informa...

Page 85: ...ets mapped to the board Displaying Connected Users To display a list of users currently connected to the ePDU select Maintenance and then select Device Information The Device Information page displays...

Page 86: ...ls If necessary you can modify any of these settings To do this 1 Select Device Settings and then select Network The Network Settings page displays The left side of the page consists of the Basic Netw...

Page 87: ...s The Miscellaneous Network Settings panel on the top right contains the communications port and bandwidth settings See Figure 74 Figure 74 Miscellaneous Network Settings Panel 2 By default CLP Telnet...

Page 88: ...shows the interface speed and duplex mode See Figure 75 Figure 75 LAN Interface Settings Panel 2 To change the interface speed select the speed you want from the LAN Interface Speed list Your choices...

Page 89: ...fset list for example US Eastern Standard Time UTC 5 3 To set the date and time manually select the User Specified Time option then enter the date and time in the appropriate fields Use the yyyy mm dd...

Page 90: ...ttings The SMTP Settings page displays see Figure 77 Figure 77 SMTP Settings Page 2 Type the IP address of the mail server in the SMTP Server field 3 Type an email address in the Sender Email Address...

Page 91: ...tings Page 2 Select the Enable SNMP Agent check box to enable the ePDU to communicate with external SNMP managers A number of options will then become available 3 Select the Enable SNMP v1 v2c Protoco...

Page 92: ...Reset Operations Page 2 Click Reset A Reset Confirmation page displays see Figure 80 Figure 80 Reset Confirmation Page 3 Click Really Reset to reboot ePDU If you change your mind click Cancel to term...

Page 93: ...e the complete path to the firmware file in the Firmware File field or click Browse and select the file S Select the Firmware URL option and type the URL link in the Firmware URL field where the firmw...

Page 94: ...uping provides a way to combine outlets from separate ePDUs into a single logical group allowing control from a single ePDU Grouped outlets that power on and off in unison are ideal for servers with p...

Page 95: ...address 127 0 0 1 Grouping Outlets Together 1 Select Outlet Groups and then select Outlet Group Editor The Outlet Group Editor page displays Figure 86 2 Type a name for the outlet group in the Name f...

Page 96: ...ays Figure 87 Outlet Groups List NOTE Only outlet groups created through this specific ePDU display in this Outlet Groups list Outlet groups created through another ePDU do not display here even if th...

Page 97: ...emote the group from the outlet groups list Deleting Outlet Group Devices To delete a ePDU from outlet grouping when it is no longer available or in use 1 Select Outlet Groups and then select Outlet G...

Page 98: ...USING THE WEB INTERFACE EATON Managed ePDUt User s Guide S 164201xxx Rev 1 DRAFT 10 OCT 2008 88...

Page 99: ...erminal is available on many of Windows operating systems but it is not available on Windows Vista PuTTY is a free program that you can download from the internet Please refer to PuTTY s documentation...

Page 100: ...rs See Figure 89 Figure 89 Login Prompt 4 Type a login name and press Enter You are prompted to enter a password see Figure 90 Figure 90 Password Prompt 5 Type a password and press Enter The password...

Page 101: ...e 92 Figure 92 Login Prompt 2 Type a login name and press Enter You are prompted to enter a password see Figure 93 Figure 93 Password Prompt 3 Type a password and press Enter The password is case sens...

Page 102: ...of a number Attributes You can use the name and powerState attributes to filter the output of the show command The name attribute displays only the name of the outlet and the powerState attribute dis...

Page 103: ...te attribute Figure 97 Example 3 powerState Attribute Turning an Outlet On or Off The set command turns an outlet on or off Syntax The following is the syntax for the set command clp set system1 outle...

Page 104: ...USING THE CLP INTERFACE EATON Managed ePDUt User s Guide S 164201xxx Rev 1 DRAFT 10 OCT 2008 94...

Page 105: ...he ePDU using IPMI protocol through this tool An example at the Linux command shell is given as ipmitool I lan H 192 168 51 58 U admin a channel info Channel Commands authcap channel number max priv P...

Page 106: ...Yes No Yes No Yes No Yes No Yes No Security Settings No Yes No Yes No Yes No Yes No Yes No Unit Reset No Yes No Yes No Yes No Yes No Yes No User Group Management No No No No Yes Yes User Group Permis...

Page 107: ...currently supported values are S Temperature Upper Critical Going High S Voltage Threshold Lower Critical Going Low S Memory Correctable ECC Error Detected NOTE The event DIR Type field is encoded wi...

Page 108: ...Sets the default gateway IP address defgw macaddr xx xx xx xx xx xx Sets the default gateway MAC address bakgw ipaddr x x x x Sets the backup gateway IP address bakgw macaddr xx xx xx xx xx xx Sets t...

Page 109: ...t of privlist is as follows Each character represents a privilege level and the character position identifies the cipher suite number For example the first character represents cipher suite 1 cipher s...

Page 110: ...nds You can use the OEM commands to manage and control the operation of the ePDU OEM Net fn is as defined below define IPMI_NETFN_OEM_PP0x3C Table 9 lists each OEM command and gives its ID The section...

Page 111: ...command is used to switch on off individual sockets Request Data 1 Socket number 7 5 reserved 4 0 socket number 0 based highest valid number depends on device model 2 New state 7 5 reserved 0 1b powe...

Page 112: ...Group number 7 5 reserved 4 0 group number valid numbers 0 23 2 New state 7 1 reserved 0 1b power on 0b power off Response Data 1 Completion Code Set Group Membership Command Request Data 1 Group numb...

Page 113: ...longs to group 5 7 1b socket 23 belongs to group 0 1b socket 16 belongs to group Set Group Power On Delay Command Request Data 1 Group number 7 5 reserved 4 0 group number valid numbers 0 23 2 Delay i...

Page 114: ...ge level depending on 6 Set Sensor Calibration Sensor calibration is only allowed for threshold based sensors that return a sensor reading byte with the Get Sensor Reading command Also not all thresho...

Page 115: ...ot pressed 1b pressed 0 up button 0b not pressed 1b pressed Set Power Cycle Delay Command Request Data 1 Socket number 0xFF for the global unit delay 2 Delay seconds 1 255 for unit and socket 0 fallba...

Page 116: ...USING THE IPMI TOOL SET EATON Managed ePDUt User s Guide S 164201xxx Rev 1 DRAFT 10 OCT 2008 106...

Page 117: ...PDU Series Serial Number ______________________________ Outlet 1 Outlet 2 Outlet 3 Model Serial Number Use Outlet 4 Outlet 5 Outlet 6 Model Serial Number Use Outlet 7 Outlet 8 Outlet 9 Model Serial Nu...

Page 118: ...l Serial Number Use Types of adapters ____________________________________________________________________________________ Types of cables _____________________________________________________________...

Page 119: ...y changed User successfully deleted User password successfully changed Group added successfully Group successfully changed Group successfully deleted Security Relevant User login failed User Activity...

Page 120: ...APPENDIX B EVENT TYPES EATON Managed ePDUt User s Guide S 164201xxx Rev 1 DRAFT 10 OCT 2008 110...

Page 121: ...Settings and then select SNMP Settings The SNMP Settings page displays Figure 98 SNMP Settings Page 2 Select the Enable SNMP Agent check box to enable the ePDU to communicate with external SNMP manage...

Page 122: ...rotocol allows for encrypted communication To take advantage of this users need to have a Encryption Phrase which acts as a shared secret between them and the ePDU This encryption phrase can be set in...

Page 123: ...U to send SNMP traps 1 Choose Device Settings Event Log The Event Log Settings window opens The SNMP Logging panel controls the use of SNMP traps Figure 100 Event Log Settings 2 Click the SNMP Logging...

Page 124: ...01xxx Rev 1 DRAFT 10 OCT 2008 114 Figure 101 Event Log Assignments Panel 7 Click Apply SNMP logging is configured NOTE Re download the ePDU MIB after updating the ePDU firmware This will ensure your S...

Page 125: ...the beginning of the file listed under their parent group The objects then display again individually defined and described in detail Figure 102 MIB File For example the unitSensorsGroup section cont...

Page 126: ...Pin No Signal Direction Description 1 DTR Output Reserved 2 GND Signal Ground 3 5V Power for CIM 4 RX Input Receive Data Data in 5 TX Output Transmit Data Data out 6 N C N C No Connection 7 GND Signal...

Page 127: ...APPENDIX D SPECIFICATIONS EATON Managed ePDUt User s Guide S 164201xxx Rev 1 DRAFT 10 OCT 2008 118...

Page 128: ......

Page 129: ...164201xxx1 164201xxx 1...

Reviews: